Friday, August 31, 2012

Hodge Podge Necklace

Remember when I said that I wouldn't like a necklace that was a hodge podge of metals? I guess I got too antsy with my jewelry making and I made one anyway.


For this, I essentially cleared house: chains of all shapes and sizes, charms, jump rings, split rings, wire cutters, and plier.


I decided to be intelligent this time and properly measure out how long I wanted the chain that went around my neck. I wanted the big jump rings that held said hodge-podgery to rest just past my clavicle. I measured around my neck, stopped just past my clavicle, got 18", and cut accordingly.


I then cut the wire in the exact middle and attached a toggle and loop with jump rings. I obviously didn't factor in the length of the toggle/loop, so my chain ended up a little longer than expected.


I hooked the toggle/loop together and attached the large jump rings to the other ends.


The first part was easy enough: I cut varying lengths of chains, starting with the smallest and working my way out, and connected them to the large jump ring with smaller jump rings. I paid close attention to the order in which they went on to the jump ring. Both large jump rings needed to have mirror versions of the order in order for the chains to stay straight.


Then I decided to add some charms to the chains, which, given that they were already on an easy-to-tangle necklace, made things challenging. And, because I'm stubborn, I didn't think to just take all the chains off and place the charms on accordingly.


After trying the necklace on, I realized that both sets of charms made the necklace too busy. So, I pulled out some ribbon leftover from another craft, folded the ribbon over a jump ring and sewed the ribbon edges onto the jump rings. I attached the chain to one end and a lobster clasp to the other. I then attached a split ring to the chain and viola, instant necklace.


To top everything off, I attached a flower pendant to one of the jump rings, situated nicely in the middle of the chain order.


One thing I've noticed about long, busy chains, is that they work really well with strapless dresses (or solid colored circle shirts). Common hat to anyone who has been a proper feminine girl, but wonderful news to me, who spent her formative years climbing trees and having her Barbies hide out in bunkers while the rest of Barbieworld dealt with nuclear war.


The unintentional second necklace works great as well, and is casual enough to go with anything, like my diced up shirt.

Tuesday, August 28, 2012

Try It Tuesday: Upcycle Your Mayonnaise Jar

I buy my shampoo in supreme bulk. And, really, why not? Shampoo is relatively expensive, it's something I use every day, and its shelf life is absurdly long. The only drawback is that the gallon+ jugs don't exactly fit on my tiny shampoo shelf.

However, most containers for condiments are the perfect shampoo bottle size. Instead of tossing them into my recycling bin, I ran the jars through the dishwasher a few times (on top of initially rinsing them out) and filled them up with shampoo. Most bulk-sized shampoo containers come with a hand pump, which makes things a thousand times easier to transfer the shampoo to the smaller containers (although it does make you feel like you're playing a Minute to Win It game).

Most labels these days seem to be superglued to the container. You can either attempt to get them off with a scrub brush and Gu-Gone, or you can go down the smartass path like myself and just go at the label with a Sharpie.

Friday, August 24, 2012

Photo Friday: In Search of Friendship


...Which is the quasi-poetic title of this extremely old picture. I was going through my old photography, and I came across this little gem from 2004, taken in one of my hometown's parks. This was used with my old HP Photosmart 315, which is the size of a brick and had zero zoom or camera functions. It's not going to win me a Pulitzer anytime soon, but I still enjoy the photo's simplicity (and the pleasant reminder of where I grew up).

Wednesday, August 22, 2012

Ribbon and Pendant (Scrunchie) Headband

I made a scrunchie headband in honor of my amazing grandma-in-law. I decided I wanted to try another one (this time without any connotation).


So, I got out my: blue ribbon (which I still had some left over from my wedding, even after doing crafts like the bangle), my rotary cutter, a scrunchie, and my fabric measuring tape. I bought a flat pendant as well, just to up the ante.


Like the first project, I measured my head and cut about an inch more of ribbon than my circumference. I then pinned each side over. I placed the flat pendant on the ribbon to see just how much I should fold over. Then I -- very carefully -- ironed the ribbon into place. Lesson learned: do not use pins with plastic heads. Twice I had to peel a flattened pin from the iron.


Sewing the hem was difficult, to say the least. This ribbon was more cloth-like than the purple ribbon. It wanted to unfold in ways that are illegal in some countries. The hem sewing was a very, very slow process.


Like with the previous headband, I folded one end over the scrunchie and sewed it into place. I then pinned the other side and (very carefully) tried it on, adjusting it until it fit right, and sewed the other side into place. Remember that everything should be flat and the folds should be facing the same way.


After I was done, I sewed on my pendant. I decided I wanted it on the lower left side of my head -- but only after putting on the headband and moving the pendant around my headband like I was trying to heal a headache with crystals.


After sewing the top portion into place, I sewed a few loops onto the bottom, just enough to keep the pendant from moving around.


I really like the grown-up-Matilda vibe this headband gives me (even though her ribbon is red). I don't know anyone who can tie a ribbon in their hair and have it stay in place (unless they're in the Trunchbull's tree and the wind blows it into a branch), so this is a great alternative.

Sunday, August 19, 2012

"Save the Date" Mod Podge Pots

I had promised myself I wouldn't touch my extra wedding stuff ever again. I mean, I had a mini meltdown over cutting up RSVP cards. But, given that I had stacks and stacks of old Save the Dates, I felt I was in the clear.


For this, I needed: Mod Podge, paintbrush, a flower pot, and enough Save the Dates/Registry Business Cards to choke a termite.


I first cut and tore as many Save the Dates/Registry Business Cards as I felt was necessary. Some cuts were random; others were more intentional (like cutting out the border on our Save the Dates, which I was saving for the top border of the pot). It was all about what designs I'd like to see on the pot (like the swirls from the business cards, or my husband's and my name).


And then -- I Mod-Podged! Using Mod Podge is incredibly simple. Remember those years in grade school when your teacher yelled at you for using too much glue on your projects? Mod Podge is the universe's apology. Paint a layer of the glue on a section of the pot, place the pieces down, and paint over the pieces of a layer or two of this wonderful decoupage glue.


Since the cards and Save the Dates were made of fairly thick cardstock (and were being glued onto a curved surface), I had to hold the pieces in place until the glue dried a little bit. This usually only took 10-15 seconds at the outside.


In the end, I did about two layers of decoupage, making sure every nook and cranny of the pot was covered.


As a bit of a centerpiece, I cut out one of the "Save the Date" diamonds and glued it to the center of the pot.


After gluing the first section of the pot, I focused on the border. This took a little more time as I was dealing with a narrow section and uneven pieces.


Since the decoupage didn't, in actuality, cover every nook and cranny, I got out a small paintbrush and painted the edges (as well as the top portion of the inside) of the pot white.


This was a great success. I wasn't teary-eyed over cutting up anything, and the results were terrific. I picked up a nice Hyacinth potted plant at Trader Joe's and adorned our window with the final result. Now the question is: how long until my cats knock it down?

Wednesday, August 15, 2012

Writer's Wednesday: It's Okay to Suck


…the writer's original perception of a character may be as erroneous as the reader's. Running a close second is the realization that stopping a piece of work just because it's hard, either emotionally or imaginatively, is a bad idea. Sometimes you have to go on when you don't feel like it, and sometimes you're doing good work when it feels like all you're managing is to shovel shit from a sitting position.
- Stephen King, On Writing

The number one question I get when people hear that I have written a book is, "How did you find the motivation to write a whole book?" To that, I always shrugged my shoulders and said, "I just wrote."

I know that sounds like absolutely no help to people who are genuinely trying to write their own novel, but that's really the only advice I have: I sat down and wrote. Even when I find like it was crap.

Now, I must admit, I haven't been taking my own advice. Working with my husband in the editing process has really put me into perfection mode. While it's wonderful for my first novel -- adding to scenes that need that extra *umf* and deleting sentences that were too flowery -- it is killing me when it comes to my second novel.

I hadn't really put pen to page with my second book for about 6 months. In order to get back into the swing of things, I had reread the 30-40 someodd pages that I had already written, hoping it would inspire me to get back into writing.

Long story short: Nope.

I was still in editor mode while reading the first few pages, and before I had even hit Chapter 2, I had driven myself insane. What was supposed to be my kickstart back into writing ended up working in reverse for me. I didn't want to write at all -- because I couldn't replicate the same polished feel as my first book, even though that "feel" took something around 5 rewrites to accomplish.

But, seriously, don't be afraid to write, even if you don't know how to word it, or even how the scene is supposed to play out. I emphasize the second one, especially since sometimes scenes and characters go in the opposite way you were planning. I'm a huge fan of the outline -- if only because it's a safety net -- but even the most meticulous plans are discarded when the story veers right instead of left.

And to go back to the first bit of advice: there is nothing wrong with writing something that sounds like ass. You're eventually going to rewrite that sentence anyway. On the flipside, sometimes you think you're writing absolute crap, only to find out that what you had been writing was perfect (or at least really, really good) all along.

For example, just recently I wrote this masterpiece:

"She slumped against the wall. She was overwhelmed."

Is that bad writing? In my eyes, hell yes. Unless I'm grading a high school creative writing project, I'd give myself a solid D on that gem. Some could argue that such simplistic sentences are not necessarily bad, but I believe that if the narrator is lucid enough to use terms like "slumped against" and "overwhelmed", they can think up better ways of saying what they need to say.

But who cares? It got me past a major road bump in my writing. I'll eventually go back and find better wording, find a better way to show how overwhelmed she is instead of just stating it (isn't that the first lesson taught in all creative writing courses?) But it helped me move forward.

And, last but not least, it's okay to Trey Parker it out. This is when you finish a story, a poem, a long segment or major change to your book, and you are left feeling like you are a colossal failure. I call it the "Trey Parker Effect" because in 6 Days to South Park, Trey Parker slumps at his desk after the episode they have been working on (for 6 days) is near completion and states that it is the worst episode he has ever created. No one really pays it any attention, and it is assumed that this is common post-episode-creating behavior.

This is actually quite normal. The comedown from a major creative project can go from pure euphoria to extreme hangover really fast. Ride the wave, do something else, come back to writing when you feel better.

It's hard to transition from the angsty-teenage "writing because you're 100% motivated to, without having to prompt yourself" to the more frustrating "writing because you love it, but fighting like hell to get yourself off the ground." This is where thousands of would-be writers end up as secretaries and marketing directors, remarking casually to their significant other that someday they'll write the next great American novel. Writing can really be a pain in the ass sometimes. You have to go with its ebb and flow and you have to trick yourself into moving forward. But, like anything in life, it's worth the hard work.

So, if you actually follow my writer's wednesdays, my latest string of advice goes as so: Listen when people suck, let go of the things that suck, and remember that it's okay to suck at points. And if my husband ends up reading this post, I'll never hear the end of it.

Monday, August 13, 2012

A Home For Teddy Bayer

Once upon a time, I went to Ft. Lauderdale on a quasi-family vacation with the man who would later become my husband (and his brother and sister, who would become my in-laws). I bought a teddy bear keychain from a tourist trap, named him Teddy Bayer (because I'm a smartass), and spent the rest of the trip photographing him at the various places we went to. For some reason, I got a huge kick out of posing him at restaurant tables, pretending to hold a fork.


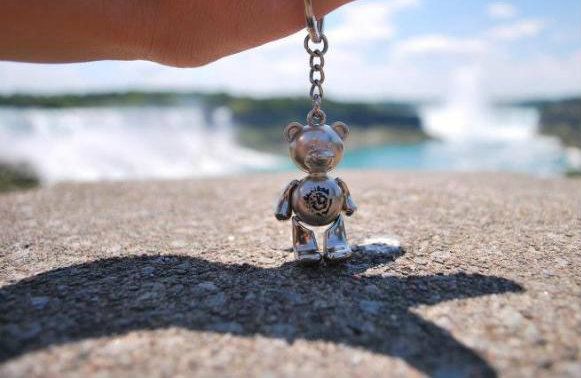
He quickly became my travel buddy, getting his picture taken wherever I went. Then, on my honeymoon, I found the Rome version (and named him Roma Bayer, because I'm not only a smartass, I'm also unoriginal). On my trip to North Carolina for my 
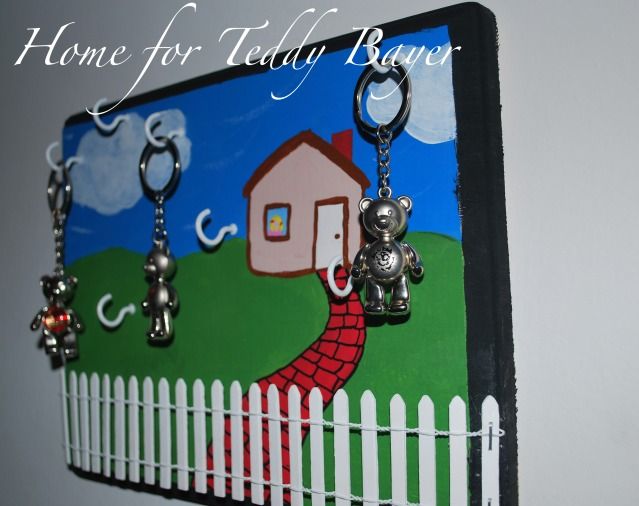
cousin's wedding, I picked up the Raleigh version (named -- you got it -- Raleigh Bayer). I realized they needed a better home than the confines of my carry-on. So, like usual, I raided Michael's and made my version of a key holder.


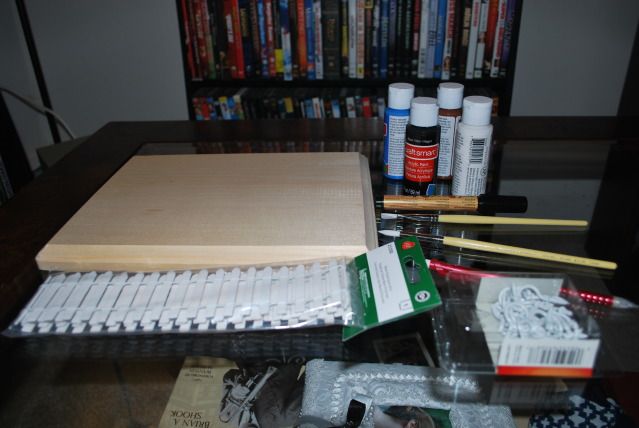
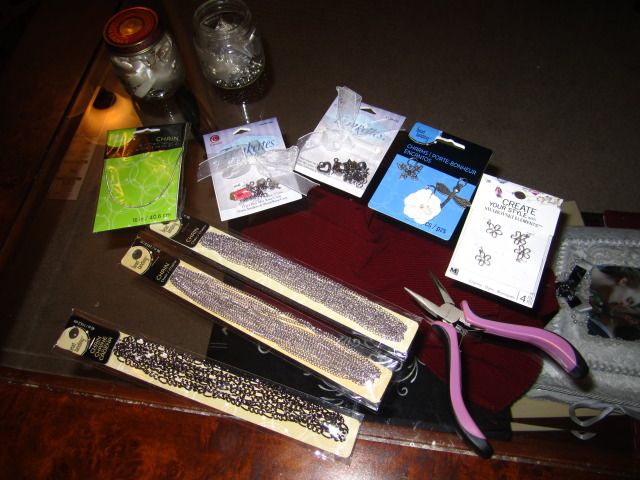
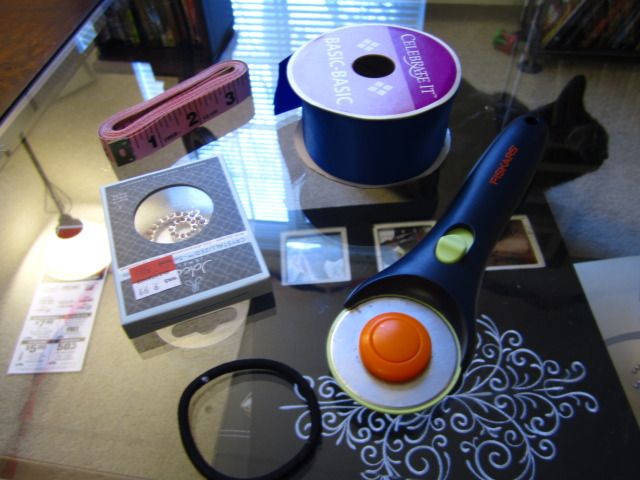
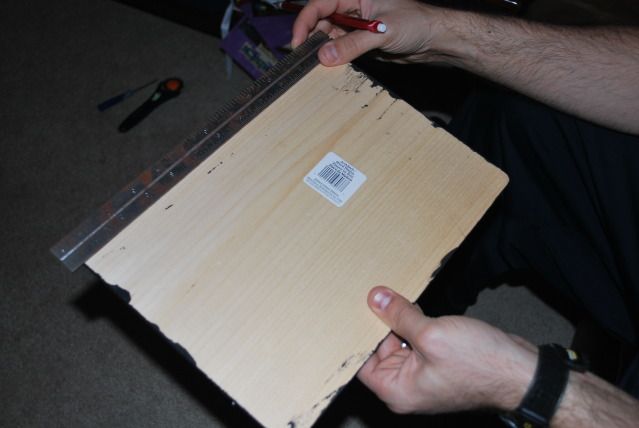
I got the following: a wooden panel, acrylic paints, paintbrush, miniature fencing, and metal screw-in hooks.


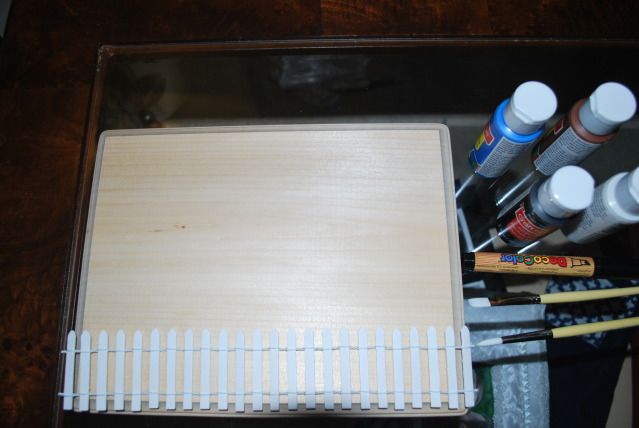
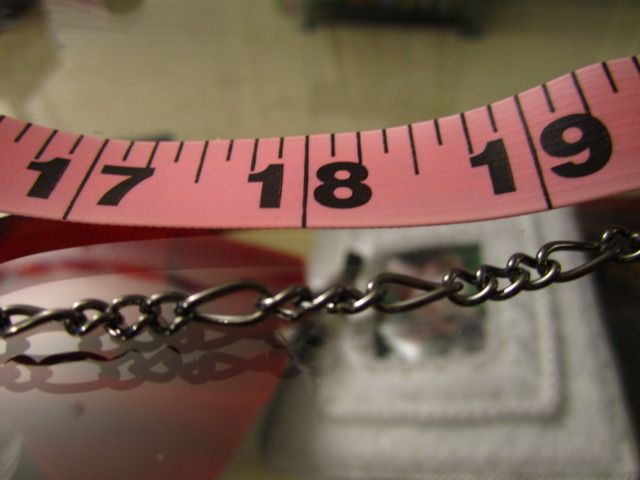
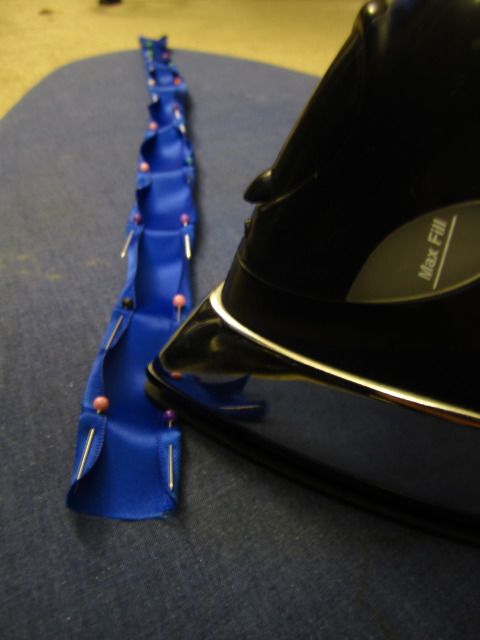
I first measured how much fence I would need, since I decided that my "home" for these keychains would be a literal home, with a white-picket fence and everything.


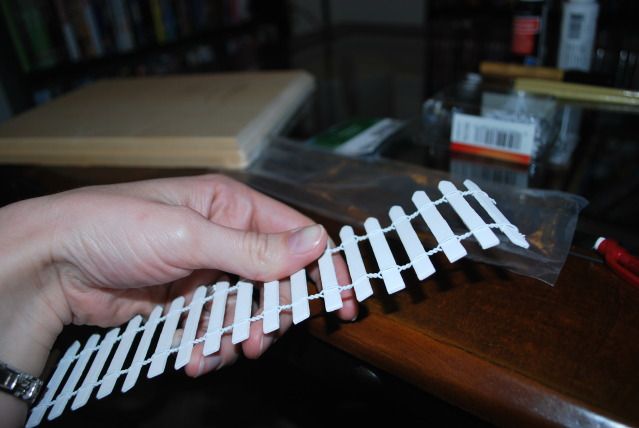
After using my wire cutters to trim the fence, I bent the last picket on each side, so that the edges would rest on the side of the board.


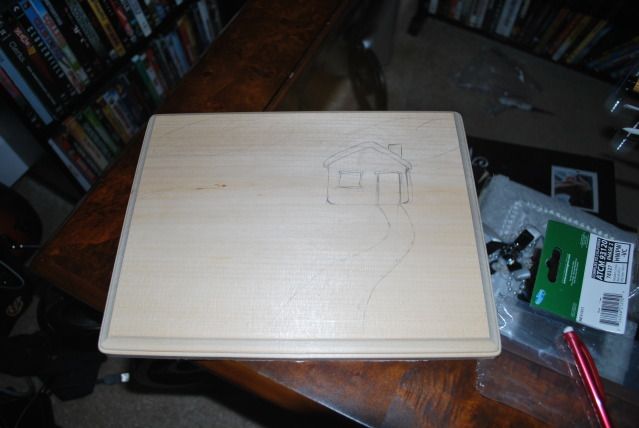
I then sketched out what I would want as my "home" scene. I decided that, on top of making a literal home, I wanted to make the only type of home suited for three bears: cottage with a Goldilocks inside. This was going to be interesting, since I have no real painting skills.


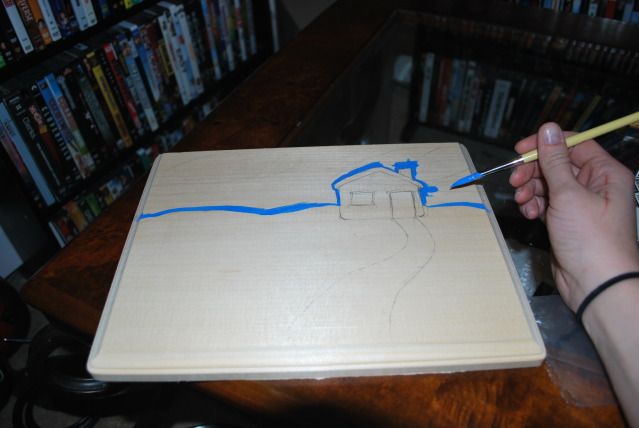
I started with all the major painting portions/background, first with the sky, then the grass, then the broadside of the house.


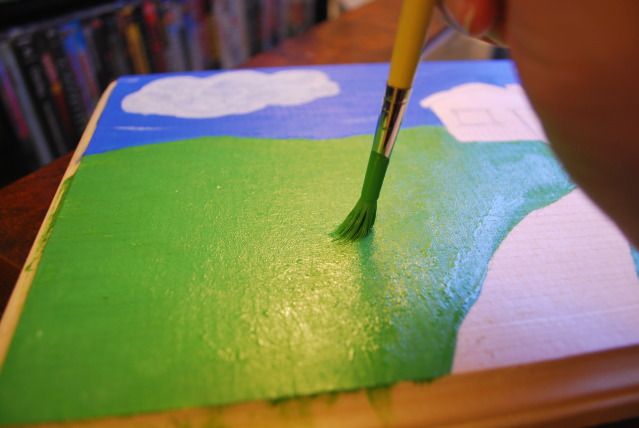
I create some texture to the "grass", I dotted my paintbrush against the first layer of grass.


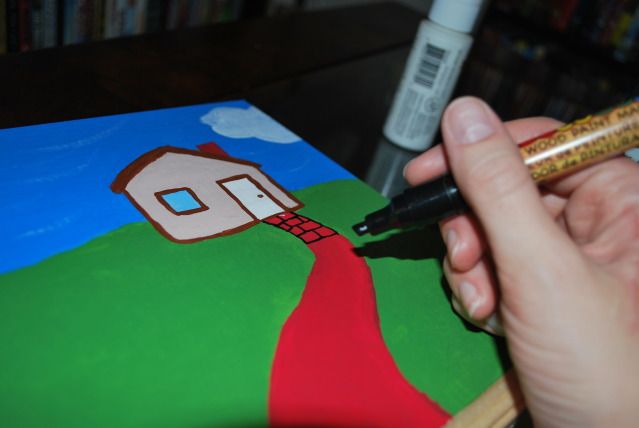
After the majority of the painting was completed, I used my wood paint marker to create "bricks" in the walkway and outline the home.


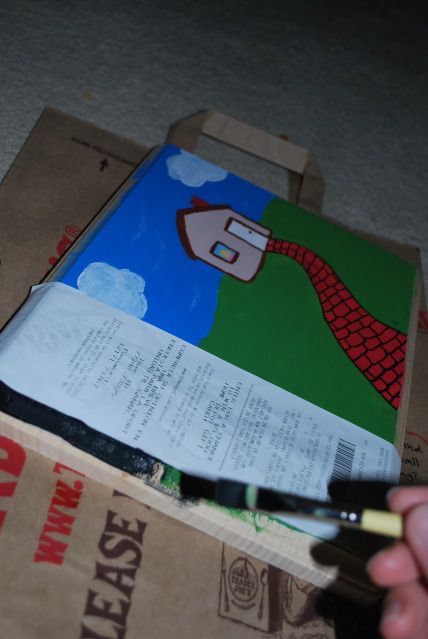
This is "Don't Do What I Did", part 1. DON'T use something as thin as a receipt to edge your border. The paint bleeds through and you'll end up repainting a section. Cardboard or painter's tape is forever your friend in this situation.


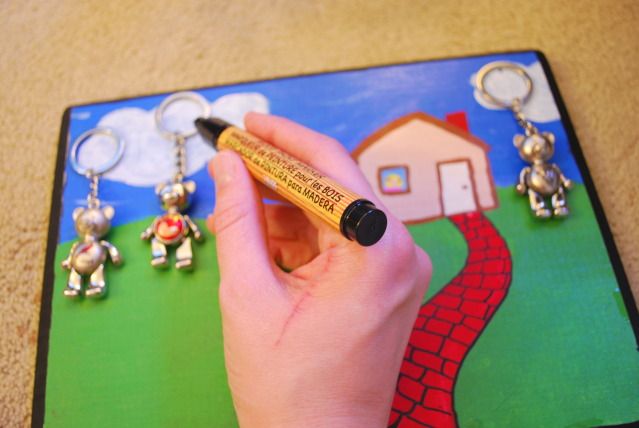
After everything was dried, I arranged my "bears" to figure out where the hooks should go. I'd place a dot near the top of the inner edge of each keychain's loop, let the dot dry, and then reposition one or two of the bears to figure out where additional hooks should go.


The next part I let my husband do, since carpentry is not one of my strengths: my husband drilled small holes where I had marked and screwed the metal hooks into place.


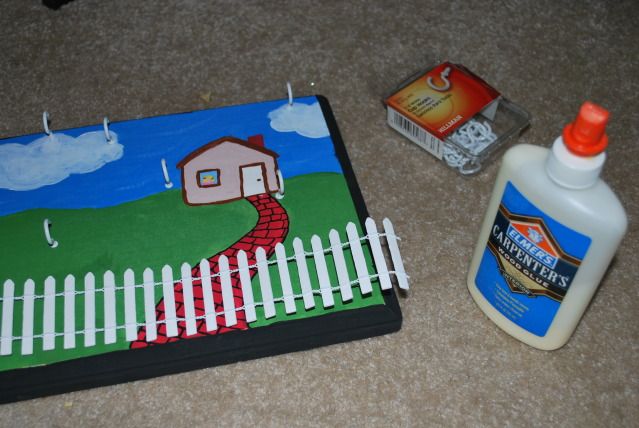
This is part 2 of "Don't Do What I Did". Now, I tried using carpenter's glue to put the fence in place. This was a horrific failure. Thankfully, a few staples from a staple gun along the wire portions of the fence (NOT the middle, as that will shatter the fence, causing you to cut out another length of fence. Part 3 of "Don't Do What I Did") did the trick.


I then purchased Sawtooth Hangers from Home Depot.


Again, this was something I let my husband do. He drew a straight line about 1" from the top, and screwed two sets of sawtooth hangers at the 1/3 and 2/3 mark.


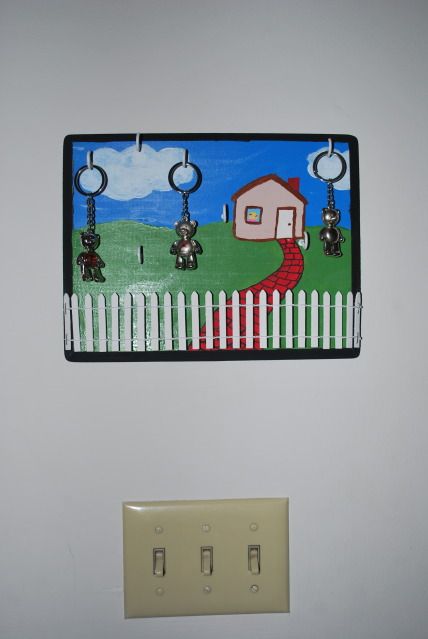
The Goldilocks isn't as obviously-Goldilocks as I'd liked her to be, but I love the result.


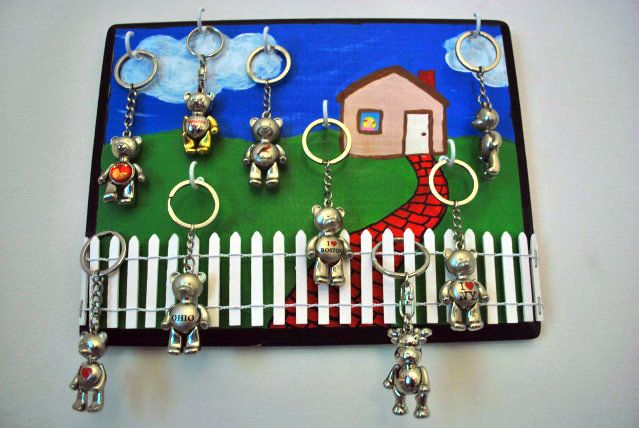
Now, I wrote this up about 3 months ago. The irony is that the original last line was, "Now I need to fill up the other hooks!" Be careful what you wish for. My husband and I ended up traveling to a handful of other places (all of which had those teddy bear souvenir keychains for cheap). So now, as you can see, not only do I have all the hooks filled, but I have a few hanging out by the fence, literally. Time to make another!

Friday, August 10, 2012

Photo Friday: Another Touch of Home

These were all taken about two years ago, around the area in Boston that I lived in. There are nothing as spectacular as my Niagara pictures, but I enjoy them, if only because I love capturing the mundane.


Related Posts Plugin for WordPress, Blogger...

09 10 11 12
Blogging tips