Sunday, June 16, 2013

Blog Update: A Change in Direction


I tend to like my changes to happen all at once, if it's not abundantly clear by my About Me: in June of 2011, I changed jobs, education levels, state residencies, and marital statuses in the same amount of time it takes someone to set up a Pinterest account. And while I've yet to beat that record, this year's June is shaping up to be almost as life changing.


I've been teaching full-time for nearly 4 years -- and have been in the early education field since I was 16. It's had its ups and downs -- times when I've cried because I was so happy, so proud, so satisfied and fulfilled, and times when I've cried because I was so stressed out and unhappy and ready to curl up into a little ball. I've learned a lot about myself as a person, as an educator, and as an adult. But that time has now come to an end. I notified my school in May that I would not be renewing my contract for the next year.


It was by no means an easy decision: I absolutely love the kiddos -- and the moments when they finally "get it" are second to none. I'm so passionate about the importance of quality early education that I can talk about it for hours, even with total strangers (since I know cognitive development in the early years whips people into a verbal frenzy).


I also lucked out in having amazing co-teachers and co-workers, people I could rely on as well as share a laugh (or drink) with. I made a bunch of great friends, people I actually wanted to see after work as well -- something I had never had before. Not to mention I had a commute so tiny that I could ride my bike without breaking a sweat. My commute home (which was almost entirely downhill) took a whopping 8 minutes from unlock to lock-up.


It was hard, saying good-bye to all of that. But my heart wasn't in it anymore. I found myself going through the motions more and more, even after my 5-week summer vacation, even after spending half of December in either Florida or Ohio. And this is not one of those jobs that you can fake it, cash your paycheck, and go about your day. Given all that being a teacher entails, you have to have a driving, unrelenting passion, or you burn out quick. I found myself thinking to myself even during the "good" moments -- the moments that are supposed to make it all "worth it" for teachers -- that this wasn't for me anymore, and I wasn't doing anyone any favors by staying.


And since my big life events like to happen all at once, about 5 days before I put in my notice, my husband and I stumbled upon a gorgeous little farmhouse-like colonial at the end of a beautiful cul-de-sac. We were hooked the moment we pulled up and, after serious deliberations, calculated reasoning, and fist-pumping our hands in the air to "Cotton Eye Joe" like Nick from New Girl, we made an offer on the house.


It has been a slow, tedious crawl to homeownership. You learn just how many steps there are in buying a house and how many people get involved in the closing process, and it's quick to see why buying a house is considered one of the most stressful things you can do. But, assuming everything goes according to plan, we will be holding the keys in our hand on July 12th.


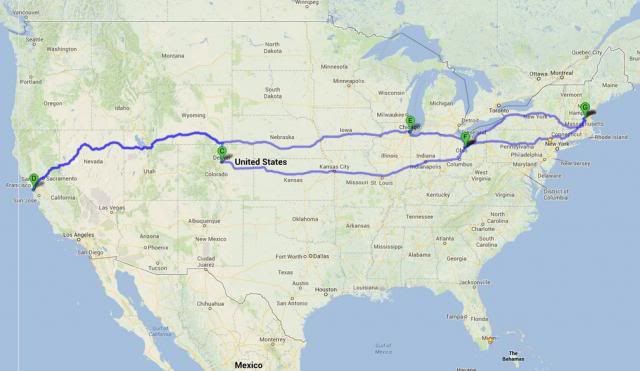
Which just so happens to be the Friday after we return from our cross-country road trip. Because everything needs to happen in threes, my husband and I are celebrating our second anniversary by knocking off a huge thing from our bucket lists. We leave on the 21st for San Francisco, stopping off in Ohio, Denver, and Chicago along the way. There's something wonderfully poetic about our nomadic vacation starting a week after my last day at school, and ending a week before we (potentially) get the keys to a house.


So it's safe to say that big things are happening. If 2011 was any indication, I will return from all of this with even more energy to be used on things like my crafts. I'm excited for what is in store for me in the coming months, and I'll make sure to keep you posted :-)


- Abby

Monday, June 10, 2013

Tank Top from a T-Shirt


I tend to have a lot of t-shirts that I refuse to get rid of. I don't wear t-shirts, but heaven forbid I donate them to charity. I have trimmed them to my liking before, but this takes it one step further.


And all you need is your t-shirt. And scissors. And sewing equipment.


Trim off the sleeves of your shirt. Then, trim straight across, from as close to the bottom edge of the collar as you can get.


Now, trim off the hem portion. Cut the hem part at one of the main stitches so that you have a nice, long piece of fabric.


This part gets a little tricky, but bare with me. Fold down the front part of your shirt. Then, line the long strip of fabric along the top edges of the t-shirt, where the color used to be. Fold the top edges over (and inward) so that it covers the strip with a little room to spare and pin into place.


The alternative is to fold the edges inward about a half inch, pin into place, and feed the strip in later, but, weirdly enough, I find the previous version easier to do.


With the strip carefully nudged to the side, sew the folded pieces into place.


And then you're done! Try the tank top on, knot/sew the straps together when you get the optimal length, and you have a brand new summer item. Easy peasy. If you're more adept at sewing, sew in the sides for a more form-fitting look.


Another way to do this project is to use ribbon instead of the bottom hem. I got this t-shirt for dirt cheap (like $2 dirt cheap) from the clearance section at Old Navy. I really like this shirt, if only because the shirt is a slim-fit, meaning I don't need to sew in the sides or anything.

Saturday, June 8, 2013

Sea Shell Fun

Now that summer is approaching, I figured I'd take a quick moment to talk about sea shells.


Since New England beaches boast mainly oyster shells over anything else, I tend to go into maniacal collecting mode whenever I'm at a beach in the south. I love New England and I will always be a passionate Bostonian at heart, but, really, nothing compares to the beaches of Florida or North Carolina.


This results in an accumulating repertoire of sea shells of all shapes and sizes. Thankfully, there are a million crafts you can do with shells, and most of them are crazy-easy.


Enjoy Starbucks milk drinks? Why not clean out the glasses and fill them with shells? They are the perfect size and shape for a decoration. The trick to properly filling up glasses with shells is to slide the shells along the sides of the walls with your most ornate shells, and then (carefully) fill the center area with the less intricate ones.


While the ones in the jar are from my cousin's wedding, the ones in the glass vase is from the Florida leg of my honeymoon, using an old wedding vase to hold the shells.


Have old baby jars lying around? Those can become fun candles in only a few steps: fill up the baby jars in the same manner as the Starbucks glass. Stop just below the beginning of the rim, even out the shells so that the surface is fairly flat, and add tea candles. These candles -- also shells from the Florida leg of my honeymoon -- adorn our antique radio, which is actually one of my husband's old MIT projects.


Some sea shells were just meant to become jewelry. I'd say at least 10% of the seashells I find have a perfect little hole in the top center of the shell. Slip a jump ring through, attach it to earring hooks, and you're set.


The same with necklaces: you can either repeat the process, only this time attach the jump ring to cord. Or -- loop the cord through the hole and thread the end pieces through the loop.


Or, you can braid the cord around the jump ring. Really, the possibilities are endless.


The projects for sea shells are endless. Which is good, because my love for collecting sea shells is just as endless, too.

Monday, June 3, 2013

Ribbons & Buttons Flower


I have a tendency to impulse buy ribbons -- which isn't exactly hard to do, as there are always stacks upon stacks of pretty ribbons on clearance. For the most part, they just collect space (with the occasional high-end-ish gift wrapping). So I decided to do something about it.


For this, all I needed was:
- ribbon
- needle and thread
- buttons
- scissors


First, cut about 3-4" of ribbon and loop it loosely.


Next, push a threaded needled through the center portion.


Push the needle back through and repeat the process. When you feel the ribbon is fairly sewn together, cut another 3-4" length of ribbon and repeat the process, this time pushing needle through both the looped ribbon and the finished "pedal" of the flower. At some point: sew in the button to the center. You can do this right away, or you can wait until your flower is done (which is usually after 3-5 loops).


I decided to pin these ribbons (and wrap additional ribbon) around a styrofoam circle for a nice spring wreath. Like I mentioned with my Christmas Wreath, it's hard to liven up a dark and dank apartment hallway, but it can't hurt to try.
Related Posts Plugin for WordPress, Blogger...

09 10 11 12
Blogging tips