Showing posts with label preschool curriculum. Show all posts

Wednesday, May 29, 2013

Open House 2: The Noisy Farm with One- and Two-Year-Olds


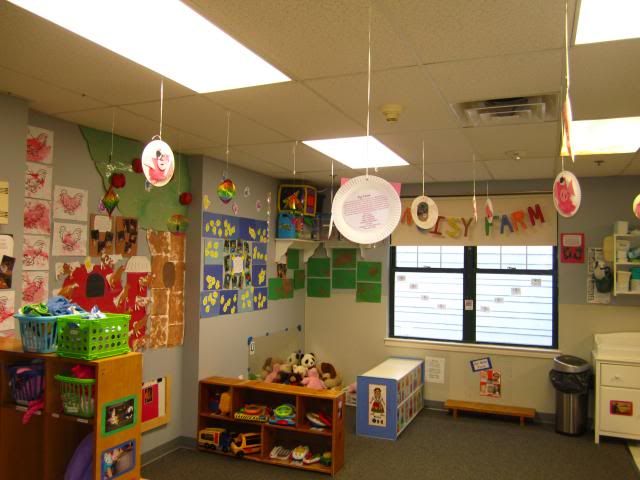
It's hard to believe that another Open House came and went. I felt like, last year, it was all I could think about. This year, it downright stumbled together. Which worked for me: while I spent nearly 2 hours after school prepping for Open House last year, I was in and out within a half hour this year.
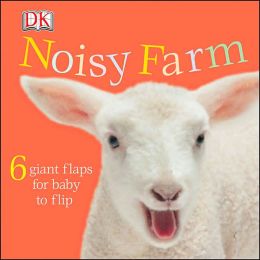


We continued our theme of "the current favorite book of the kiddos" and picked Noisy Farm. I love books like these, especially for older infants and young toddlers. From the simplicity of its design to the pull-down flaps that keep the child's interest and the pre-literacy skills involved (the only thing on the flaps are the words of the sounds), these books are a must for any parent or teacher.


Much like we broke down From Head to Toe, we broke down the book by animals. Of course, the only drawback is that you then have to walk the fine line between finding activities that are age-appropriate and activities that your administration will appreciate (especially if you're administration primarily handles elementary and middle school happenings and you just so happen to be working with one-year-olds).
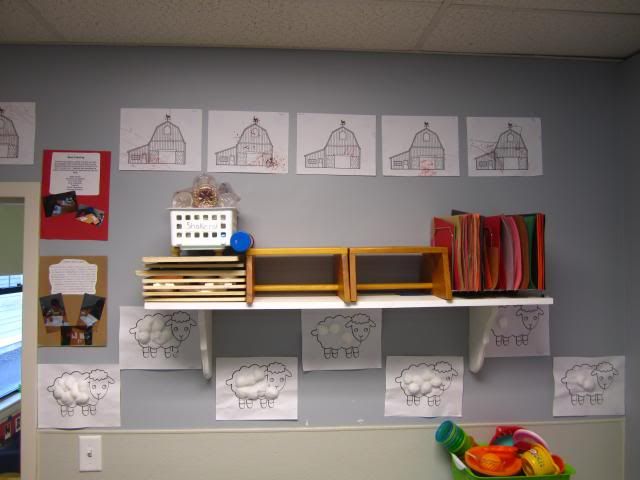


The first animal in the book is the "wooly lamb". For this, children glued cotton balls onto a sheep outline. This project was a HUGE case of trial and error. I learned two major things for next time: 1) Let the kiddos just explore the cotton balls at first. and 2) It's actually easier to instruct a child to dip the cotton ball in glue and THEN put it on the outline than it is to place the glue on the sheep yourself and instruct the child to keep their hands out of the glue. A lot of kiddos wanted nothing to do with the project, so I supplemented it with coloring over pictures of barns (key word is over and not in, but more on that another day).
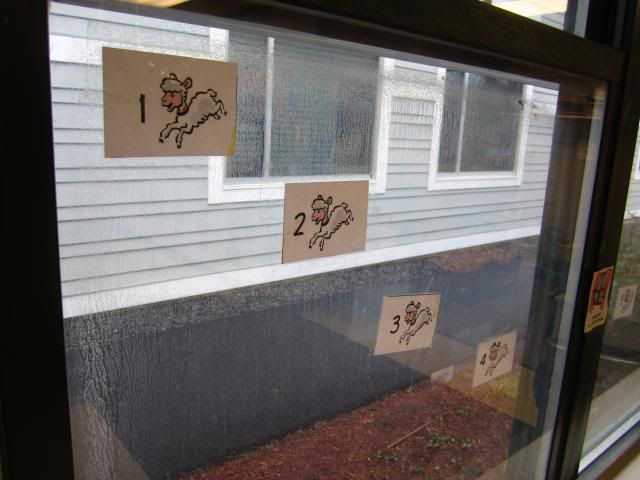


We also put little "counting sheep" on our windows. The best part, is that our kiddos are already learning counting. This is why it's never to young to count things in front of your kids, or point out words in a book: I have kiddos who are now 18-22 months and half can count to three (with two who can count up to 5 and 8, respectively).
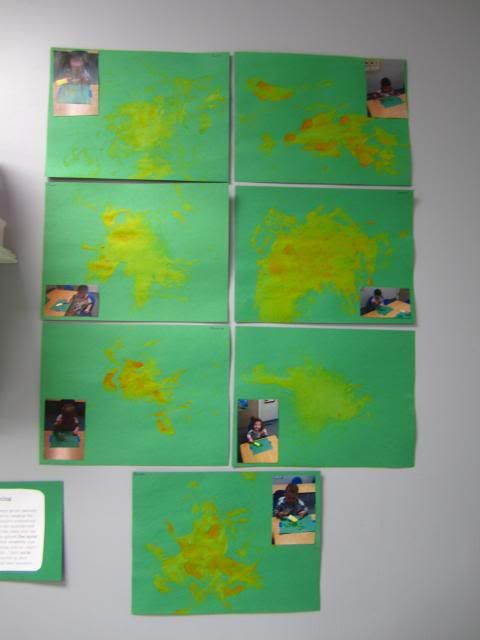


Next was the fuzzy duck. We had two projects for this. The first was what I called "Duck Prints". The kids were given spatulas to pant with and were encouraged to smack the paper with the spatula the same way a duck's foot smacks the ground. This is the perfect type of project for younger children: it's open-ended, it's about the process (not the product), and it still ties in an important lesson.
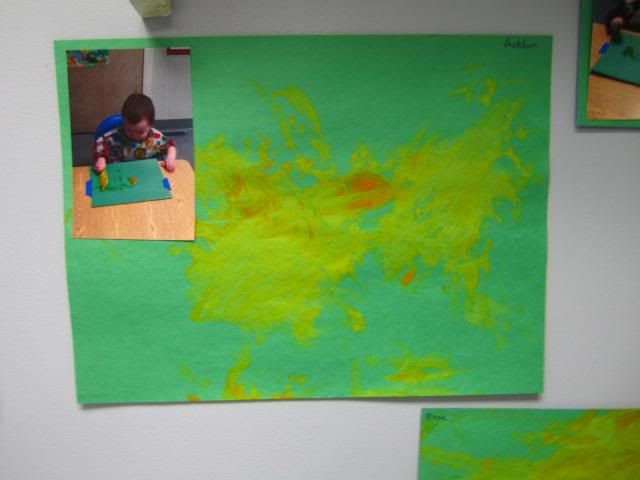


Again, I always love putting a picture of a child doing activities like this. It's hard to get the process, just looking at the final result, so this helps parent understand what is going on.
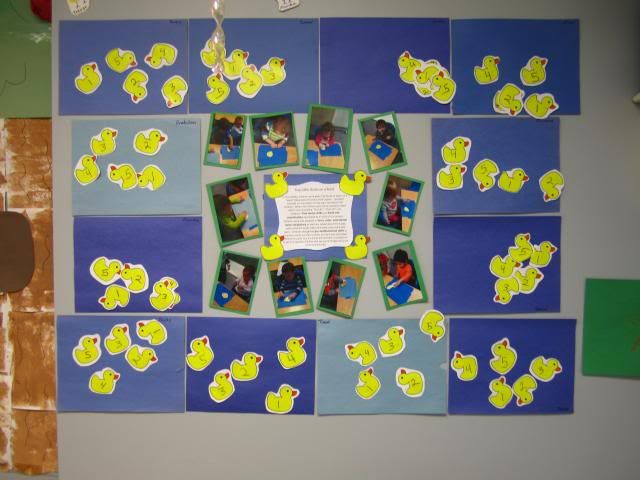


This project was a lot more structured, but still an incredible project and continues what I was talking about with counting. The children were doled out five little ducks to put into a pond (like the song "Five Little Ducks Went Out One Day" or "Five Little Ducks That I Once Knew"). The teachers counted out the ducks (which already had tape on the backs) and encouraged the kiddos to put them in the "pond" (blue paper). Once all five were placed on the paper, the teacher would get out her Sharpie and ask the kiddo to point out which duck should be Duck #1. They would point to a duck, and the teacher would mark a number "1" on said duck. The teacher would then ask, "Now, which one should be Duck #2?" with a gentle redirection if the kiddo wanted Duck #1 to be Duck #2 as well (something as simple as, "This duck is Duck #1. Another duck needs a turn.")
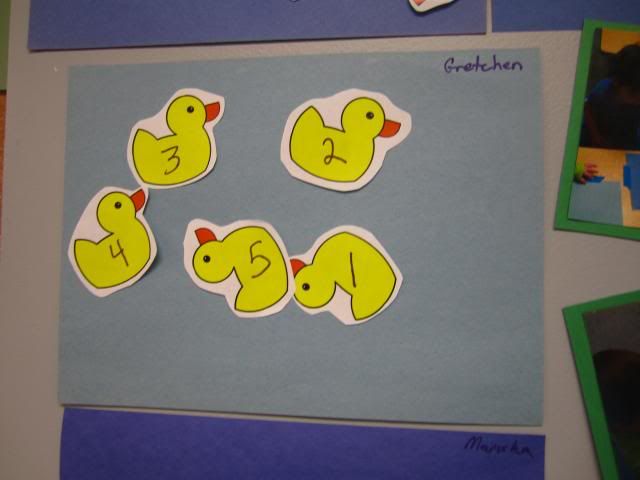


Continue onward until all five ducks are labeled. I loved counting the ducks in order once everything was said and done. This project is so huge in terms of pre-mathematical skills. Aside from counting and showing numbers to the kiddos, you are teaching them that we only count things once. This is a difficult concept for young children to wrap their mind around (and why you sometimes see toddlers counting the same toy two or three times).
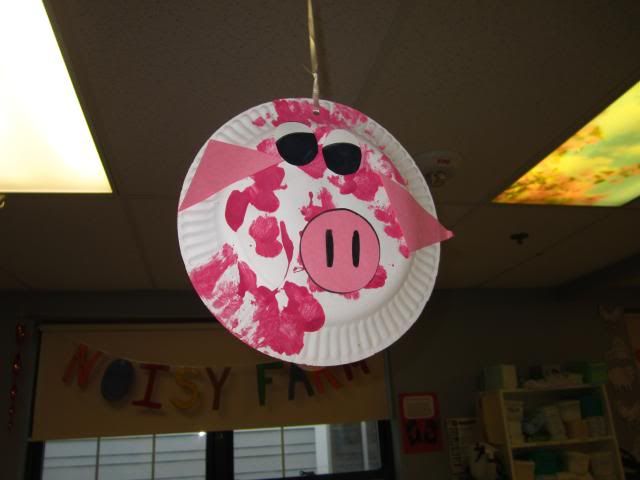


Then there was the pink piggie. This was a two part project: first, the kiddos paint a plate with pink paint. The next day, when the paint dries, the kiddos are given pre-glued parts of the face to place wherever they see fit.
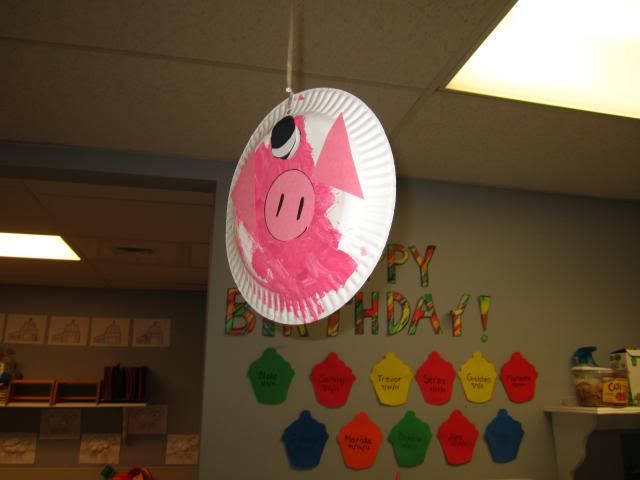


Some kiddos got creative with where the pieces should go. This one student created a cyclops with reverse ears. But that's the beauty of working with young children: there is no "wrong" type of piggie!
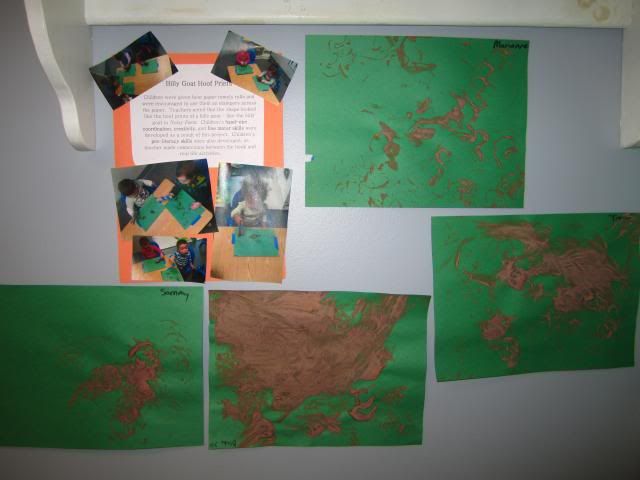


The billy goat was tough, but I decided to take a Pinterest idea and flip it on its ear. Almost everyone who visits the crafts section of Pinterest knows of the Heart Stamper out of Toilet Paper Tube, where you essentially pinch a toilet paper roll, secure it with tape, and use it as a heart stamper. I did the same thing, only instead I dipped it in brown finger paint (since I knew it dried to look almost like mud) and called them billy goat hoof prints. Young toddlers love banging away at whatever they are given (don't believe me? Hand them anything that resembles a hammer and watch them go at it), so my kiddos had a blast with this activity.
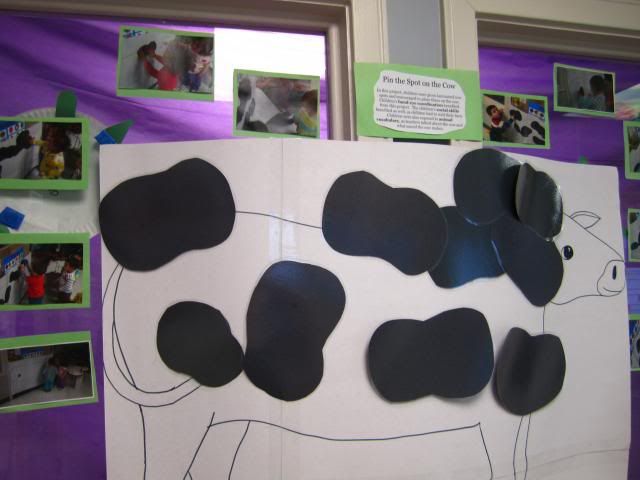


So the book's cow is technically a brown car, but that didn't stop me from creating a various of pin the tail on the donkey. I made an outline of a cow on poster board, laminated some black construction paper "blobs", taped one side of said blobs, and let each kid have a turn Pinning the Spots on the Cow.
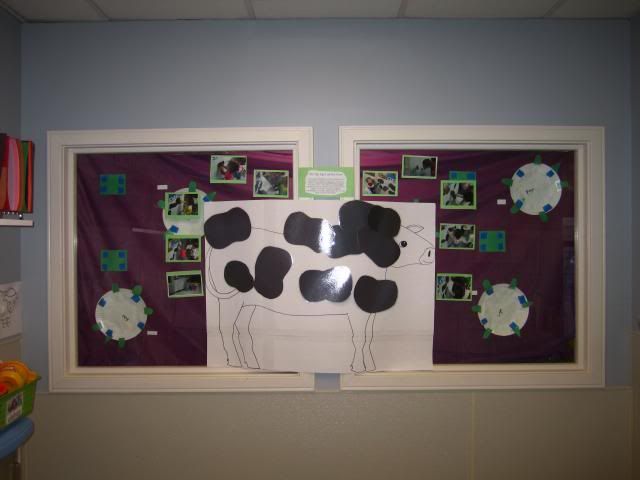


They got a huge kick out of it, and loved pointing to the cow once it was hung up (and mooing at it, of course).
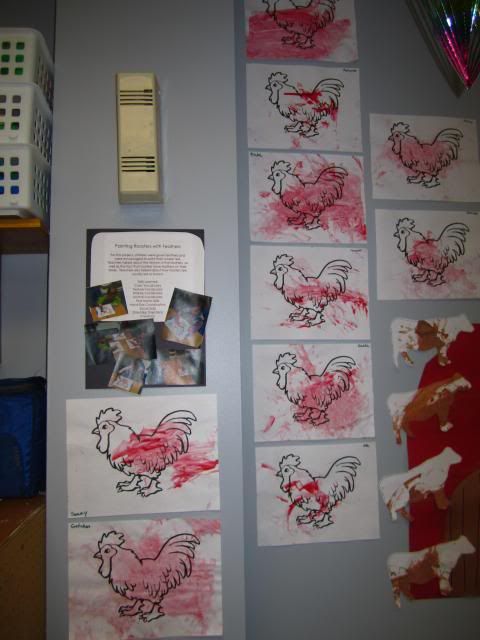


The red rooster rounds out the book. Originally, the children were going to glue the feathers onto the rooster. However, since the sheep turned out to be a sensory nightmare, I decided to tweak the project last minute and have the children paint with the feathers instead. I'm actually happier with the painting than I would have been had they glued the feathers. The project was stress-free, the kiddos had a great time, and the end result is amazing.
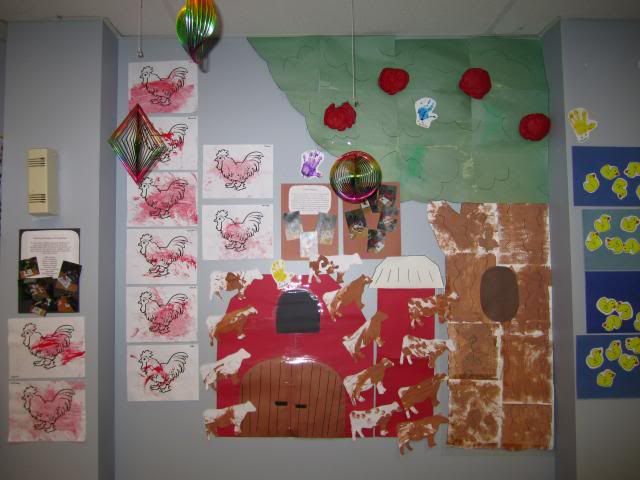


I made a barn out of construction paper and adorned it with brown cows (painted by the kiddos, since the cow in the book is brown). It worked perfectly under the room's tree (possibly the first big decoration I made once I was in my room).
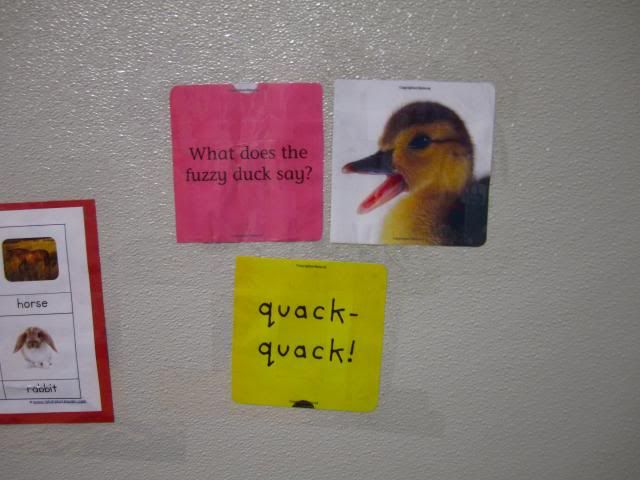


I took full advantage of Amazon's "sneak preview" function and printed out a few pages from the book and taped them to the wall. This is a great way to promote literacy and show that words/images can be in places other than books.
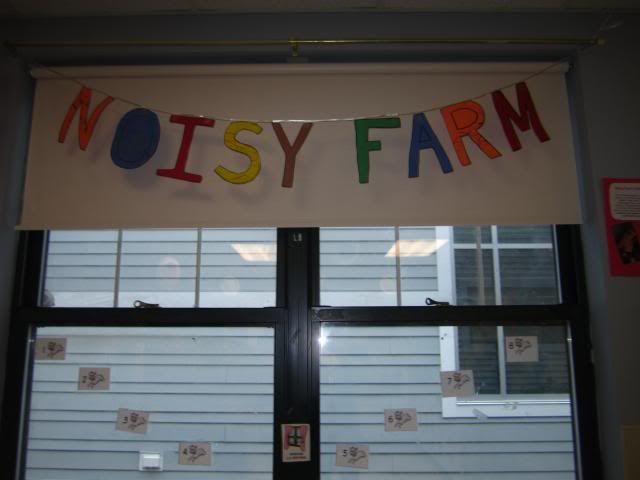


And, much like last year with From Head to Toe, I made a sign out of colored letter outlines. I'm amazed at how quickly the kiddos learned their letters. This year, I decided to add "pointing to letters while singing the alphabet song" to my circle time repertoire, and the results are definitely noticeable. Some of the kiddos knew what letter that had been given!


Open House is always an adventure, but I'm very happy with the results (and happy that it all came together effortlessly this year!)

Saturday, May 11, 2013

Mother's Day Gift #2: A Recipe Book ... Kind Of.

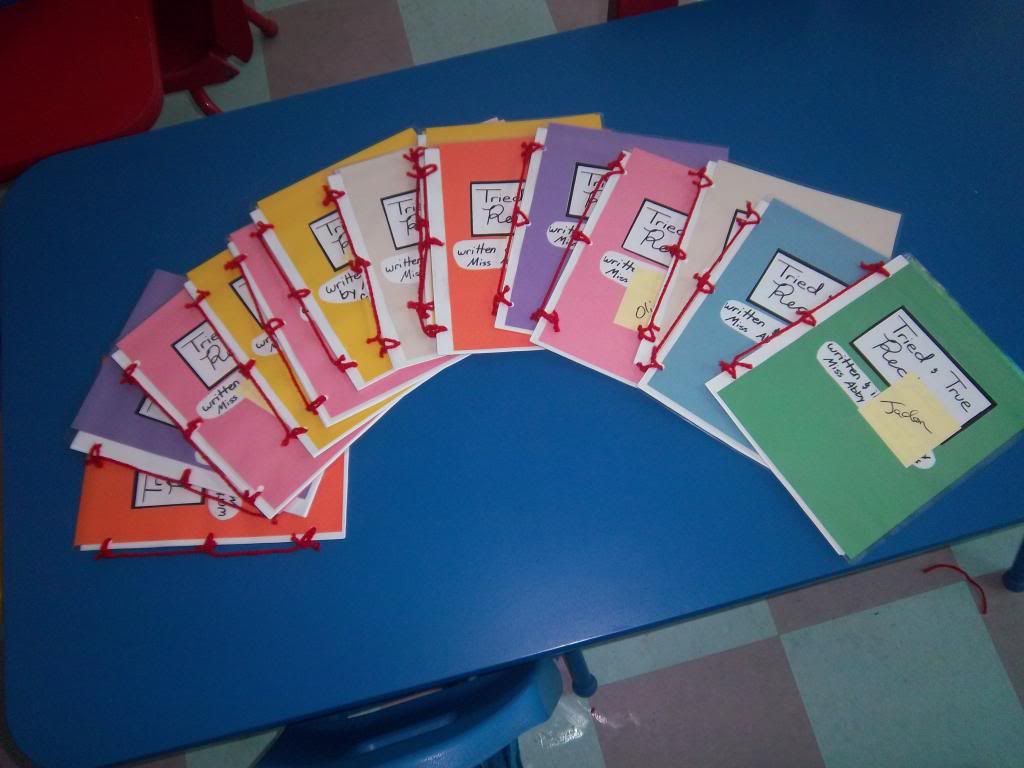
This was one of my favorite projects with my Pre-K students. During circle time, I asked each child to tell me their favorite food, and then asked them to think about how they think it's made. After circle time, the students drew a picture of said favorite food. I then went to each child individually and asked them to tell me how they thought their favorite food was made. I asked them what they thought they needed to make it as well as what were the steps to make it. I wrote everything down, typed up the "recipes", and paired the picture with the recipes.


I then spent a very, very, very long evening at FedEx, making copies, three-hole punching papers, and assembling the "cookbooks" you see up there. They were the "Tried & True Recipes: Written and Illustrated by Miss Abby's Pre-K Class".


If you are a father, this can easily be done with just your child or children. Simply spend a little time each day talking about some of the favorite meals they have at dinner, and ask them to tell you how they think they're made. The answers are oftentimes hilarious. While I don't have a picture of it, below is one of my favorite recipes:


Macaroni & Cheese

Ingredients:
- A Box of Mac and Cheese
- That's it. You don't need anything else. Just a box of Mac and Cheese.


Mommy puts the box into the pot and stirs it with a really big spoon. When the smoke comes out of it, you know it's done. Mommy dumps everything into the sink and then puts it on our plate. Sometimes Daddy calls a pizza. I like pizza, too.

Friday, May 10, 2013

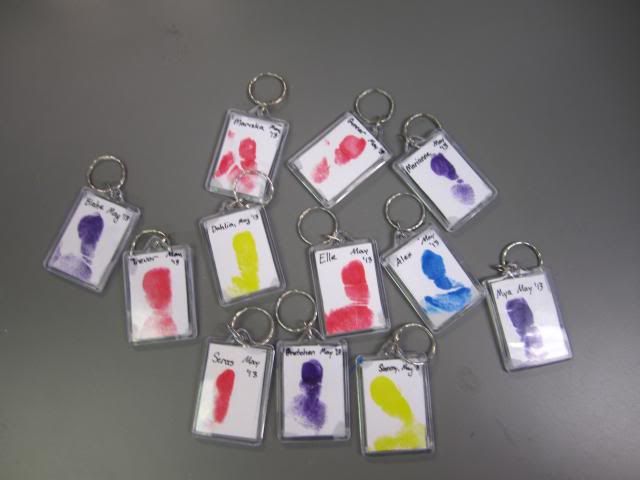
Mother's Day Gift #1: Mother's Day Fingerprints Keychain Gift

This is a wonderful project to make for someone's parent. Great for teachers, aunt/uncles, and various friends of mothers.


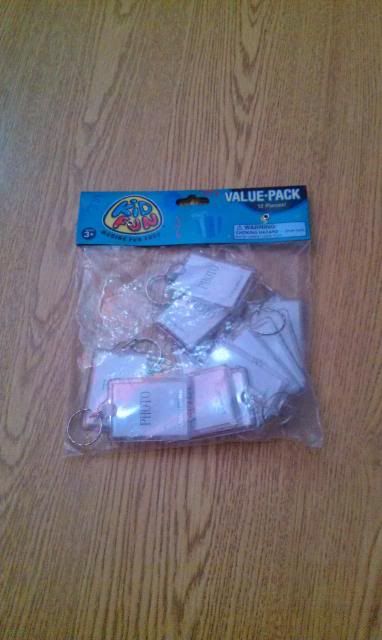
First, order picture keychains. They're absurdly cheap -- I got this set of 12 for only $9. Then, all you need are ink stampers (or paint), white card stock, and a thin Sharpie.


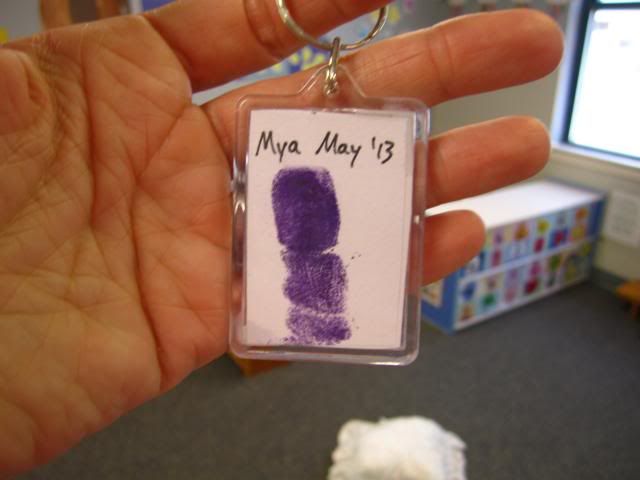
On one piece of paper, get a thumbprint of the child. I found the easiest way to do this is to ink the entire hand and then bring the paper to the thumb only. This is especially true for young children. Use the Sharpie to write the child's name and date.


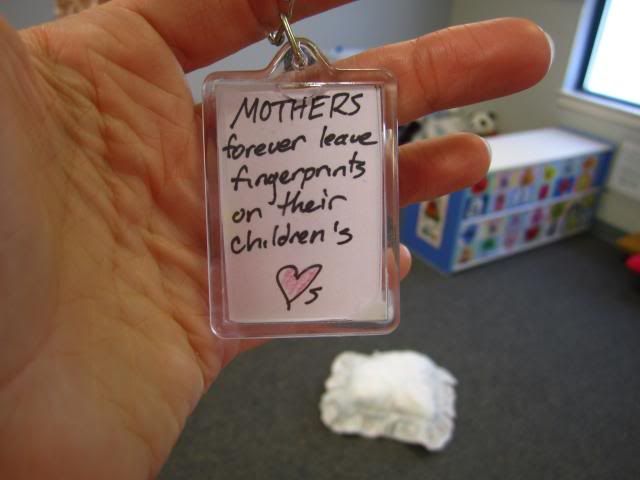
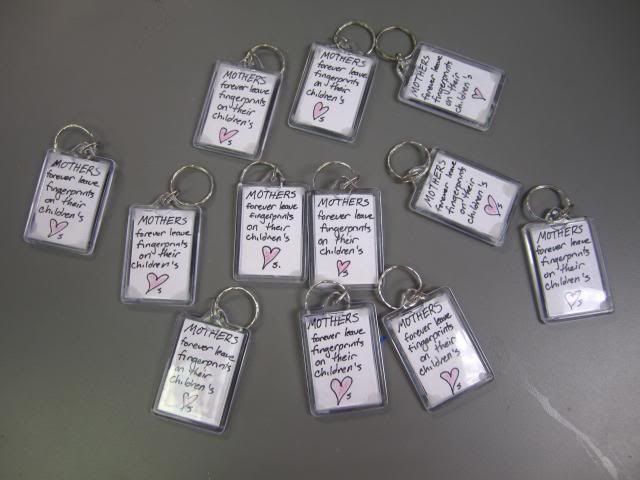
Teachers love puns! On another paper I wrote, "Mothers forever leave fingerprints on their children's <3s"


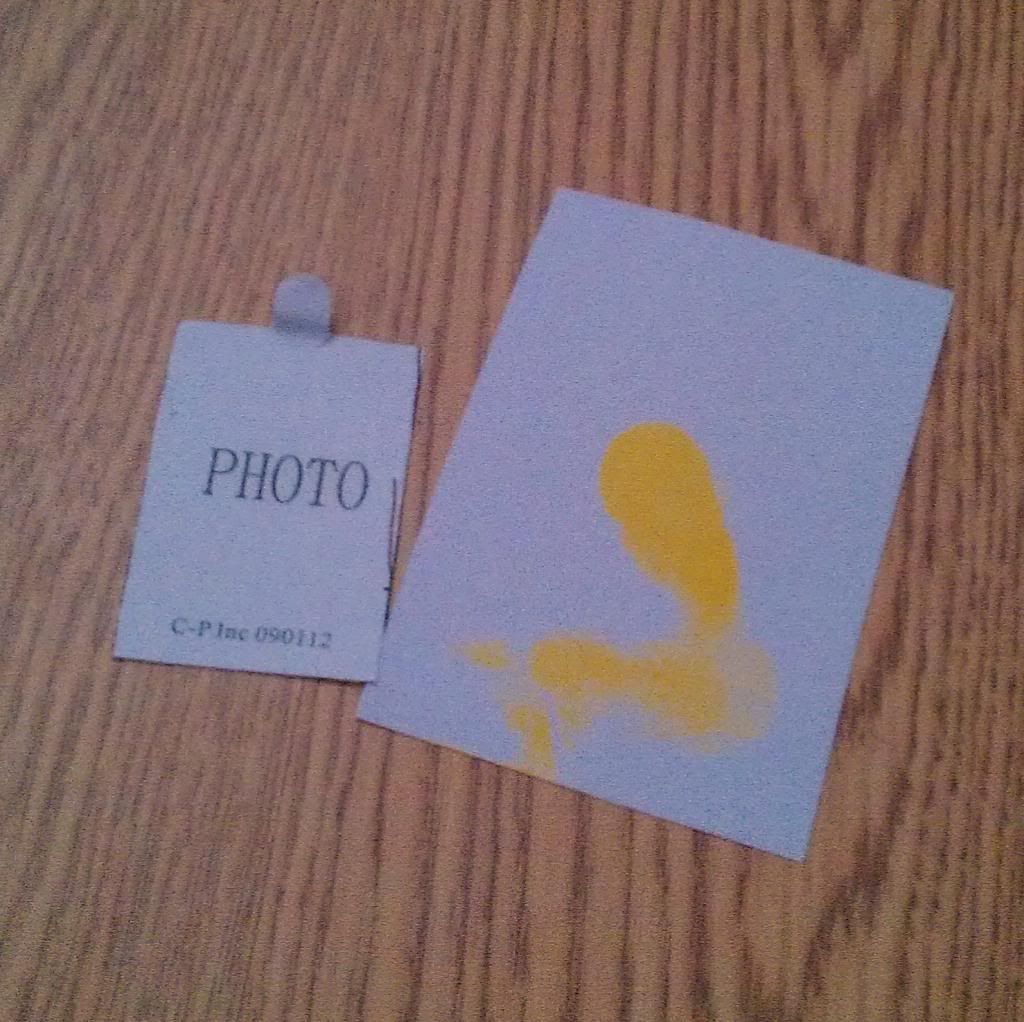
I pried open the keychain with the edge of my scissors and used the paper inside to trace around the thumbprint and wording. I cut them out, placed them in the keychain, and snapped it shut.


The best part is that I have exactly 12 students total, so I didn't have to buy any extra keychain sets. I'm looking forward to wrapping these up and giving them to my kiddo's moms!

Tuesday, March 26, 2013

Painter's Tape Finger Painting

I tell parents this project is akin to chopping up the vegetables really small that the children's don't realize that what they are eating is good for them.


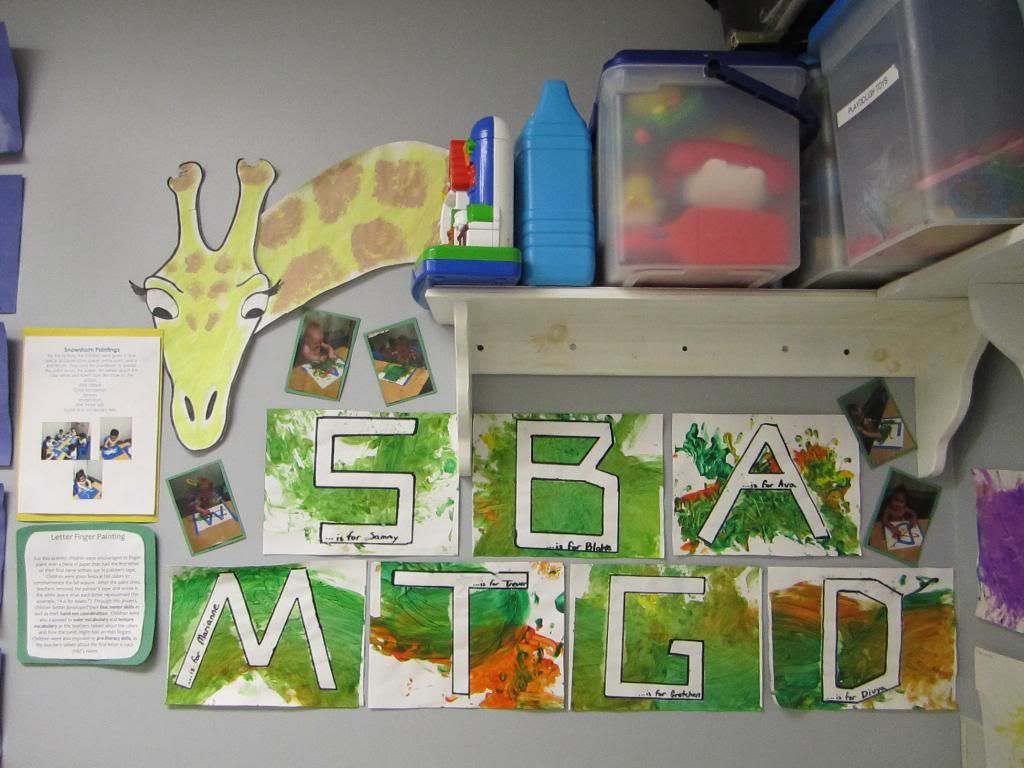
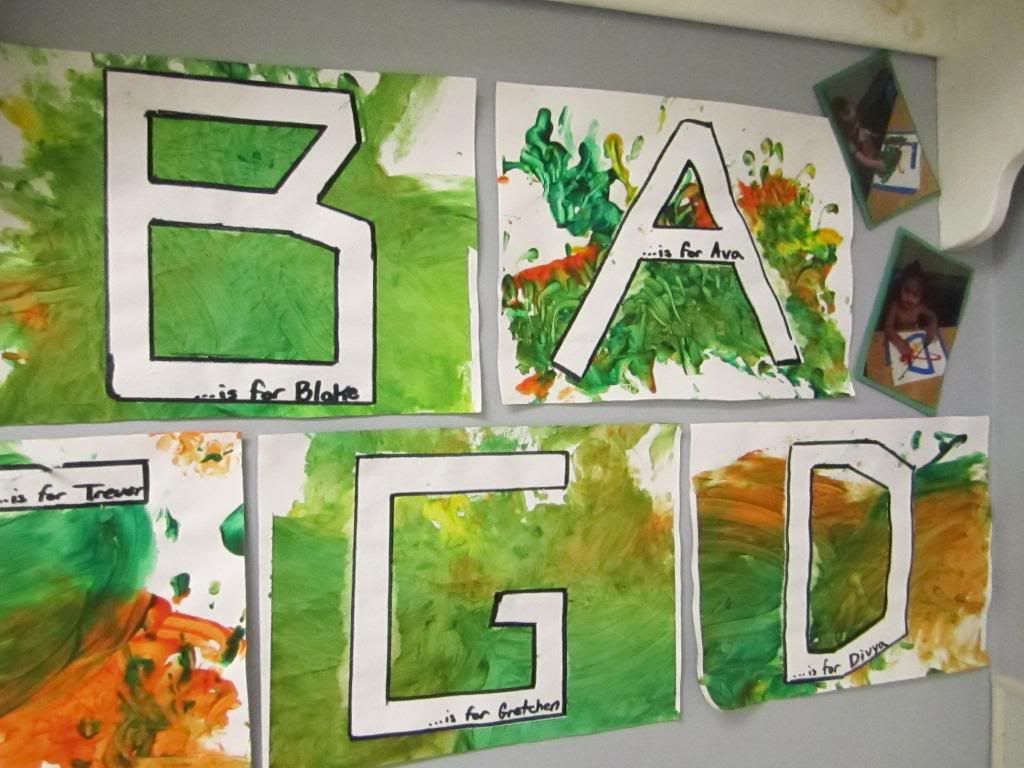
To the kids, they are just fingerpainting. But they're also learning their letters -- as well as the beginning of phonics.


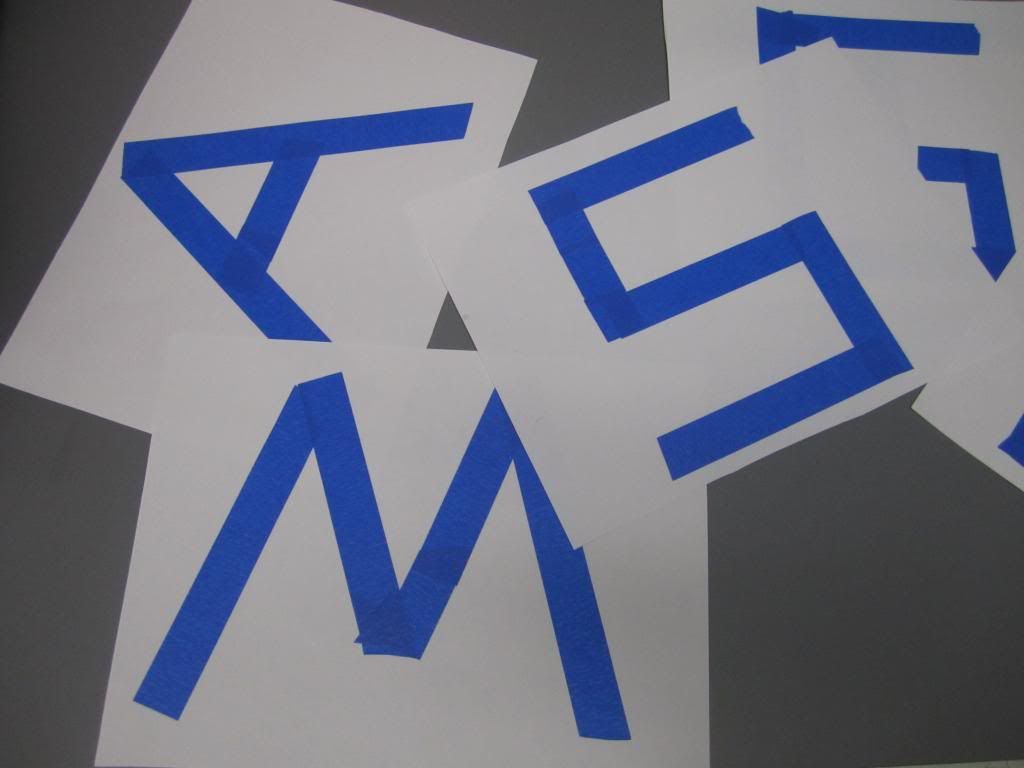
All you need for this project is canvas (or, in this case, paper), and painter's tape. I can't stress enough: use painter's tape. Any other tape will rip.


Write out in tape the first letter of each kid's name. Just my luck: I had kids with letters like G, B, and D -- some of the more intricate letters! In a perfect world, every one of my kids' names would start with the letters T or I.


Then -- let them finger paint over it! I made sure to point out the letter on each paper as I handed them out to the students and explain why they were getting that letter. This is honestly as simple as, "John gets the letter J, because that's the first letter in his name! J for John!"


I suggest removing the tape about 15 minutes after the child is done. Just long enough that the paint is not completely wet, but short enough that the tape doesn't have time to super-adhere to the paper.


For emphasis, I outlined the letters and wrote, "... if for _____" in the white area of the letters. I know you're technically not supposed to do that -- you're supposed to never write on a students' artwork! -- but I figured my kids wouldn't mind. Plus, my parents got a huge kick out of the project. One parent even took a picture with their smartphone to send to their family. And nothing is more rewarding than knowing the parents appreciate the projects you are doing!

Wednesday, February 6, 2013

The 5 Things Bosses Should Be Doing (That Preschool Teachers Already Do)

picture source

I read this article recently, about the 10 things that bosses steal from third grade teachers. While it disintegrates pretty quickly (one minute they're talking about positive reinforcements; the next they're talking about silly ties), the article does point out the fact that there is a lot of overlap between classroom management and office management. Below are the 5 realistic things bosses should be doing that teachers already do.


1. "I need you to" versus "You need to."

Kids are sensitive. Tell a child they need to do something and they'll find a way to contradict it. They don't need to do anything. But semantics is a beautiful thing. Tell them that you need them to do something, and the likelihood that they'll do it usually increases. The same with adults: there is nothing more off-putting than people telling you that "you need" to do something. Tell an employee, "YOU NEED TO DO THIS," and they'll be thinking, "No, what I NEED to do is find a new job."

It really can be as simple as, "I need you to..." Because, at the end of the day, that's the reality of the situation: they don't need to estimate a project's budget -- but you, in fact, need an estimated budget for the project.


2. Model the behavior you want.

You can't expect your students to gently put toys away, stay in their seat, say only nice things, etc, if you are tossing books onto the shelves, constantly fidgeting, and gossiping with the other teachers. The same goes for employees. Back in the day, I used to have a boss who would sit in her office and play on her phone. All day. Just her, in her office, cell phone "hidden" under her desk, checking Facebook. She'd then have the audacity to turn to her employees and expect the world of them, wanting to hear no excuses as to why a certain task couldn't get accomplished. A lot of us (myself included) resented that she wanted us to put in 110% while she put in the minimal effort. As a result, our productivity began to mirror that of our boss's, which was the minimal acceptable amount.

If you want your employees to work hard: work hard. If you want your employees to respect each other: respect them, as well as your own colleagues. The world does not operate by, "Do as I say, not as I do."


3. Consistency is key for respect.

I can't stand it when teachers use empty threats to get children to follow the rules. The most common I hear are, "We'll leave you behind!" (when obviously they won't, since that would result in getting fired) and "I'm counting to three and then [consequence that pertains to the matter at hand] … one, two… two and a half … c'mon just do it!"

The only thing this does is teach the kids that your words carry no weight. This is the same for anyone in a leadership position. The best way to undermine your own authority is to say that a certain protocol is in effect, only to inconsistently carry it out. Promise one thing, but deliver another. Say that one thing will definitely not happen, only to have it happen anyway. All you are doing is proving that your words have no weight, which will only result in employees who don't respect your authority.


4. Everyone needs a break.

A semi-recent study found that people are actually more productive when they have more opportunities to have fun and take some time off. Kids start acting out if they're stuck all day at their desk or in circle time, constantly working and learning. Kids tend to be better behaved when they are given a chance to get out of the building, run around, play, and just in general take a break.

Likewise, employees lose their focus, their drive, their energy, when they feel like they are being driven into the ground without any break or opportunity for time off. There's a reason why some of the most successful and innovative companies in the world allow their employees to take naps or get unlimited vacation time.


5. Understand the Big Picture.

The most important -- and hardest -- thing to do as a teacher is to recognize that disruptive behavior is usually the result of external forces. A kid might be acting up because home life has been stressful, or because too much is happening at once and they have no real way to process all of the stimuli.

While, at the end of the day, everyone is accountable for their actions, regardless of the catalyst, it's important to remember that we're not cogs in a machine. We're all human, complex and emotional, and sometimes we need those in charge to recognize that. And while bosses can't exactly approach their employees in question and give them a hug the way teachers can, the ability to understand and act accordingly is vital.

--

So, there we go. Nothing about silly hats or whatever other nonsense the first article delved into. Just some actual similarities between being a proper boss/manager and being a preschool teacher.

Thursday, January 31, 2013

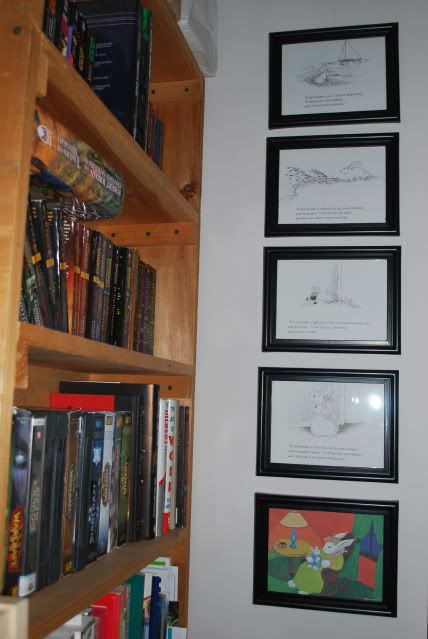
Storybook Frames

The second bedroom in my apartment is more of a library than anything else. And, thanks to this idea, I was able to add some fitting decoration.


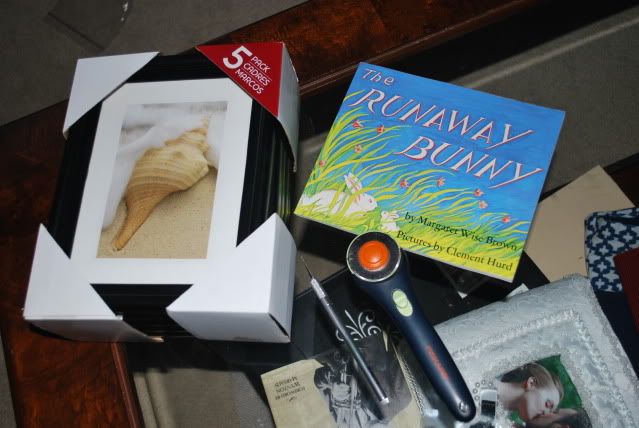
For this, I needed:
a beloved children's book,
my exacto knife/rotary cutter,
and 5 pictures frames that the pages would fit in (thankfully, Runaway Bunny is almost exactly 5 x 7).


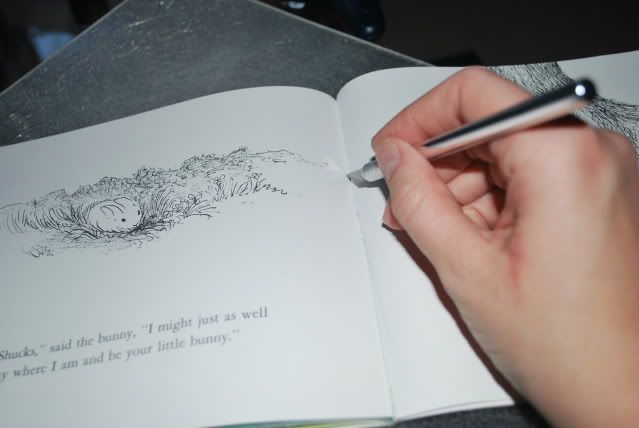
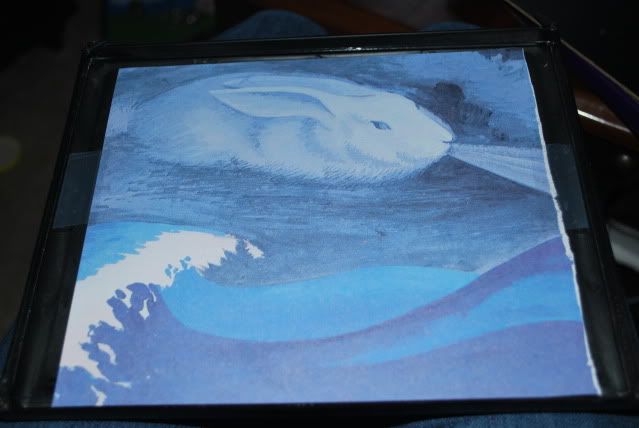
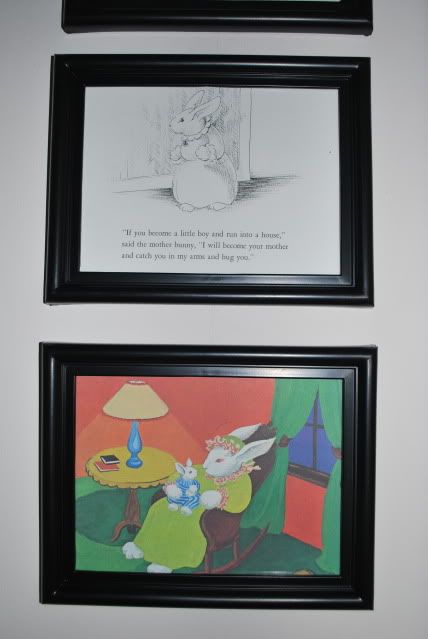
I first found five pages that would mesh well together (and were also not on the same page). I wanted something that would create a cohesive mini-story, which is not too hard to do, since Runaway Bunny is very repetitive. I then cut each page out with my exacto knife. I found breaking the spine and cutting parallel with the fold produces the cleanest cut. It's okay if the page isn't perfectly cut out, as most frame borders tend to hide a small portion of the picture anyway.


Since my frames weren't cooperating, I taped each page into place in the frame.


After that, there was nothing to do but hang them up. Since I'm rubbish at math, this took a bit of time. I first drew a straight line where I wanted the frames to hang. Eventually, I found that the frames work best if I hammered in a nail every 8 or so inches. This number will obviously vary, depending on the size of your story's pages, the frame itself, etc.


Someday, when I have kids, this will adorn their walls. Until then, it can accent my husband's incredible collection of science fiction novels.

Tuesday, May 22, 2012

The "Peg Game" (and all its wonderful benefits)

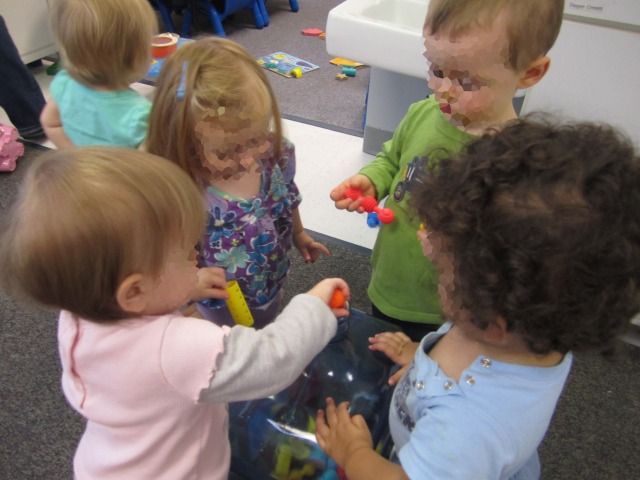
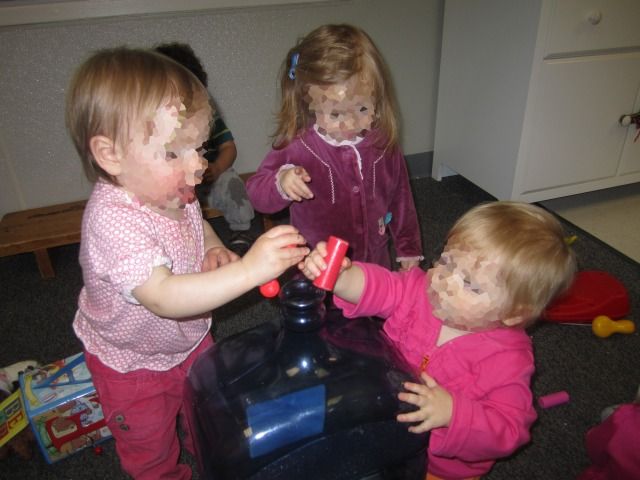
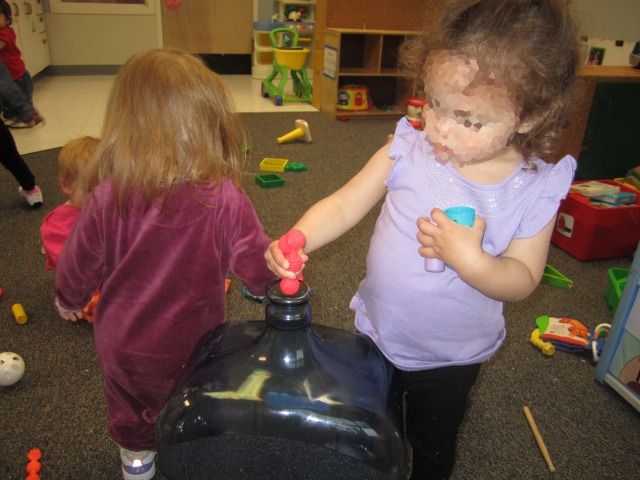
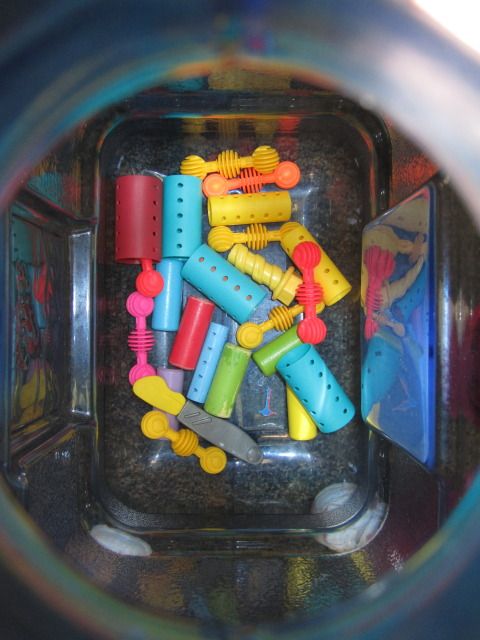
One thing I love about working with one-year-olds is that everything can be a multi-level learning experience.  One of my favorite activities to do with my students involves an empty Poland Spring jug -- and whatever can fit into the opening of said Poland Spring jug.  The rules are simple: find things that fit into the jug and put them into the jug.  Then stand back when teachers turn the jug over to empty its contents. 

I love this game for a multitude of reasons:
1) It's the best redirection when the kids are going insane, if only because they are immediately attracted to the sound of falling pegs.
2) This is a game made out of recycled and miscellaneous items. Nothing needed to be purchased. And we all know how much administration loves it when you find ways to not spend money
3) While every activity involves learning on many levels, this activity is a smugisboard of learning and development.
 
This is the write-up I have up on my wall in my classroom, along with the (non-blurred) pictures:


The Peg Game


In “The Peg Game”, children find various items that would fit into the opening of an upside down Poland Spring jug (wooden pegs, hair rollers, plastic building pegs) and drop them into the jug.  When all of the items are dropped into the jug, the teacher turns the jug over and empties it out.  This game helps further our students’ development in a multitude of areas.  While playing the game, the children’s fine motor skills and hand-eye coordination are developed as they pick up the toys and drop them into the narrow opening.  Children also learn turn-taking and sharing, as only one child can put a peg into the bucket at a time (and the bucket is to be used by every child).  While children are playing, they are also practicing their clean-up skills as the students have to find toys on the floor, pick them up, and “put them away” into the jug.  Children are also exposed shape recognition, as well as size differences, as certain objects will or will not fit into the jug based on their size, shape, or both.  Children are also gaining pre-mathematical and problem solving skills as they learn which objects will fit into the jug, and which ones won’t.  Children also gain problem solving skills when the jug is filled with pegs: the children cannot reach down to grab the pegs out of the jug.  The jug must instead be turned over for the pegs to fall out.

Monday, April 16, 2012

Turning A Classroom into Eric Carle's From Head to Toe

Open house was (thankfully) a huge success. We had the majority of our parents come in to see what their students had done. Prospective parents came in to get a preview of what their children would be doing come June. A few students who remembered me from when I was a substitute teacher stopped by as well. I'll digress real quickly and say that, while being a sub was easily one of the hardest things I did as a teacher, it is hugely rewarding to see students of all ages coming into my room and greeting me with a cheerful, "Hi, Miss Abby!"

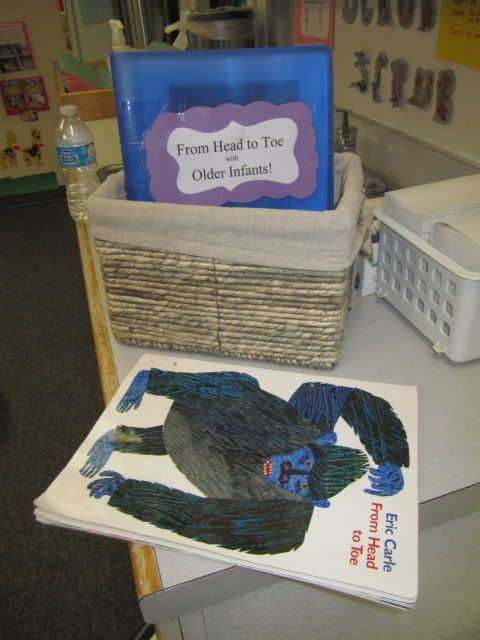
Each classroom had to decorate their classroom based on a theme. We decided on Eric Carle's From Head to Toe, as the book has been a favorite of our students since Day One. Also, as any teacher working with young children can attest, Eric Carle is a haven of learning.

This became a wonderful excuse to read the book every morning during our informal circle time. Our students loved it, since this age group thrives on repetition. After the children got into the routine of reading the book every morning after singing the "Good Morning" and Alphabet song, we videotaped us reading the book to the children. Much to our surprise, no kid pushed, grabbed, or cried during the entire story. We then uploaded it to a laptop and had it playing on loop during Open House.

Unfortunately, this was probably the easiest thing we would be doing with our students. My co-teacher and I were tasked with finding projects that were age-appropriate, engaging, and within the theme. We decided to break it down by animal/action. We didn't get every animal, but we came very close.

"I am a penguin and I turn my head. Can you do it?"

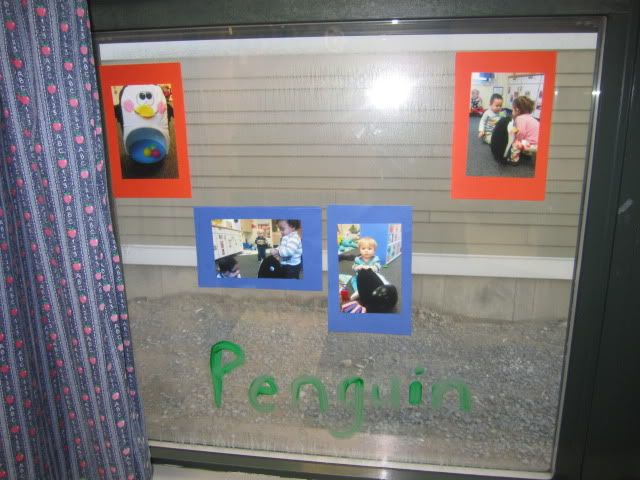
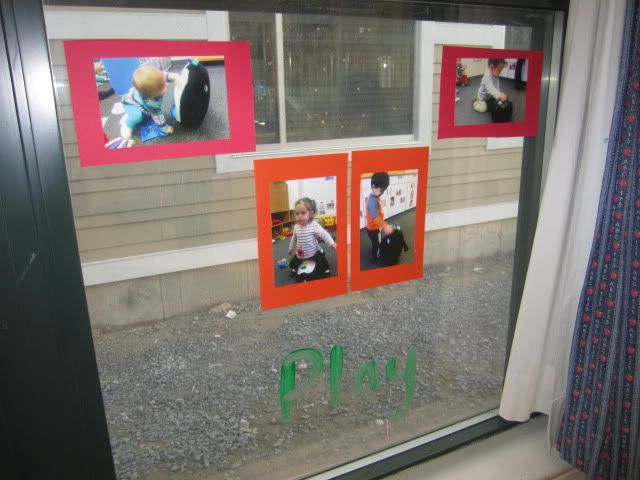
We gave the children a Penguin bop bag to explore/play with. The children got a kick out of pushing the Penguin down, only to have it pop up. A few sat on the penguin in an effort to keep it down. We took pictures of the play and posted them on our window under the title "Penguin Play".

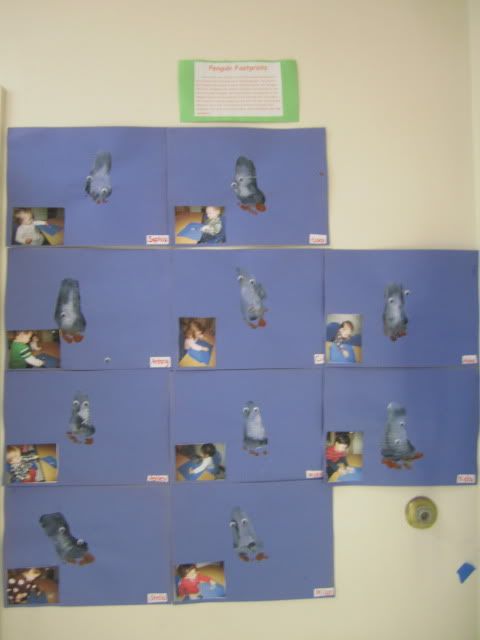
We also decided to create penguins out of footprints. It was definitely a challenge, painting the toes orange, the center white and the outline black, but the children got a kick out of it (especially since we recently did a similar activity, but more on that later). The children were then given sticker googely eyes. The children got to put their eyes on their penguins as if they were stickers. While the painting portion was entirely teacher-lead (which is frowned upon in the RIE Philosophy), the children were given complete freedom in placing eyes on the penguins. Of course, that meant some penguins had eyes located a stone's throw from bodies, but, hey, that's the child's prerogative.

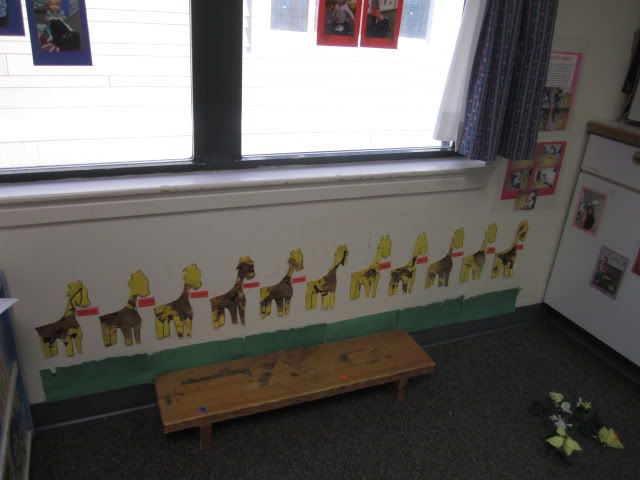
"I am a giraffe and I turn my head. Can you do it?"
The children were given an outline of a giraffe and brown paint. We let the children do whatever they wanted with the paint. If they wanted to make hand prints, they could make hand prints. If they wanted to finger paint, they could finger paint. If they want to use a paintbrush, they could use a paintbrush. The teachers then cut out the giraffe -- which, I will admit, is also pushing the limits of child-oriented activities, but cut-out giraffes look a lot cuter lined up against the "grass" than yellow rectangles.

"I am an alligator and I wiggle my hips. Can you do it?"
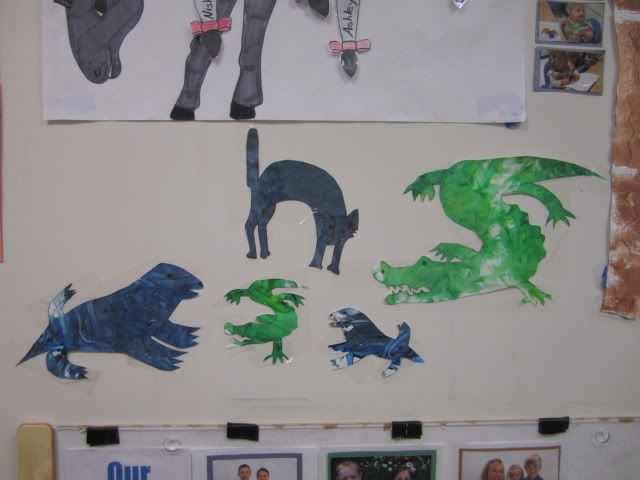
For the alligators, cats, and seals, we gave the children two different colors to finger paint with, since the characters in Eric Carle's books are colored with the same two-toned finger paint texture. For the children's alligator, we gave the children yellow and green paint, like the alligator in the book. For the children's cats and seals, we gave them black and blue paint, like in the book. Once the children were done mixing the colors around with their fingers, I drew the animals on top of the paint and cut them out.

The kicker is that this is almost exactly how Eric Carle makes his creations. Only his are a lot more intricate (and make him a lot more money).

"I am a seal and I clap my hands. Can you do it?"
On top of the finger painted seals, the children dipped them hands in pants and "clapped their hands" against the paper. This project was perfect for the children, as they love smacking the paper with their painted hands after we do a handprint activity.

"I am a donkey and I kick my legs. Can you do it?
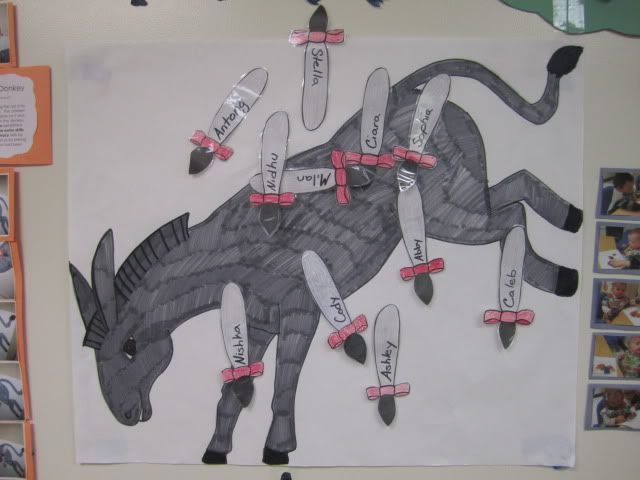
The children got to play Pin the Tail on the Donkey. The rules were simple enough at even our one-year-olds were able to play. The children also gained some pre-literacy skills, since their names were on their tails.

The coolest part was that the children were still interested in the project long after we finished it, which meant we were able to point out everyone's names/tails on multiple occasions. That might seem like a fruitless effort on a 1-year-old, but it really does lay the groundwork for higher learning. Everything is a connection, and that is why I love early childhood education.

"I am an elephant and I stomp my legs. Can you do it?"
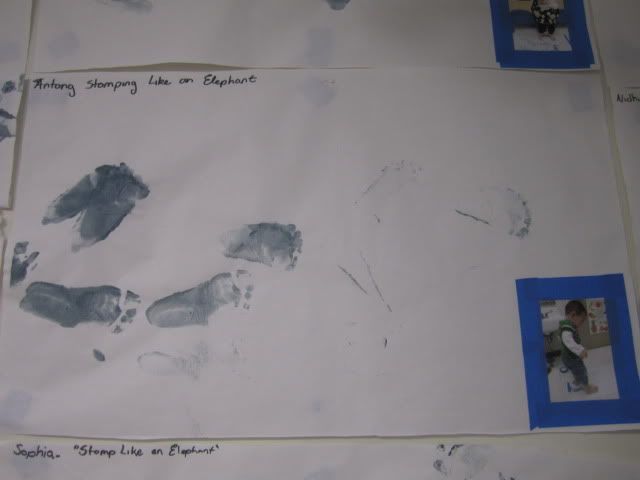
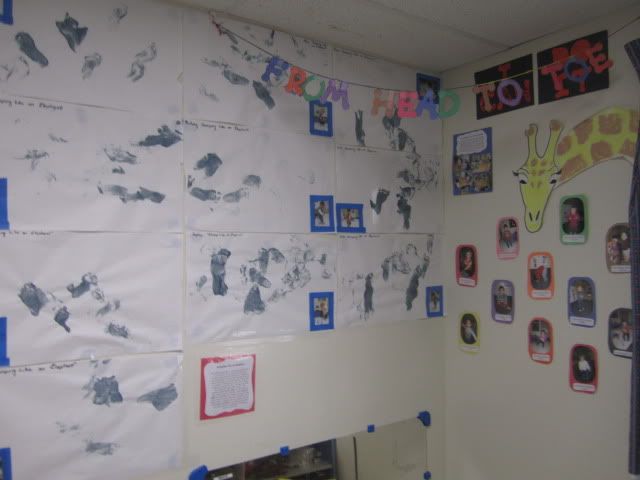
Before the penguin footprints, the children dipped their feet in pant and stomped their feet across a large sheet of paper. The children were fascinated with their footprints. Every child spent the majority of the project looking at what they were creating. This really showed in the documentation pictures (which is vital, especially for this age group, since these projects are all about the process, and pictures/written blurbs capture the process). We attached a picture of each child doing the project onto a corner of their footprints.

"I am a monkey and I wave my arms. Can you do it?"
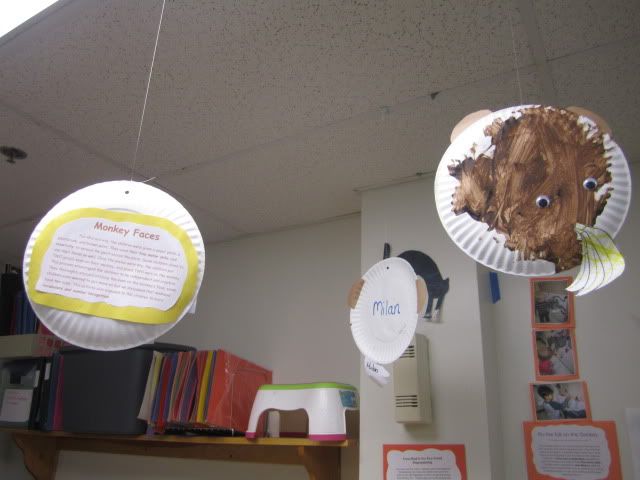
The children painted paper plates, attached sticker googely eyes to the plates, and attached (pre-glued) ears to the edge of the plates. They then colored in pictures of bananas for the monkeys to eat.

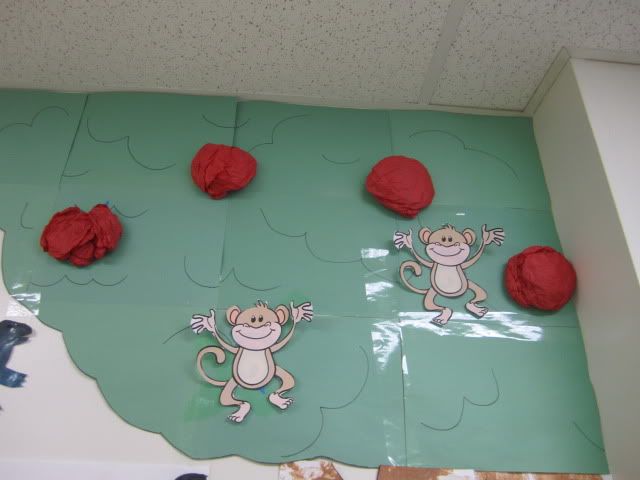
We also added monkeys to our "tree".

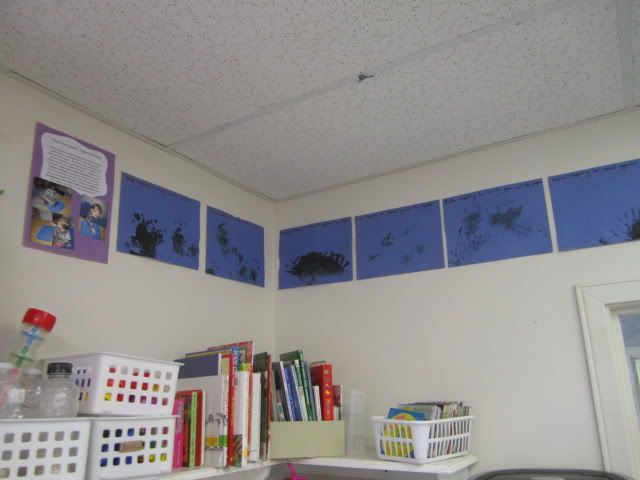
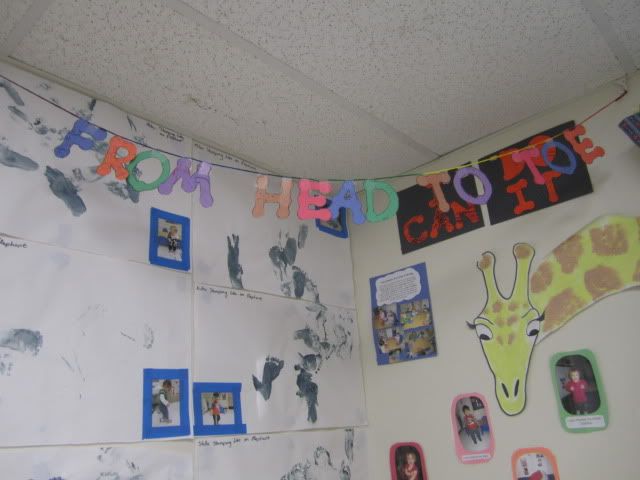
The children also explored crayons on pieces of papers with letter outlines. The children gained even more pre-literacy skills, as we announced which letter each child got. We then cut them out, taped them to string, and hung it up in a corner.


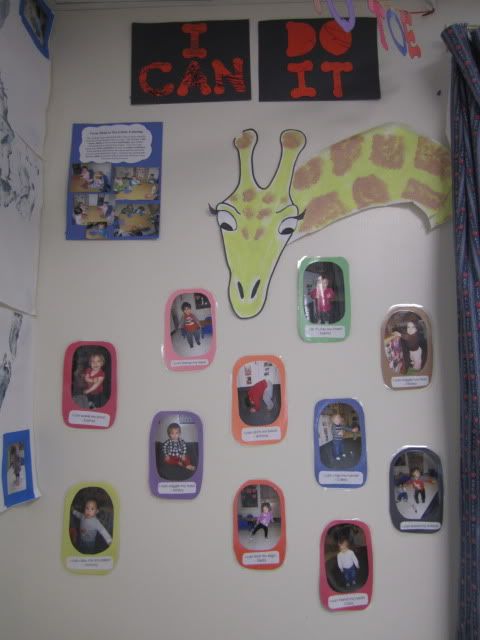
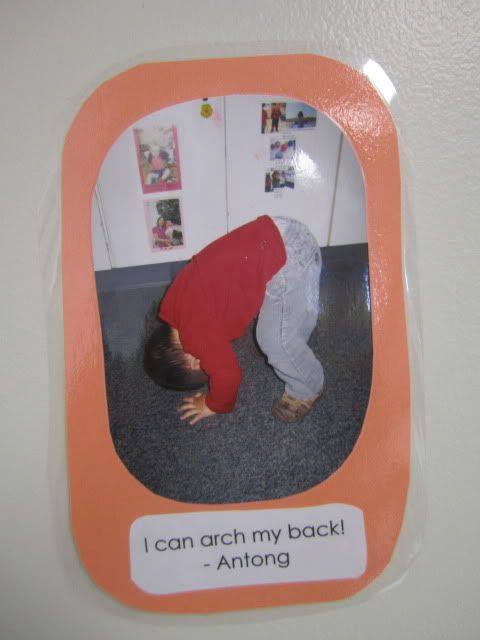
Since the children knew the book by heart, we took pictures of them doing the various actions and put them up under a giraffe bending his neck.


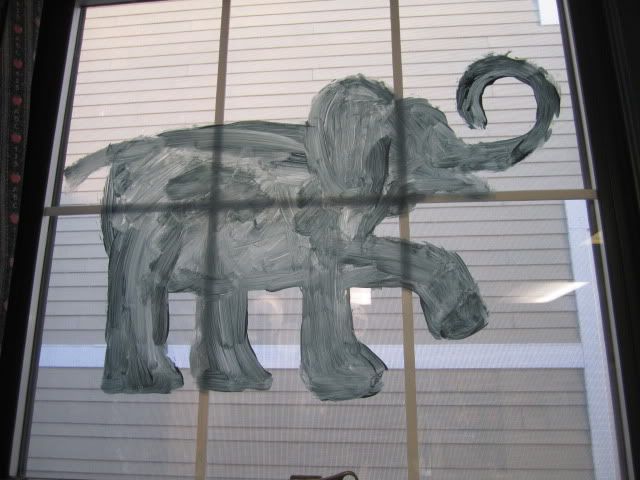
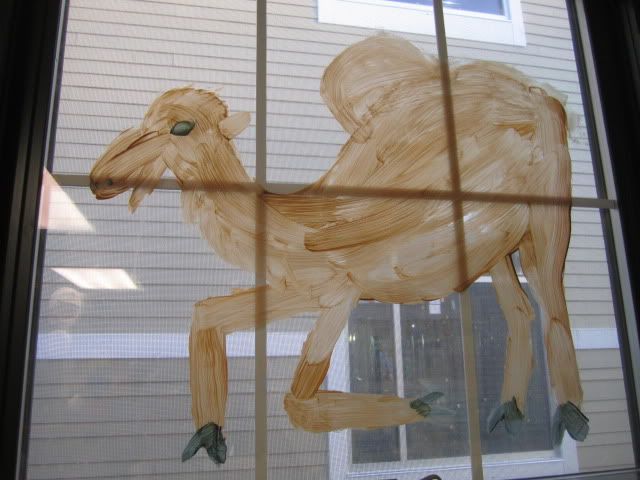
To accompany the giraffe, I painted the elephant stomping his foot and the camel bending his neck on our window. Much like the giraffe and the donkey, the children loved pointing out the animals and then doing the action that each animal was doing. It was wonderful seeing the children remember that the gorilla thumps his chest, the donkey kicks, the camel bends his knee…

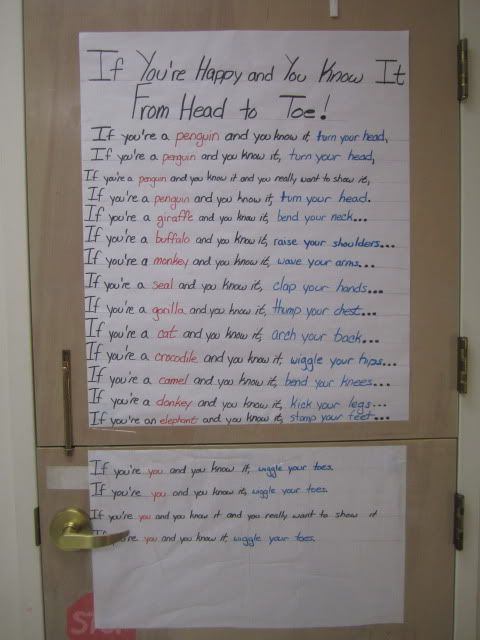
We also changed the lyrics of "If You're Happy and You Know It" to accompany the book. Instead of, "If you're happy and you know it, clap your hands," we sang, "If you're a seal and you know it, clap your hands," "If you're a cat and you know it, arch your back." We wrote the lyrics on large sheets of paper and posted them on the wall.

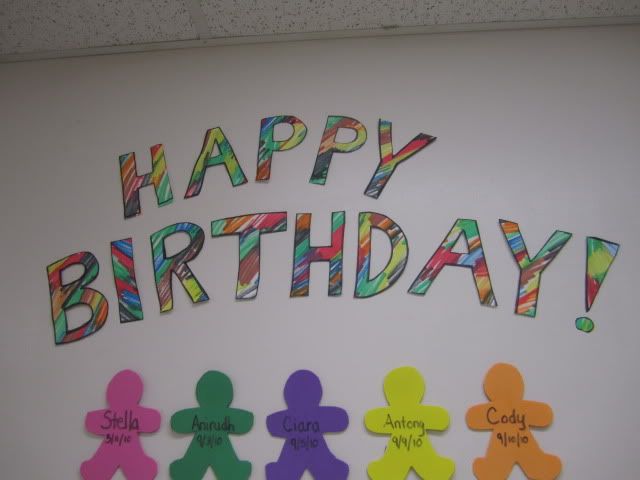
The beginning pages of From Head to Toe are filled with random brushstrokes of a rainbow of colors. I incorporated that in our Birthday Wall by coloring roughly 10 sheets of paper in the same fashion and cutting out letters that spell out, "Happy Birthday!"


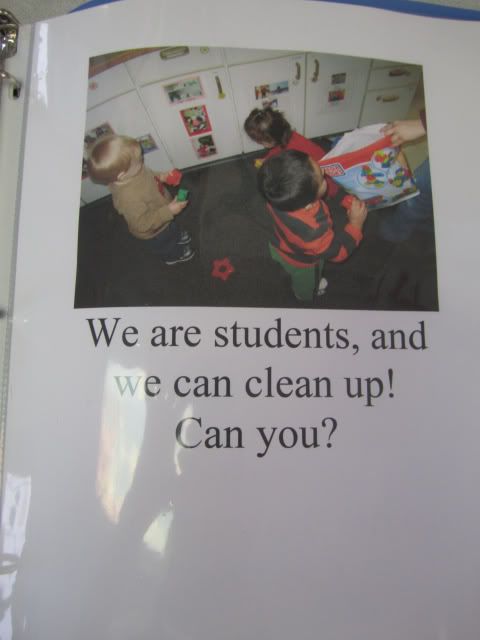
I was feeling a little guilty about such teacher-lead/teacher-manipulated projects like the footprint penguins or cutting out the giraffes. The children didn't have to do a single thing but be themselves for this. I followed the children around with my camera and took pictures of them doing what they do best: playing dress-up, touching their toes, eating their food, etc. We then created our version of From Head to Toe. Instead of, "I am a seal and I clap my hands!": "I am a Johnny and I play with blocks! Can you do it?"

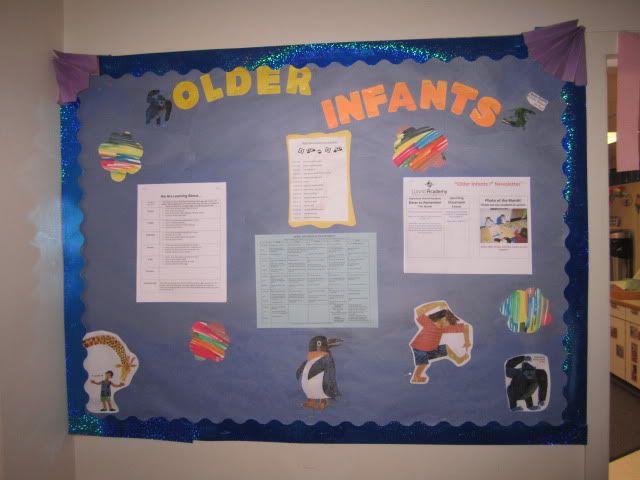
We decorated our bulletin board with various characters from the book. After cutting up the letters for the birthday board, I ended up with a few extra sheets of paper. I decided to cut out a few flowers to fill in the empty space.


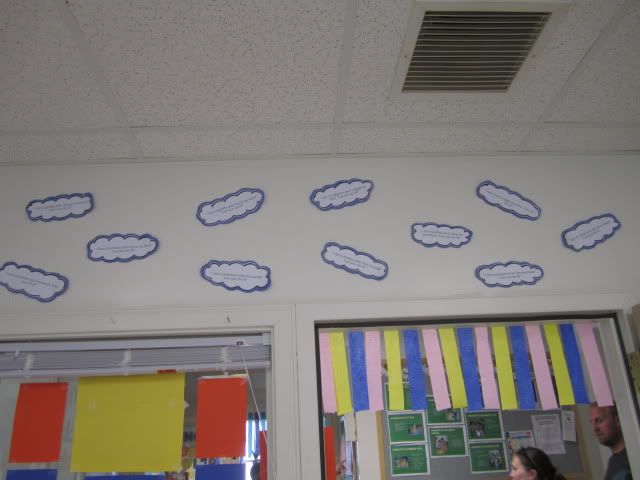
We also put up little clouds with the various sentences from the book on the wall above our classroom.


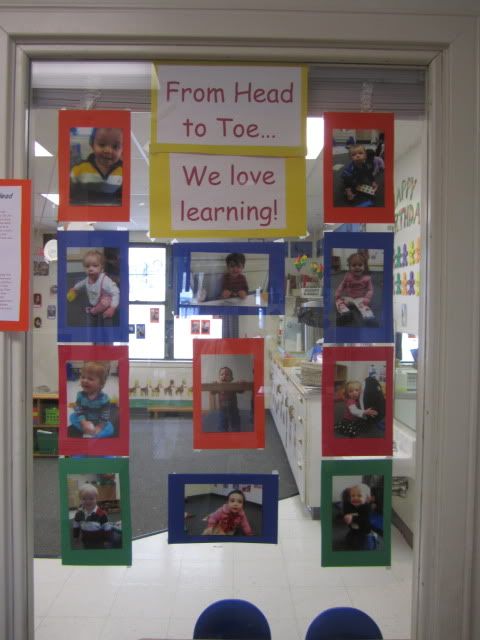
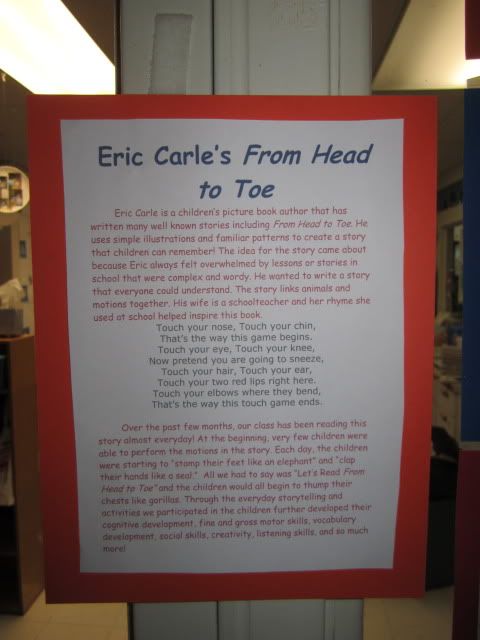
Our room has a "preview" window of sorts. We took pictures of every child and taped it to the window under the title "We Love School From Head to Toe!". On the border of the window, we placed a little blurb about Eric Carle and his book.

I talk a lot about pre-literacy skills, but I should point out that every project for this theme was a exercise in gaining pre-literacy skills. Anything that takes what they read and incorporates it into real-life scenarios gains pre-literacy skills. This is the age where they learn that pictures are a representation of real-life objects, which is the precursor to reading.

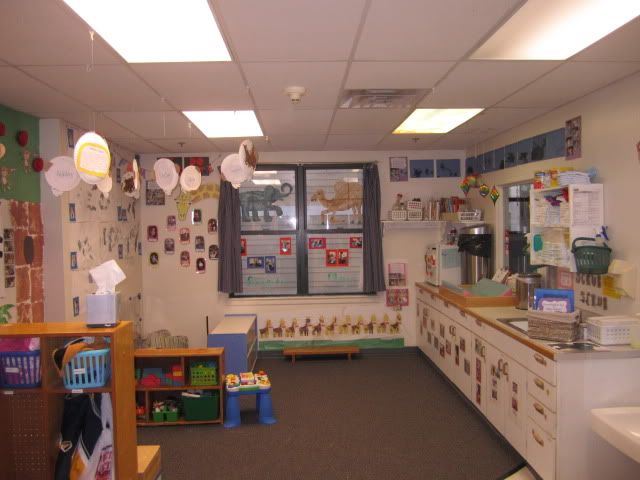
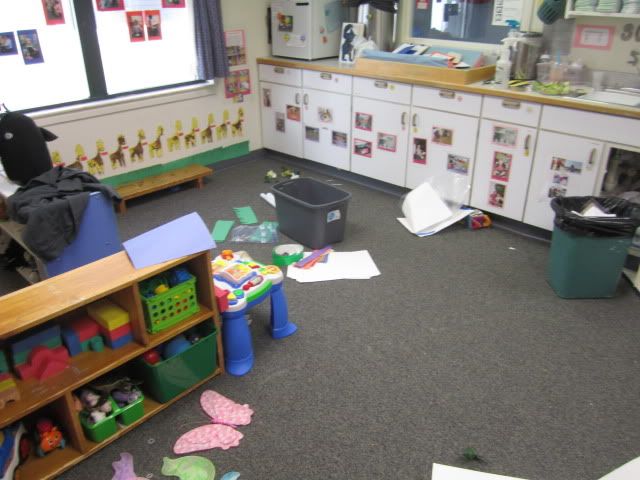
Setting for Open House was a project. My co-teacher and I probably spent at least 3 hours putting everything up, as we weren't allowed to have anything up before Open House. Our room was a mess of paper shreds and tape rolls.

But it was worth it. The parents loved seeing what their children were doing, the other teachers loved seeing what everyone else did, and it was wonderful seeing the excitement on prospective parents' faces as they toured the room.

But I must admit: I'm glad there is only one Open House a year. Sunday afternoon was two months in the making and we're exhausted.
Related Posts Plugin for WordPress, Blogger...

09 10 11 12
Blogging tips