A funny thing happened about two months ago: I hit a complete dead-end in my agency hunt.
It's not that I ran out of steam, or ran out patience.
I ran out of agents.
On the advice of a fellow writer, I kept my search limited to members of AAR (Association of Author Representatives). I looked at this list -- pages and pages and pages of names and contact information -- and thought I was set. I could be searching for an agent well into my second novel, possibly even second child. I searched and researched and sent queries to every agent who seemed to represent my type of book -- and a few who probably didn't (fun side story: I've, on more than one occasion, accidentally sent out queries to cookbook agencies, children's lit agencies, and/or academic textbook agencies).
I continued this way for over 6 months. I was downright feverish in constantly editing my query, my synopsis, my sample chapter. Some days I'd submit to as many as 10 agencies. In a better economy, this would probably have been labeled as reckless, if not downright stupid. But given the current state of publishing, my spray-and-pray method was really all I had.
And then … I hit the end. I submitted to as many agents as I possibly could. Something to the tune of 100+ agencies. I had even submitted to additional agents within one agency after the first agent passed. I had a few nibbles: a partial manuscript here, a full manuscript there, but nothing ever fleshed out.
And I was left thinking: okay, wtf do I do now?
Part of me geared up for part 2 of my publishing endeavor. Another part of me wanted to take a nap on the nice new couch my husband and I purchased.
Take a gander as to which part won.
Even though I'm on a bit of a publishing hiatus, every week or so, I get a rejection email back from an agent I queried upwards of 4 months ago. Once upon a time, rejection emails were a punch to a gut. I'd see the "Re: Query" in my inbox and get all excited, like a little child hearing puppy barks from downstairs on Christmas morning. I'd click on the email only to find out that the puppy barks were actually just the washing machine acting up and my main Christmas present was a reminder to get a job.
But now? They're just what I need to keep chugging away. A brief reminder that, even though the ball's not in my court (if only because I chucked it to the other side and scream, "I hate your stupid game! I'm telling Mom!"), the journey is not even close to being complete. I'm still in the queue for many agencies. My name is still out there, even if it is being systematically ignored. And even if it continues to be ignored, so what? I have back-up plans to my back-up plans. And this is all for Manuscript #1 -- who knows what will happen when I finally finish it's bastard little brother, Manuscript #2. I've got enough plans to keep me happy and delusional well into my 30s. And by then, I'll be so weighed down with kids and a mortgage that I won't even notice that my writing is gathering dust.
And even though I'm taking a break and focusing more on crafts and reading and somehow surviving as a teacher in New Hampshire, this story is not nearly over. And hopefully, when I resume my hunt again, I'll come up with snazzier names for my books outside of Manuscript 1 and 2 (although that does have a nice ring to it).

Wednesday, February 29, 2012
Saturday, February 25, 2012
Diverse Families "Curriculum"
If NAEYC (The National Association for the Education of Young Child) ever backs me into a corner and demands an example of social diversity in my curriculum, I always have this story. The best part is that this was never planned, and instead happened organically -- which, as every teacher can attest, the best lessons always come about that way.
My former classroom's dramatic play area had a bin full of wooden dolls for the dollhouse. They came in every ethnicity you could think of, although they all tended to wear the same monochromatic shirts and pants. One of my students was meticulously sorting out the dolls, placing the white dolls with the other white dolls, the Chinese dolls with the other Chinese dolls, etc.
I asked what she was doing, and she replied with, "Making the families!"
I asked her how she knew which dolls belonged in which families. To that she replied, "I look at the color of their faces."
Out of no where, I suggested to her, "Well, what about their shirts instead of their faces? We could make a family of all red shirts."
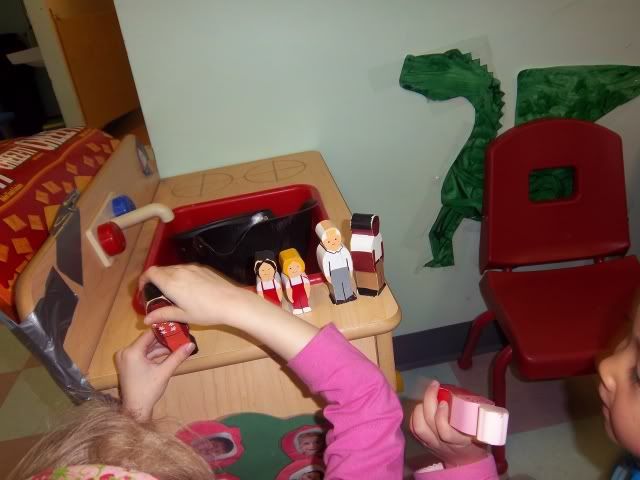
To give you an example of our diverse family, I present to you the "Blue Family":
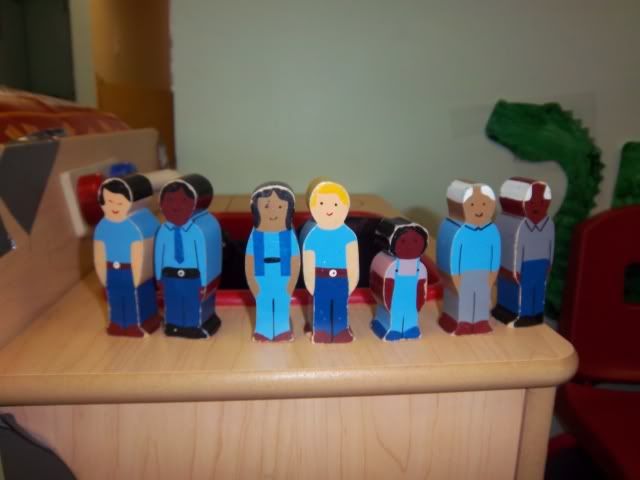
The best part was that, not only did the family members have different skin tones, but none of the families were of the normative "Grandpa, Grandma, Mom, Dad, Sister Brother" grouping. Some families had all men as the adults. Some families were primarily made up of the "Grandparent" dolls. My students might not have walked away thinking, "Families come in all shapes and sizes and I should adjust my thinking accordingly!" But this little activity helped lay the groundwork for a different way of viewing families. And this isn't even factoring in the mathematical skills gained by sorting dolls according to shirt color.
All this, from simple "playing".
And this is why I love early education.
My former classroom's dramatic play area had a bin full of wooden dolls for the dollhouse. They came in every ethnicity you could think of, although they all tended to wear the same monochromatic shirts and pants. One of my students was meticulously sorting out the dolls, placing the white dolls with the other white dolls, the Chinese dolls with the other Chinese dolls, etc.
I asked what she was doing, and she replied with, "Making the families!"
I asked her how she knew which dolls belonged in which families. To that she replied, "I look at the color of their faces."
Out of no where, I suggested to her, "Well, what about their shirts instead of their faces? We could make a family of all red shirts."
To give you an example of our diverse family, I present to you the "Blue Family":
The best part was that, not only did the family members have different skin tones, but none of the families were of the normative "Grandpa, Grandma, Mom, Dad, Sister Brother" grouping. Some families had all men as the adults. Some families were primarily made up of the "Grandparent" dolls. My students might not have walked away thinking, "Families come in all shapes and sizes and I should adjust my thinking accordingly!" But this little activity helped lay the groundwork for a different way of viewing families. And this isn't even factoring in the mathematical skills gained by sorting dolls according to shirt color.
All this, from simple "playing".
And this is why I love early education.
Monday, February 20, 2012
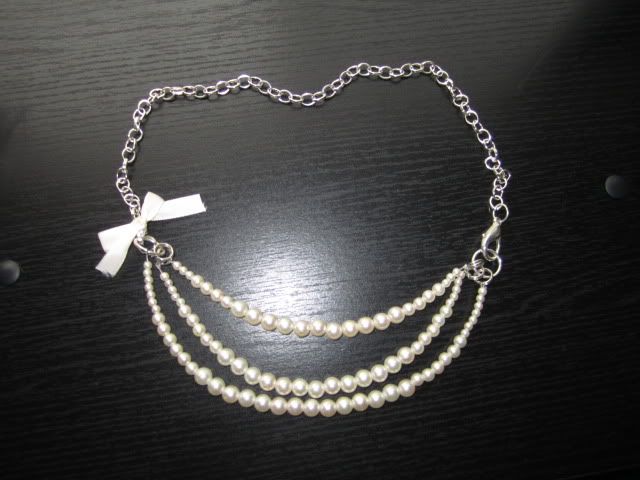
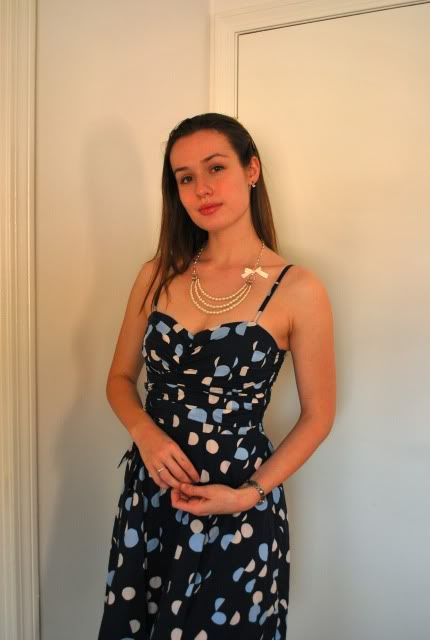
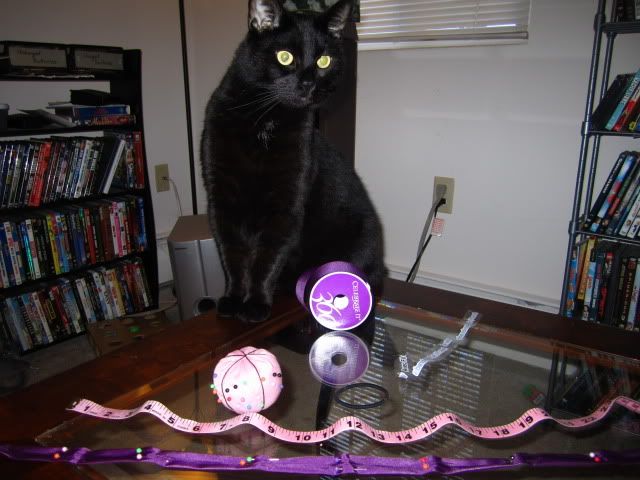
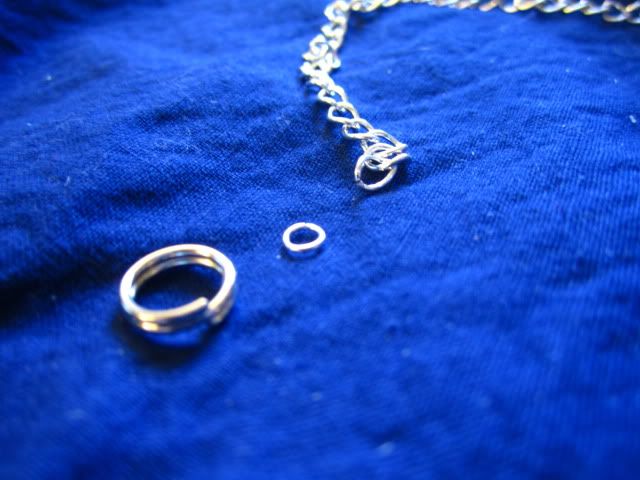
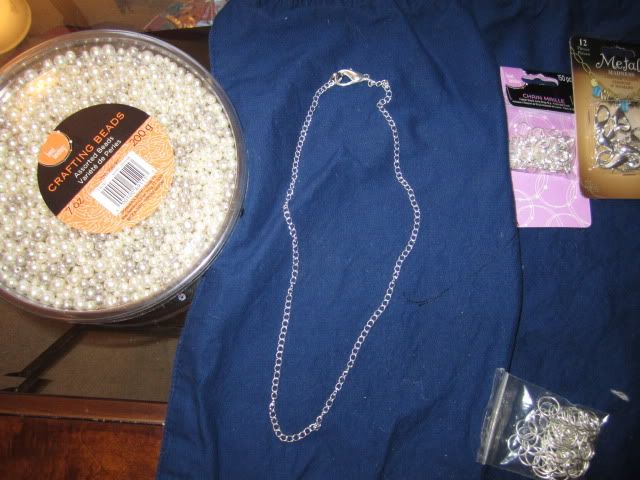
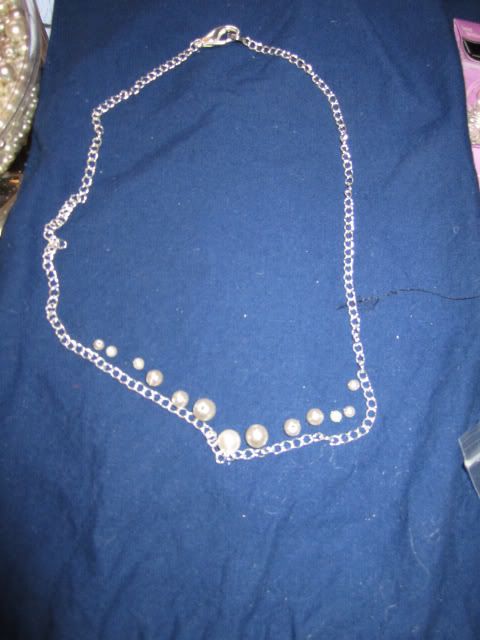
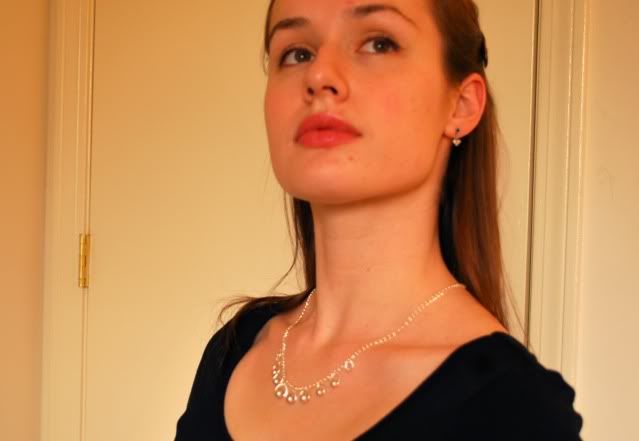
Three-Strand Pearl Necklace
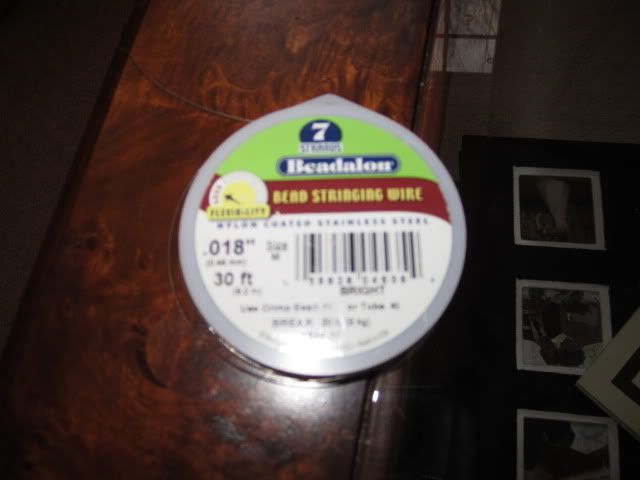
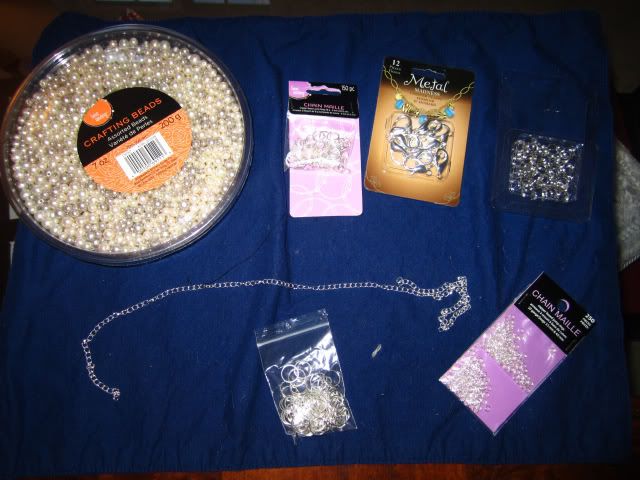
One of my favorite jewelry making projects has been the multi-strand necklace. And my favorite kind of multi-strand necklace projects to read about have been the ones that are joined together by one chain. These kind of multi-strand necklaces tend to be a hodgepodge of chains, beads, and rhinestones. Since I'm not bold enough to pull that look off, I decided to pull out my big bin-o-beads and make a fake-pearl multi-strand necklace instead.
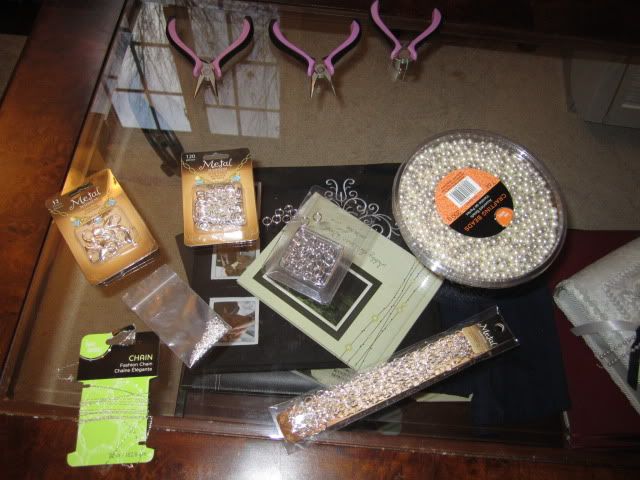
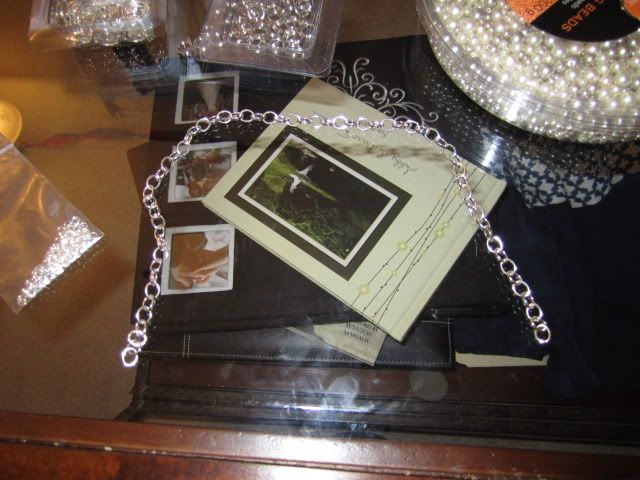
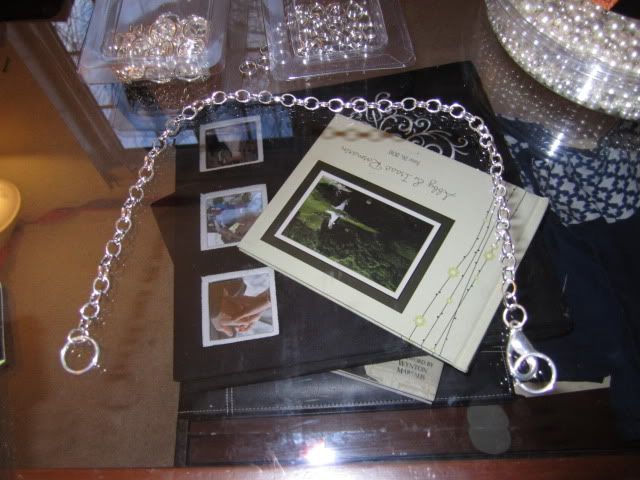
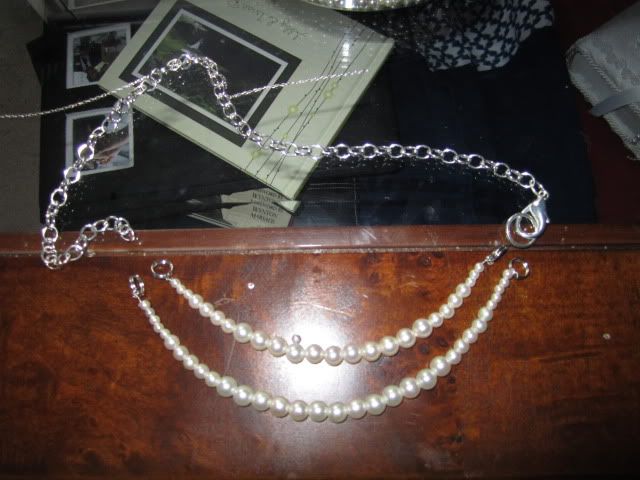
And then, I beaded. For my necklace, I started the shortest necklace with: 3 tiny beads, 4 medium-sized beads, a lot of regular-sized beads -- and then 4 medium and 3 tiny beads to finish it off. It was all trial and error to figure out exactly how many beads to use. The only thing to keep in mind was that I needed at least an inch of wire at the end to twist it to a split ring.
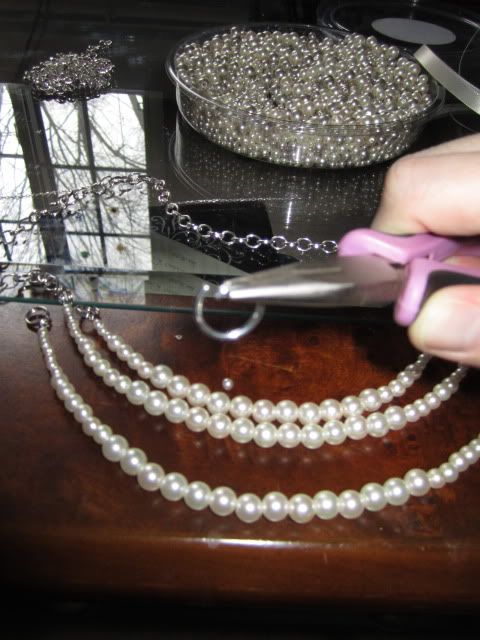
And then, I beaded. For my necklace, I started the shortest necklace with: 3 tiny beads, 4 medium-sized beads, a lot of regular-sized beads -- and then 4 medium and 3 tiny beads to finish it off. It was all trial and error to figure out exactly how many beads to use. The only thing to keep in mind was that I needed at least an inch of wire at the end to twist it to a split ring.
Saturday, February 11, 2012
Ribbon and Scrunchy Headband
Of the many things I have been blessed with as a result of my relationship with my husband, his family truly tops the list. From an incredible sister-in-law to a hilarious brother-in-law, warm-hearted and intelligent parents, aunts and uncles who went the distance and then some for our wedding, to grandparents whose humor and wit make any day better. Even though I come from a large family myself, I welcomed his family with open arms, adopting them as my own long before my husband even proposed.
Last week, we lost one of the most inspirational ladies I know. If I end up having even half the strength, the wit, and the drive that Grandma R had, I'd consider myself blessed. The woman had battled numerous illnesses, cancers, the loss of her husband after his battle with cancer, and soldiered on, always with a joke on hand. I remember visiting her during a chemo treatment, and even in the middle of one of the most arduous medical treatments a person can go through, she had no problem dishing out jokes with ease.
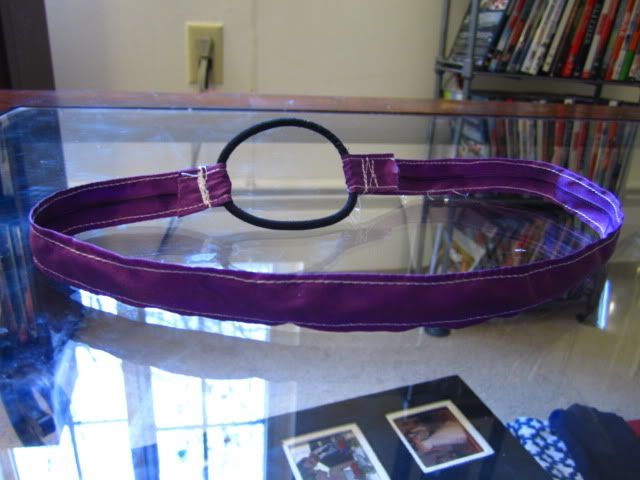
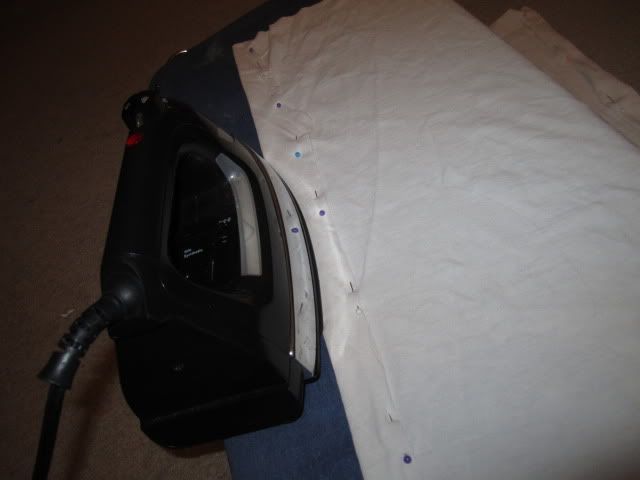
When funeral arrangements were made, I found out that she wanted no one to wear black. She wanted festive colors -- specifically, the color purple -- not the morose and solemn black. I don't even own shirts that are purple, let alone something dressier. So, with only a day to think of something before I flew to her funeral, I decided to create a purple headband.
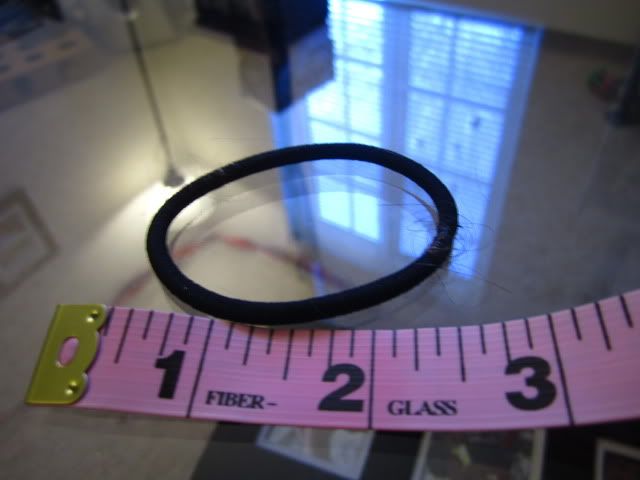
My biggest problem would be the elastic. I have tried sewing in elastic before, only to have a hot mess on my hands instead. Also, I have a huge Irish noggin, so buying a purple headband and embellishing it was out of the question.
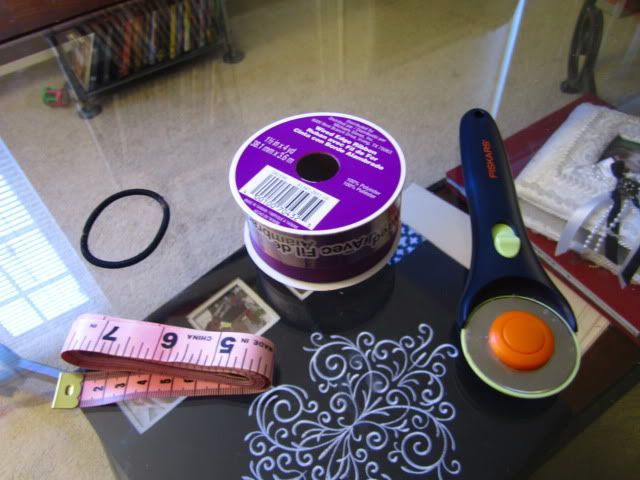
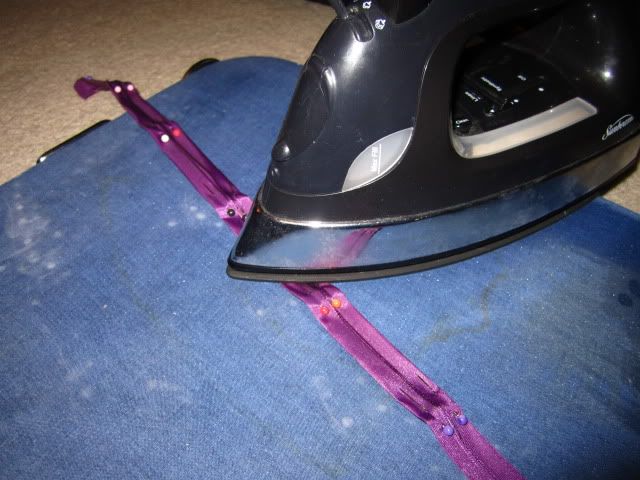
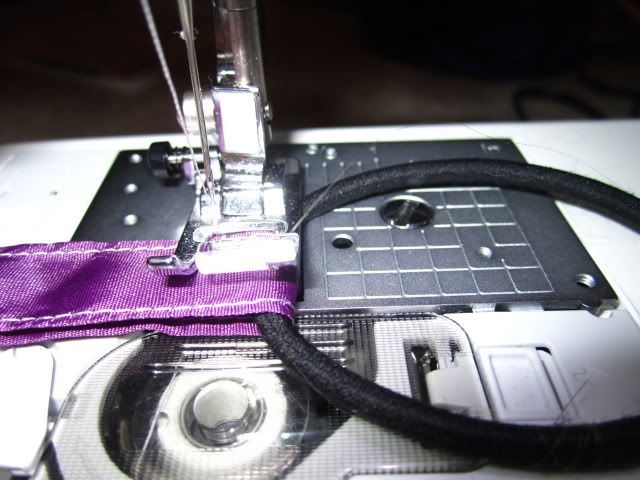
Eh, live and learn (and remember the dimensions of the needle's foot).
Afterward, I folded the ribbon over the other side of the elastic roughly at the 19 1/2" mark, pinned it, and (carefully) tried it on. It took a few adjustments, and it turned out I needed even less ribbon than I measured (which gained me back a little bit of self-esteem). After making sure the ribbon was straight and the ribbon was folded in the same direction as the first side, I sewed the second strap into place.
Dedicated whole-heartedly to Grandma R.
Last week, we lost one of the most inspirational ladies I know. If I end up having even half the strength, the wit, and the drive that Grandma R had, I'd consider myself blessed. The woman had battled numerous illnesses, cancers, the loss of her husband after his battle with cancer, and soldiered on, always with a joke on hand. I remember visiting her during a chemo treatment, and even in the middle of one of the most arduous medical treatments a person can go through, she had no problem dishing out jokes with ease.
When funeral arrangements were made, I found out that she wanted no one to wear black. She wanted festive colors -- specifically, the color purple -- not the morose and solemn black. I don't even own shirts that are purple, let alone something dressier. So, with only a day to think of something before I flew to her funeral, I decided to create a purple headband.
My biggest problem would be the elastic. I have tried sewing in elastic before, only to have a hot mess on my hands instead. Also, I have a huge Irish noggin, so buying a purple headband and embellishing it was out of the question.
Eh, live and learn (and remember the dimensions of the needle's foot).
Afterward, I folded the ribbon over the other side of the elastic roughly at the 19 1/2" mark, pinned it, and (carefully) tried it on. It took a few adjustments, and it turned out I needed even less ribbon than I measured (which gained me back a little bit of self-esteem). After making sure the ribbon was straight and the ribbon was folded in the same direction as the first side, I sewed the second strap into place.
Dedicated whole-heartedly to Grandma R.
Thursday, February 9, 2012
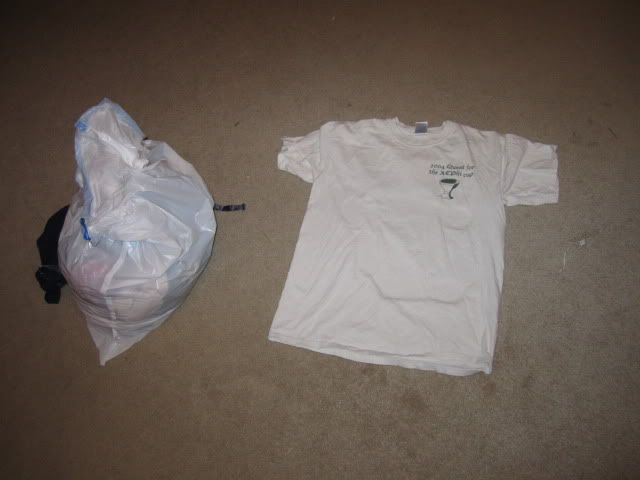
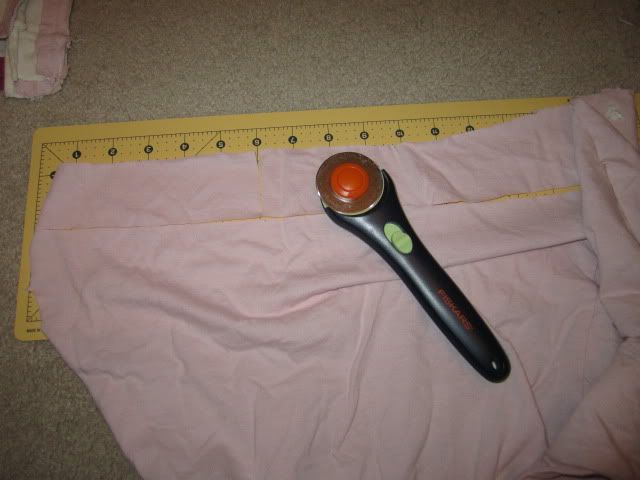
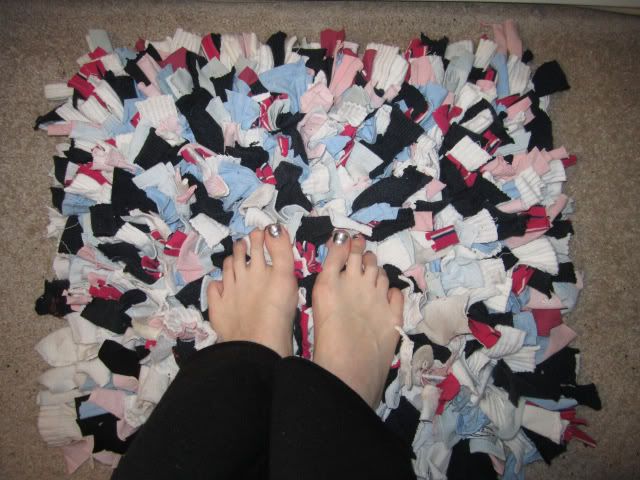
T-Shirt Shag Carpet
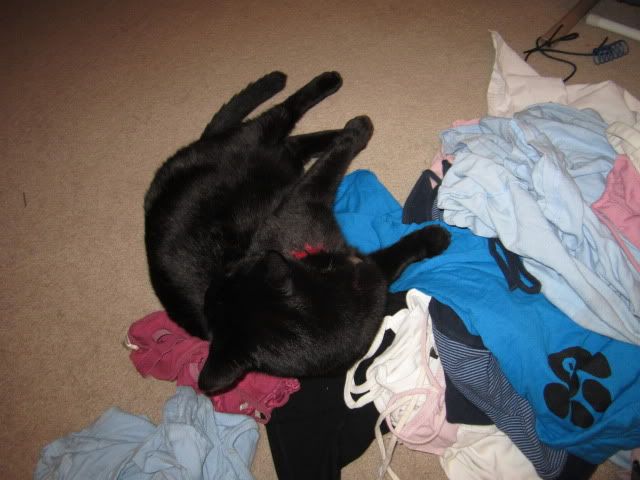
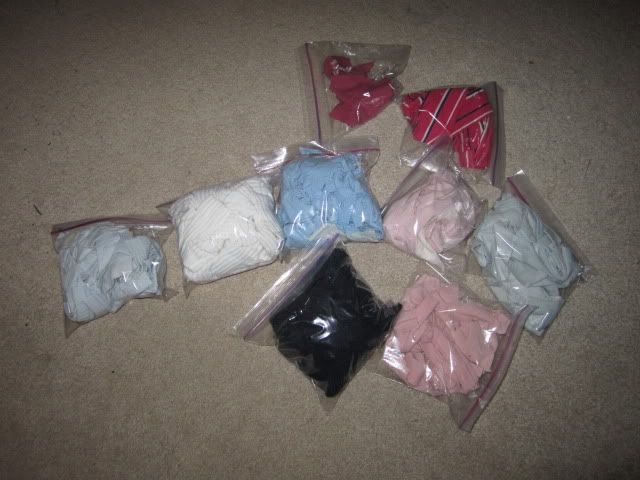
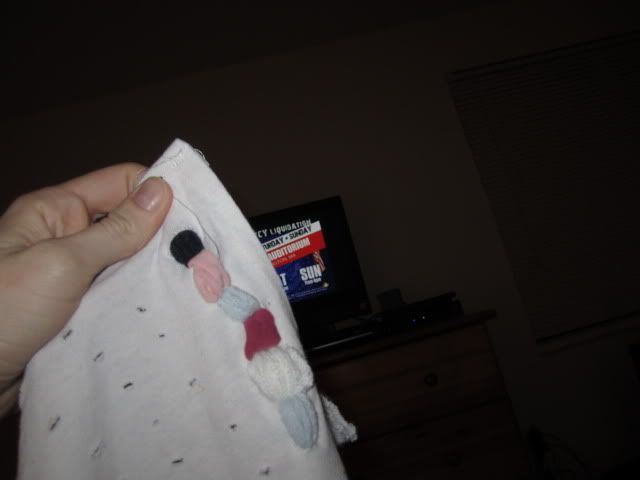
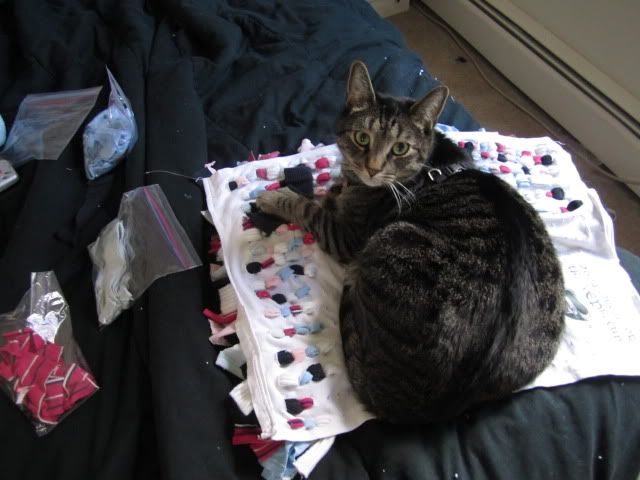
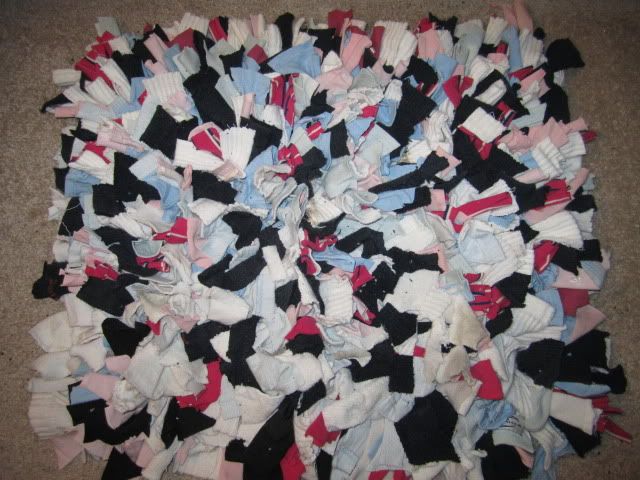
Even though I made a kitty superhero cape with an old pair of pajama bottoms, I still had a whole trash bag's worth of old clothing. Again, thanks to Pinterest, I stumbled across this amazing idea and found a great use for at least half of the trash bag's clothing.
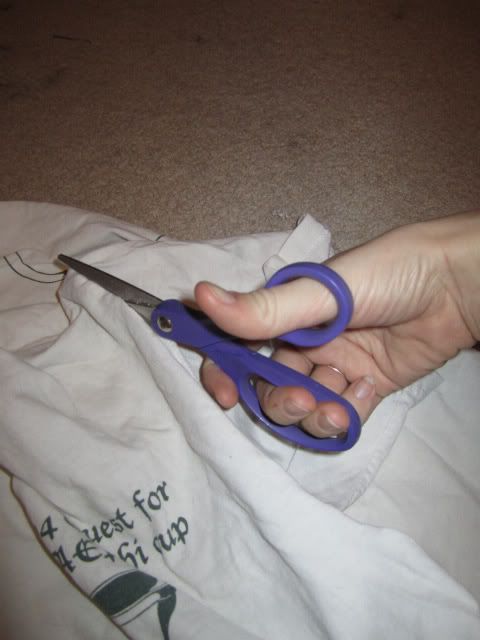
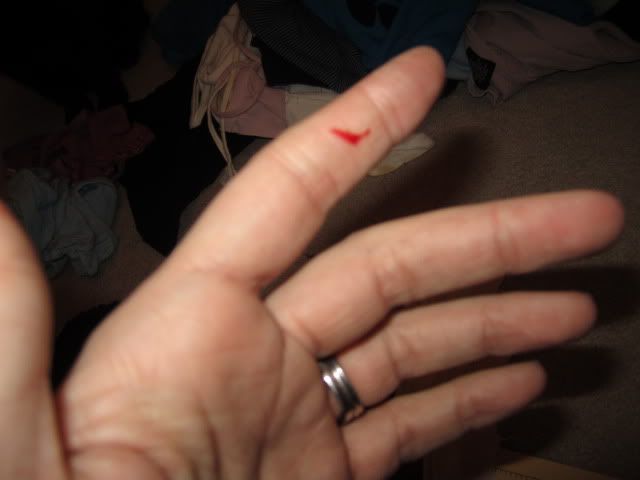
Also, if you find yourself knicking your fingers, don't take a picture of it. Just go and wash your bloody hand.
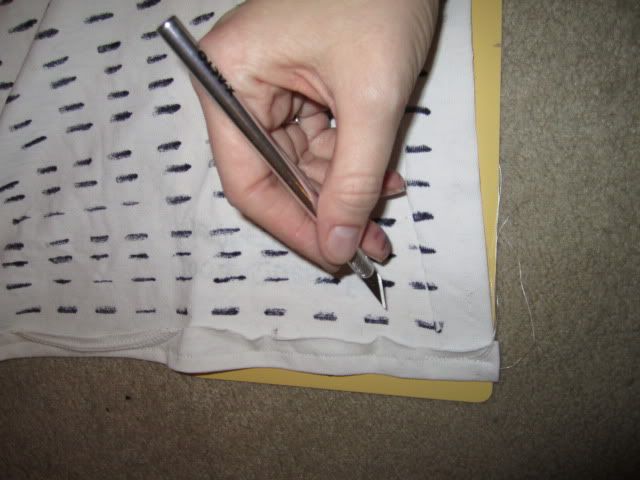
Do not worry about making the holes the full centimeter wide. In fact, I suggest against it. The holes will naturally get wider as you shag.
I'm just getting dirtier and dirtier with this blog post.
Remember that all strips -- with the exception of the edge pieces -- with share their holes* with two other strips. That means, for the second strip, thread it halfway through the second hole and the other end through the third hole.
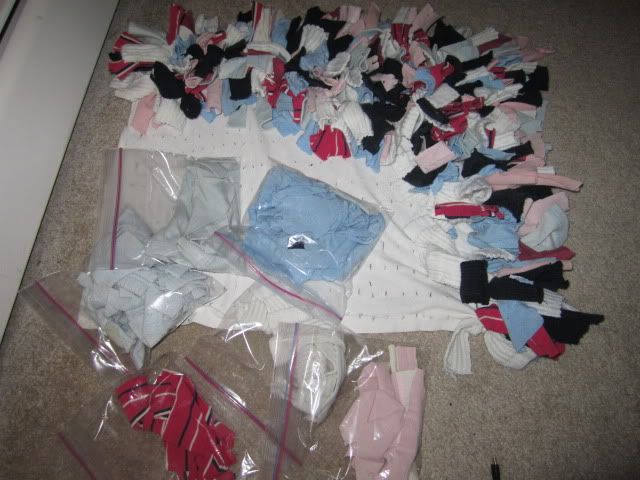
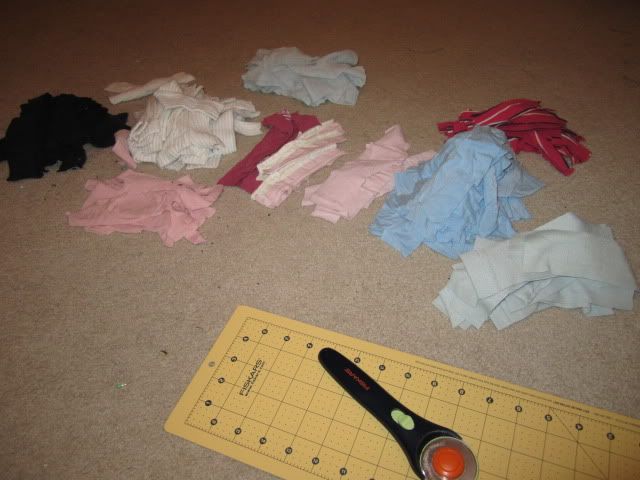
Don't be afraid to cut up strips as you go along. And remember that the possibilities are endless: if you want to do a pattern, do a pattern. If you want to a certain color scheme, do a color scheme. I lucked out in that most of my old clothing is pastel-colored, so I got the nice contrast of the white socks and pastel shirts with the black socks and the one rogue dark-colored shirt.
*Heh, share their holes.
Also, if you find yourself knicking your fingers, don't take a picture of it. Just go and wash your bloody hand.
Do not worry about making the holes the full centimeter wide. In fact, I suggest against it. The holes will naturally get wider as you shag.
I'm just getting dirtier and dirtier with this blog post.
Remember that all strips -- with the exception of the edge pieces -- with share their holes* with two other strips. That means, for the second strip, thread it halfway through the second hole and the other end through the third hole.
Don't be afraid to cut up strips as you go along. And remember that the possibilities are endless: if you want to do a pattern, do a pattern. If you want to a certain color scheme, do a color scheme. I lucked out in that most of my old clothing is pastel-colored, so I got the nice contrast of the white socks and pastel shirts with the black socks and the one rogue dark-colored shirt.
*Heh, share their holes.
Saturday, February 4, 2012
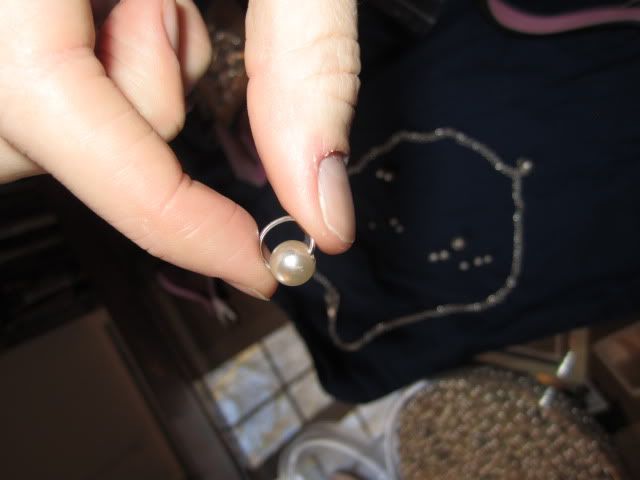
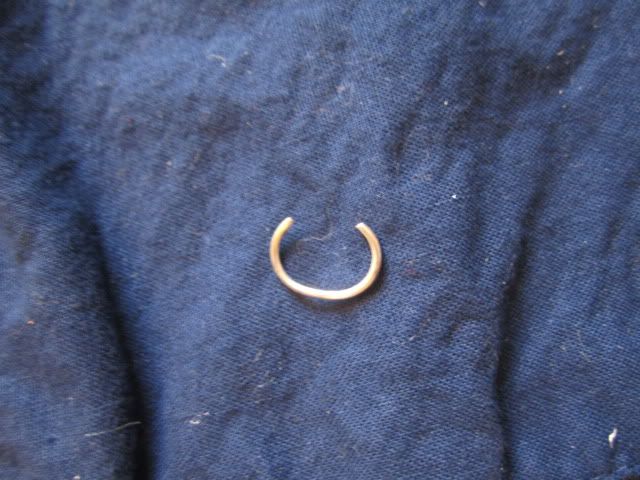
Pearl Bead Necklace
As a girl who suffers from what I call Audrey Hepburn Syndrome, I have an obsession with pearl necklaces. And, after saving that excess bit of chain from the second belly chain, I knew exactly what my next project would be.
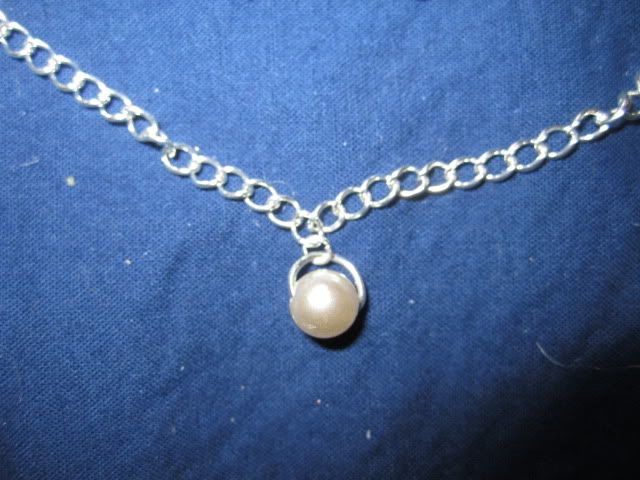
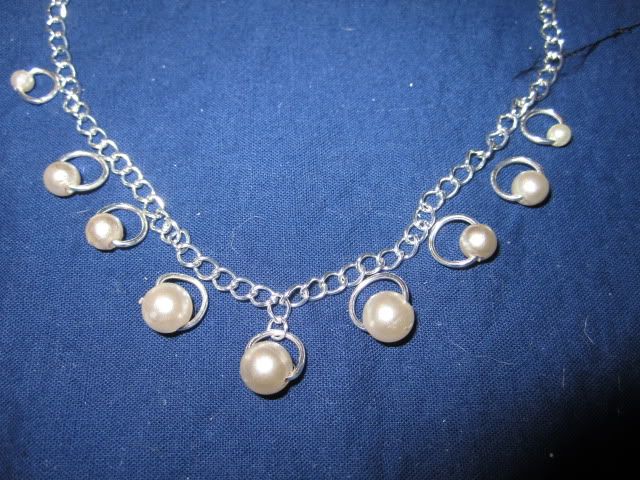
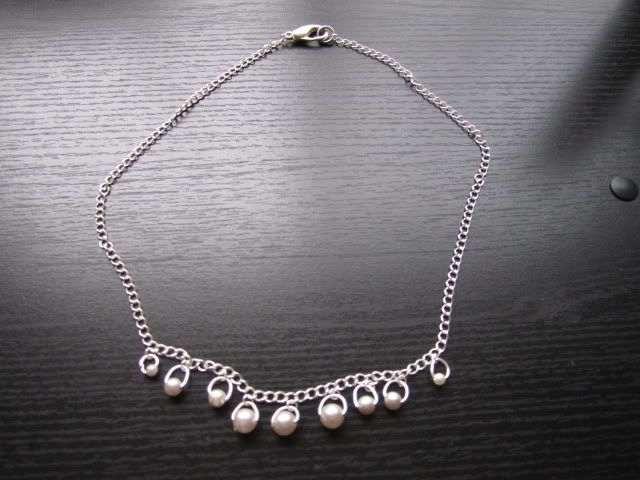
At some point I might gain the gumption to attach those last 4 tiny beads on the necklace, but definitely, definitely, definitely not now.
At some point I might gain the gumption to attach those last 4 tiny beads on the necklace, but definitely, definitely, definitely not now.
Friday, February 3, 2012
Photo Friday
Wednesday, February 1, 2012
Writing Wednesday: Words with Friends Writing Prompts

Writing prompts are supposed to help a writer get into the writing spirit. At the very least, it's a lot more productive than looking at a blank Word document and going, "Oh shit, oh shit, oh shit, oh shit." Unfortunately, I haven't done a writing prompt since my senior year creative writing course.
Thankfully, like Alec Baldwin, I love Words with Friends. I tend to play with a lot of fellow former English majors. Last month, one of said Friends suggested that, at the end of our current game, we should each take 15 random words and write a short story. I upped the ante and said that we should pick the words out first (instead of scanning the board and thinking what could fit) and write our short story in one take -- no rough drafts, no multiple writing sessions, no edits. Bonus points if you can get two (or more) words in the opening sentence.
This is what I came up with from that game. It's nothing to submit to The New Yorker over, but it was a great project and a great start to a very fun writing prompt tradition. And, since I have been a bit stagnant in writing Book #2 (specifically Chapter 3 of Book #2), I'm diving headfirst into this in the hopes that I can get back on track:
There was no joy for the bride on her wedding day.
She had spent years planning it in her head, watching her friends go before her. Or technically after, walking down the aisle after the now-bride preceded them as a bridesmaid.
Years have gone by since the majority of her friends have been wed. My, how she aged! She had sworn she would someday meet the right guy -- that she would be able to weed out those who were less than perfect and find Mr. Right. She'd find him, she'd know right away, and right away she could build a life with him.
But that was not what life had in store for her. Instead of giving her a prince, life doled out years of loneliness and confusion and mixed feelings and heartbreak.
So things should've changed when she met Brandon. They met at church, no less. He came for the first time, heard her sing, and made his way to the choir's area by the end of the sermon.
He was a recent divorcee, and willing take her out even though her looks had fallen flat. So she really didn't have a choice but to agree. After nearly 40 years, a wedding was more than due. Right?
She had asked her friends -- at this point in their lives, looking more like mothers than bridesmaids -- to leave the room. Her legs gave way by the time the door closed behind her, her dress in a heap by her waist. She looked around, desperate to find a reason to stand back upon, before resting her eyes on the patio doors.
The bride gathered her dressed and walked onto the balcony. Below her was the hotel's back yard, its trimmed grass bordering a vast forest.
All at once she could see herself escaping through the woods, dancing like an elf from tree root to tree root, dirtying her gown with moss and bark, leaves gathering in the delicate spirals of her hair.
There was joy for the bride in that moment, as she gathered her dress even more, lifted herself off the edge, and flew off.
Subscribe to:
Posts (Atom)