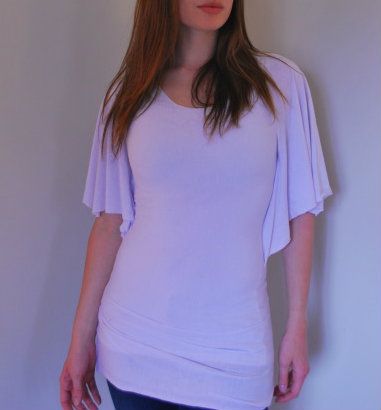
Creating
the circle shirt was a lot of fun, and a great first shirt to make, but I'm trying to improve as a pseudo-seamstress. I wanted to up the ante. So I decided to throw caution (read: money spent on fabric) to the wind and create my own version of it.
Like the first shirt, I bought a yard of stretchy nylon fabric, right next to all the swim and dancewear fabrics. This time I bought white, understanding fully that I'd forever need to wear a tank top underneath it because the fabric was pretty sheer.
And, like the first shirt, I folded it in half the long way/vertically, so that I'd have half a yard hanging from my shoulders. I did this because I'm 5'10" and all torso, so I need my shirts very long. For for normally-height-and-proportioned people, you could try folding it horizontally instead. This would probably give you much flowey-er sleeves.
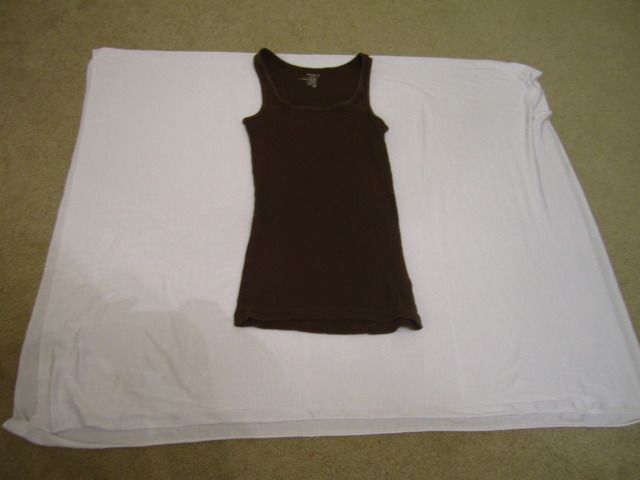
I found another favorite shirt and placed it in the center of the fabric. I first pinned about halfway down (which, in this case, was nearly the full length of the actual shirt. Like I said:
I like my shirts long). I went with the same curves as the shirt, keeping at least an inch border between the pins and the edge of the shirt.
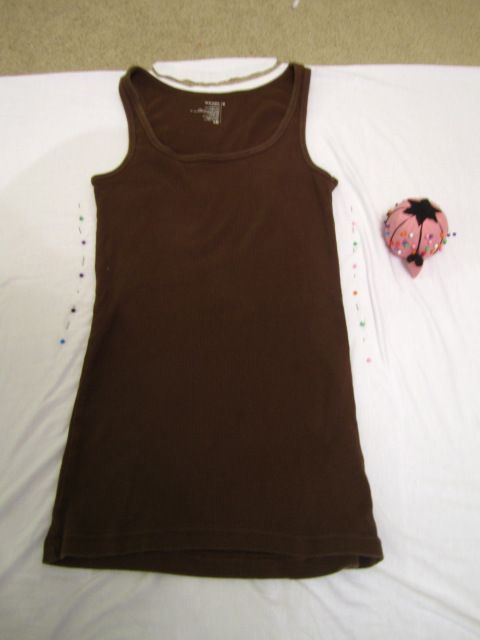
After, I used the shirt's neck hole as a starting point for the circle shirt's neck hole. Like the first shirt, I cut through both thicknesses along the back edge.

I then cut a conservative hole in the top layer of fabric. As I learned already,
I need to be super careful about how big a hole I cut. I could always cut bigger -- I could never cut smaller.
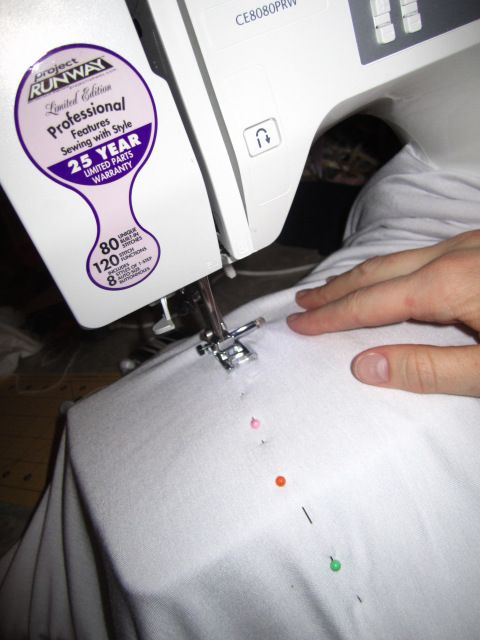
I then sewed exactly where the pins were, being careful to stop when I ran out of pins.
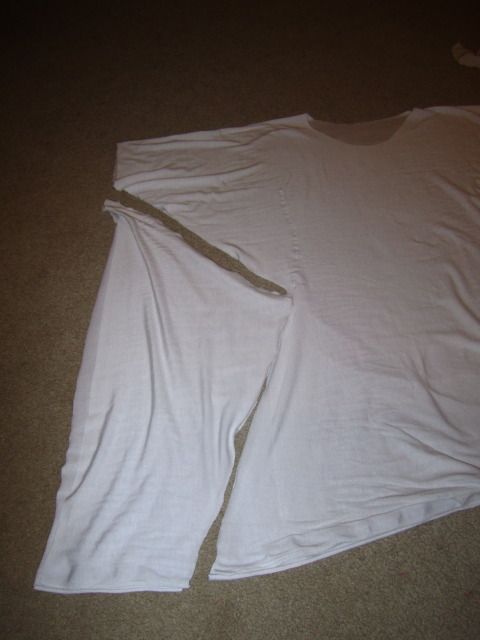
After I was done with the sewing machine, I cut an incredibly angular section off the shirt. Remember that I wanted this shirt long, so I made ample room for my hips. For a regular-sized shirt, the angle would be a lot less dramatic. Like with the first shirt, I folded the first shirt over and cut along the edge of the first side so both sides would be symmetrical.
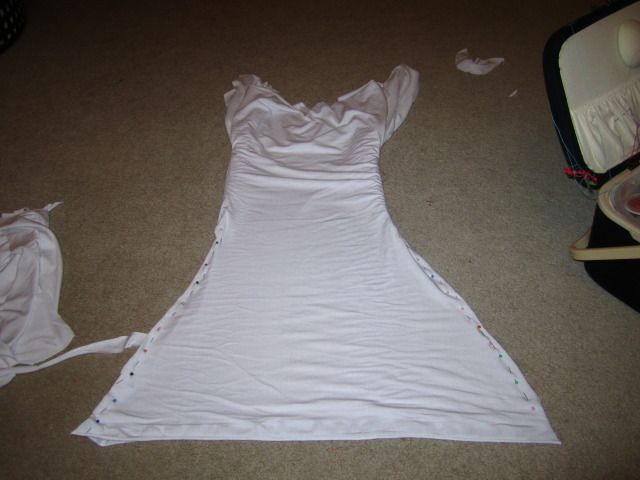
I flipped the shirt inside-out and pinned the edges together. Although the angle makes it look longer than it is, you can get an idea as to how long this shirt is for me. On normal people, this is known as a "dress". So, if you are of normal height, follow what I'm doing exactly to make a semi-circular-sleeved
dress.
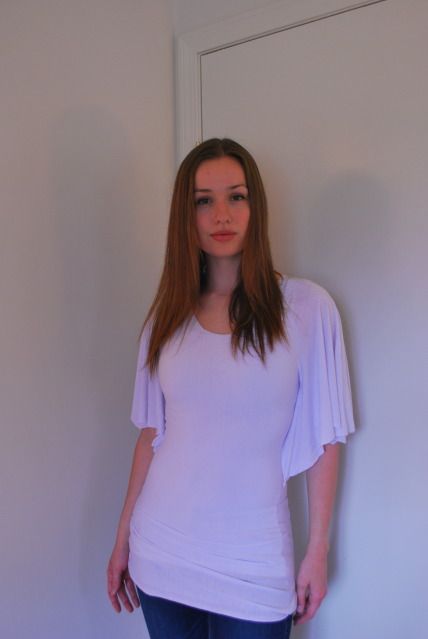
It's sheer, it's long, and I love it. Pair it with a belt or a
belly chain and I'm set.
Did I mention yet that I'm all torso and this shirt is long?

Very nice! I am looking for this type of info and sometimes I get lucky like today...:-). Thanks for your post.
ReplyDeleteI think I did something wrong. I just used this to make one myself and the sleeves open on the bottom.
ReplyDeleteWhen it comes to the stitches, it somewhat breaks down as so:
DeleteOne set of stitches on either side in the middle when the shirt is right-side-out.
One set of stitches on either side, starting from the edge of the fabric (so, opposite the fold/neck hole) and meeting at the beginning of the first set of stitches, when the shirt is inside-out.
And fabric is so key with this project. I've made a few other versions of this shirt, and attempted to make one for a friend with a fabric that had a decent give to it. As I've learned, "decent give" is not enough -- it has to stretch like spandex, lol.
I hope that helps!