Sunday, March 31, 2013

Easter Egg Decorating

Happy Easter everyone! I hope everyone's day is filled with exactly what they need, be it a spiritual day of reflection and celebration or a great excuse to pig out on chocolate. One of my favorite traditions with my husband is egg decorating. My husband's family takes egg decorating very seriously, which ups the ante for anyone decorating with them. Unfortunately, most of my husband's family that had moved to the Boston area have now moved away from the Boston area, but that doesn't stop us from continuing the tradition with our friends.


I absolutely love using wax to decorate my eggs. Most egg-dying packets even come with a wax stick specifically for that purpose. You can do nearly anything, like create a nice cloud scene (and a Mario Brothers egg to match the aforementioned egg because the cloud scene reminded you so much of Mario Brothers 3).


It doesn't have to stop at wax sticks. Any type of crayon works wonderfully. Mix the colors to make whatever scene you'd like.


Or you can make a typical "Easter Egg" (like the kind you see in *every* decoration that uses pictures of Easter Eggs) in no time flat.


Or you can do what my husband did and make a Donald Trump egg (or Conan O'Brien egg…jury's still out on that one).

Masking tape is also a great way to enhance your eggs. Lay out strips of masking tape on a cutting board and use a box cutter to create slim slips. You can put the masking tape on first, or dye your egg one color, let it dry, use the masking tape, and dip it in a second color (you can create a pretty awesome watermelon with this effect).


And now begins the Week of the Hardboiled Egg, where I'll be having everything from egg salad sandwiches to egg crumbles on my salad. Good thing eggs are so good for you!

Tuesday, March 26, 2013

Painter's Tape Finger Painting

I tell parents this project is akin to chopping up the vegetables really small that the children's don't realize that what they are eating is good for them.


To the kids, they are just fingerpainting. But they're also learning their letters -- as well as the beginning of phonics.


All you need for this project is canvas (or, in this case, paper), and painter's tape. I can't stress enough: use painter's tape. Any other tape will rip.


Write out in tape the first letter of each kid's name. Just my luck: I had kids with letters like G, B, and D -- some of the more intricate letters! In a perfect world, every one of my kids' names would start with the letters T or I.


Then -- let them finger paint over it! I made sure to point out the letter on each paper as I handed them out to the students and explain why they were getting that letter. This is honestly as simple as, "John gets the letter J, because that's the first letter in his name! J for John!"


I suggest removing the tape about 15 minutes after the child is done. Just long enough that the paint is not completely wet, but short enough that the tape doesn't have time to super-adhere to the paper.


For emphasis, I outlined the letters and wrote, "... if for _____" in the white area of the letters. I know you're technically not supposed to do that -- you're supposed to never write on a students' artwork! -- but I figured my kids wouldn't mind. Plus, my parents got a huge kick out of the project. One parent even took a picture with their smartphone to send to their family. And nothing is more rewarding than knowing the parents appreciate the projects you are doing!

Sunday, March 24, 2013

Salsa Jar Candles

We already know that I have a minor fascination with glass jars. And, thanks to my continual purchases of things like salsa, peanut-butter, and pasta sauce, I'm never low on them. So I decided to spruce up my bathroom a little bit with three cleaned-out salsa jars.


On top of the cleaned-out jars, I picked up tea candles and glass marbles. I also ended up using tweezers as well, but more on that later.


I first dropped a handful of marbles into each jar. After having the worst time trying to keep the number of marbles equal, I decided to keep the amount uneven, arranging the jars so that the marbles incrementally increased.


I then filled the jars with water according to the amount of marbles the jar had. The jar with the lowest number got the smallest amount of water, and so on. I then placed one candle in each jar. I found that tweezers worked wonders in placing the candles in the jars without splashing water on the candle. It also helped prop up the wick.


I placed these in the bathroom on the off-chance I have enough time to take a bath. Turn off the lights, light the candles (which are best lit with a long barbecue lighter), and relax.

Friday, March 22, 2013

Sprucing Up Shoes

On my most recent trip to DSW, I came across the most comfortable pair of flats. They were cushy, they didn't kill my heels and -- best of all -- the $50 pair of flats was on uber-clearance for $16.


The only problem was that I hated the pom-pom decor on the toes. Everything else was perfect. So, the only logical solution was to buy them anyway and find a way to fix the pom-pom problem.


So I got out my: hot glue gun, ribbon, and small fabric scissors.


I first trimmed off the pom-poms. I didn't know exactly what I was doing yet, but I did know that the pom-pons had to go.


After some trial and error (hehe), I decided on making ribbon bows for my shoes. Not exactly that far off from the pom-poms, but definitely an improvement. To make a ribbon bow, I made a loop from one length of ribbon and superglued it into place.


I then folded another length of ribbon in half, superglued one end to the back, looped it around the first ribbon and, when I felt the ribbon was folding in the proper bow way, superglued the other end to the back. I then superglued the bows onto the toes of the shoes.


The shoes are slightly reminiscent of Snow White. Or, at least, the ribbon in her hair. Either way, a definite upgrade from the pom-pons.

Thursday, March 21, 2013

Guess Who Made It To Pinstrosity?


Love my latest Pinterest Fail? Feel like reading about it again (alongside some other Pinterest ideas that have gone horribly, horribly wrong)? Check out my very own feature on the Pinstrosity Blog.


Tuesday, March 19, 2013

Try It Tuesday: Glass Jar Your Hotel Shampoos


I'd say I travel on average four or five times a year. This, combined with an obsession with taking as much free stuff as I legally can (something I was never able to shake off, even long after graduating college), has resulted in a LOT of mini shampoos.


We always pack a few with us when we travel -- y'know, just in case we end up stranded on the side of the road and need to fend for ourselves when it comes to personal hygiene. But we never end up using them.


Before, I just kept them in a giant grocery bag in the bathroom closet. But why not put them to use? If you have a guest bathroom, a glass jar with the mini shampoos is a nice way to accent the room and provide guests with the necessary hygienic products without lining the bathtub with gigantic jugs.


Granted, my "guest bathroom" right now is also the "bathroom that's not connected to our bedroom" -- also the only bathroom that has a bathtub/shower, so the function is kind of moot. But someday -- someday -- this will be incredibly useful when we actually get a house.

Sunday, March 17, 2013

Tank Top Dress


Like I mentioned before, I have a lot of shirts that I love but are just too short. I've already combined two shirts into one and was looking for a new way to reuse my shirts. The idea came as the result of an utter failure: I had purchased a yard of fabric for a shirt idea, but I could tell by stitch number 2 that it wasn't going to work out.


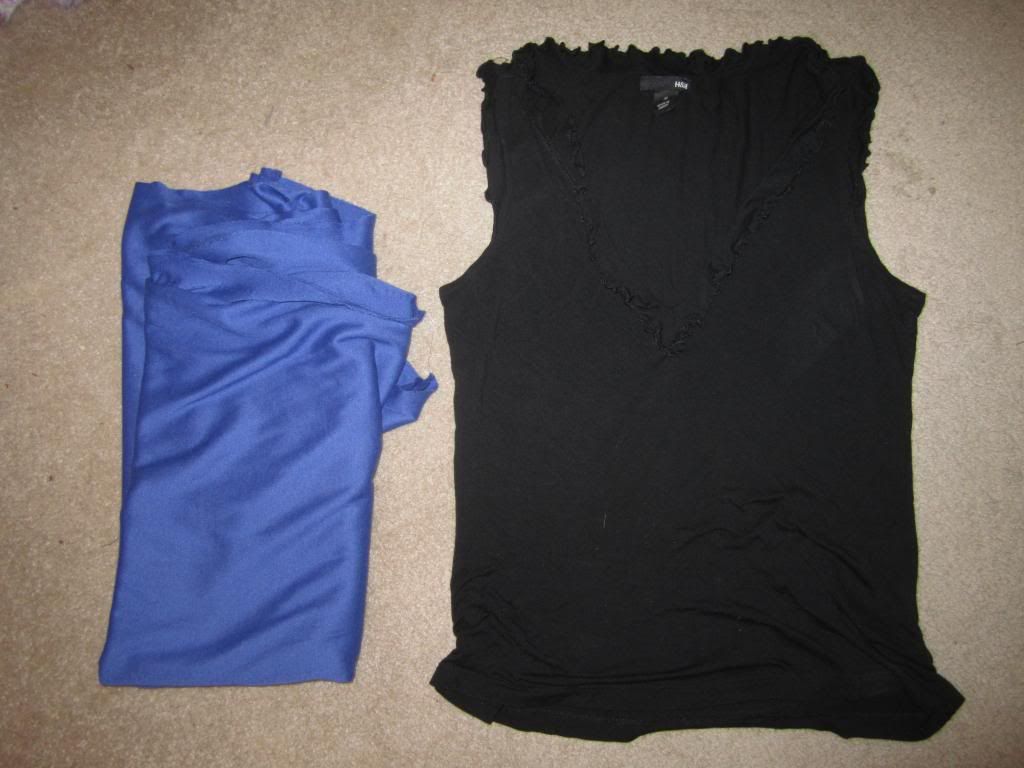
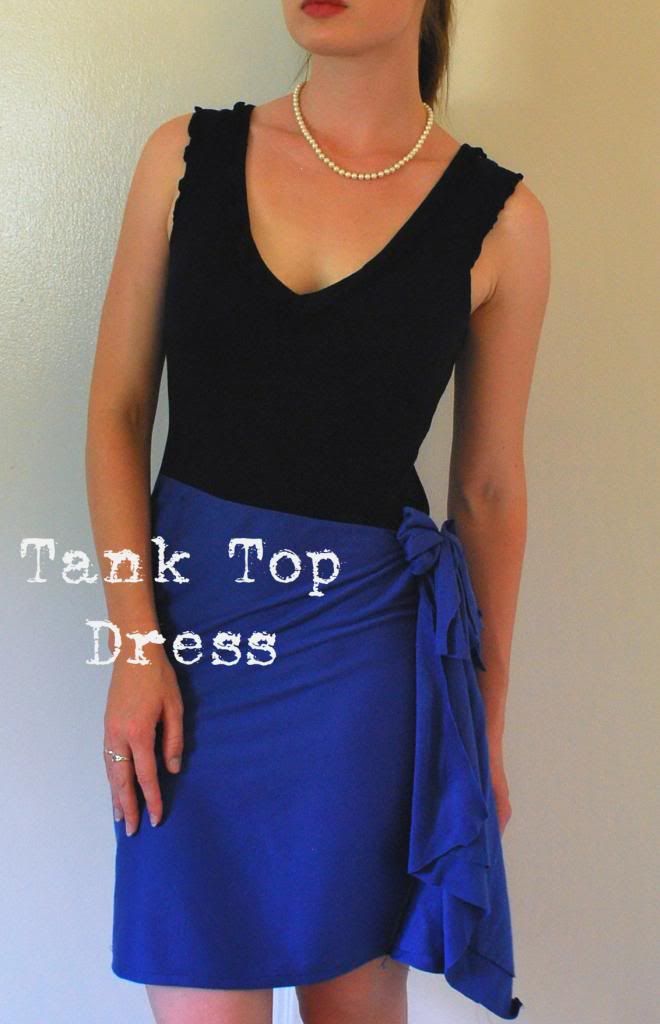
So, what can a girl do with a tank top and a yard of fabric…
...time to up the ante and make a dress!


As I mentioned with 
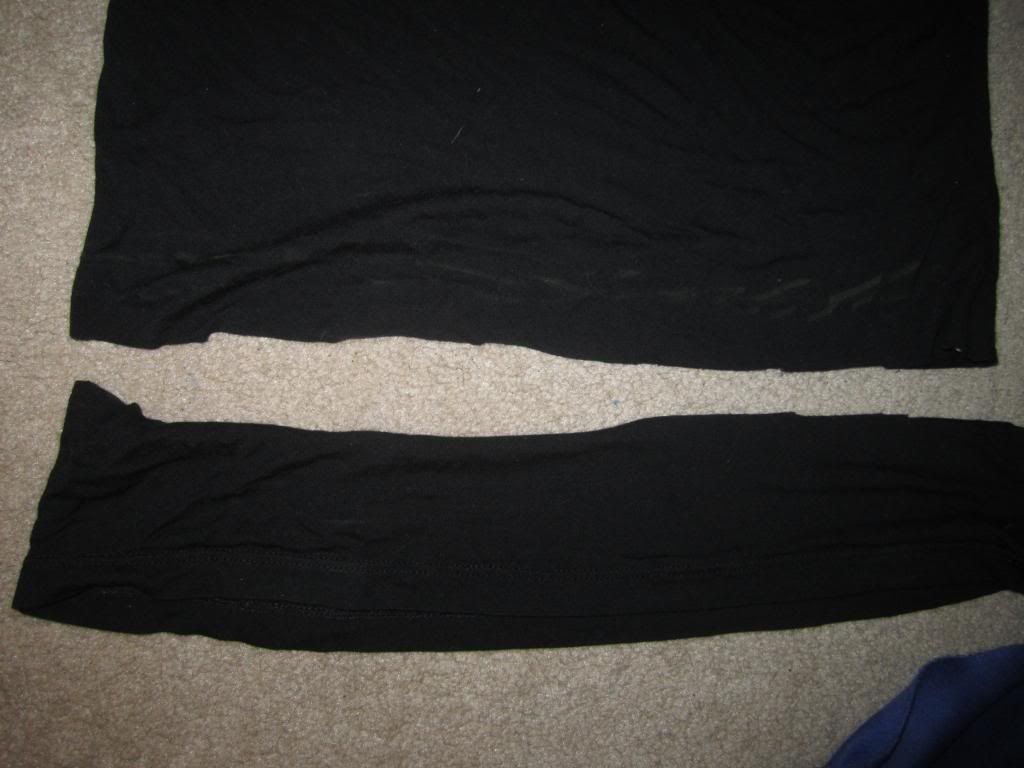
Frankenstein Shirts, I don't own fancy things like chalk. But, thankfully, yellow crayon works in a pinch. I put on my shirt, marked where I wanted the dress portion to come up to, and cut about an inch below the line.


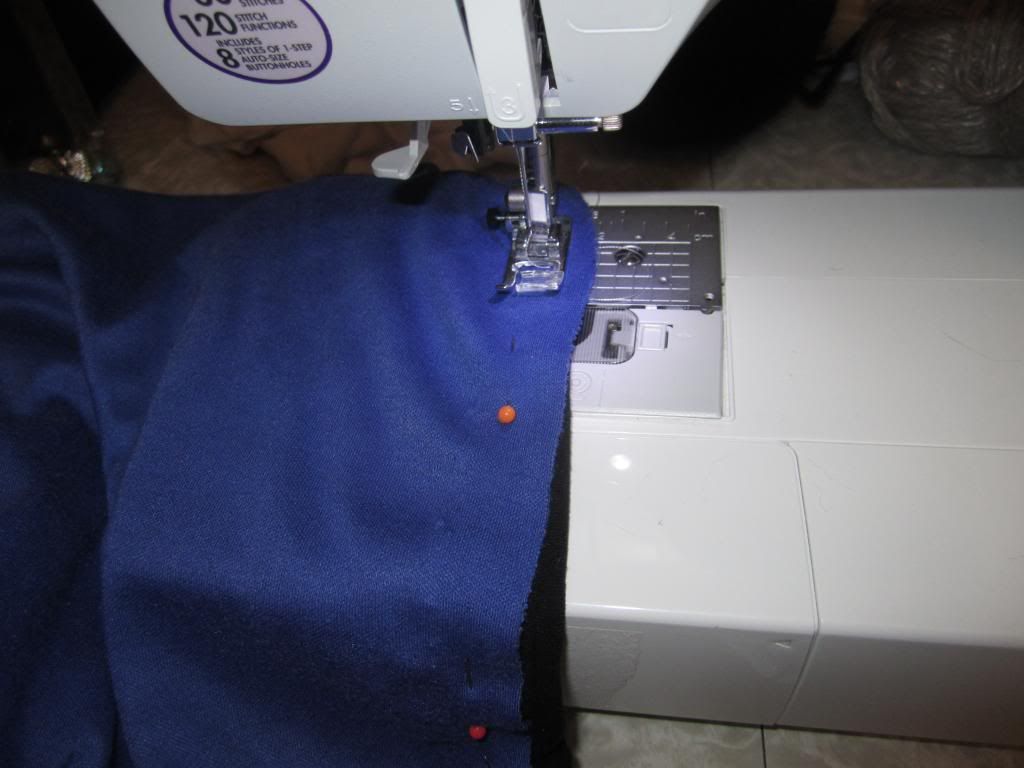
The best way to pin is the way I pinned my Frankenstein shirt: with the shirt rightside-out, lay what will be the top edge of the dress over the bottom edge of the tank top and pin along the bottom, alongside the line created with yellow crayon. After taking this picture and realizing my mistake, I unpinned everything and pinned in that exact fashion.


Much to my chagrin, I realize I have cut/pinned everything at a very noticeable slant. Instead of getting upset and undoing the seam, I decided to work with it, since, at the end of the day, it looks downright intentional. Plus, the slant helped me figure out an idea as to what to do with the other side of the dress.


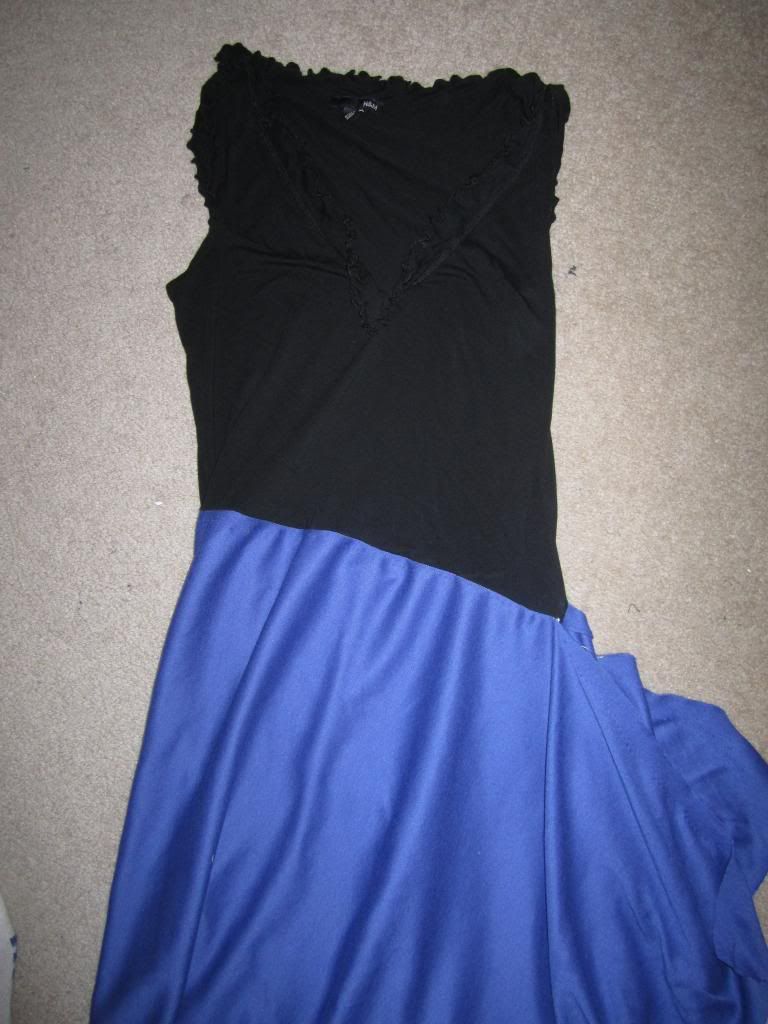
I was worried about how to go about the second portion of the dress. I couldn't sew a straight seem down, lest my hips burst through, and, after the crooked seam fiasco, I didn't trust myself to cut and sew in curves. So, while wearing the dress, I used baby pins to map out where the dress would go around my hips and legs. I cut the dress to length and hemmed the bottom (which, as I mention with the Frankenstein shirt, I absolutely hate doing, but there was no way around it this time) from end to end, and sewed up the side right after.


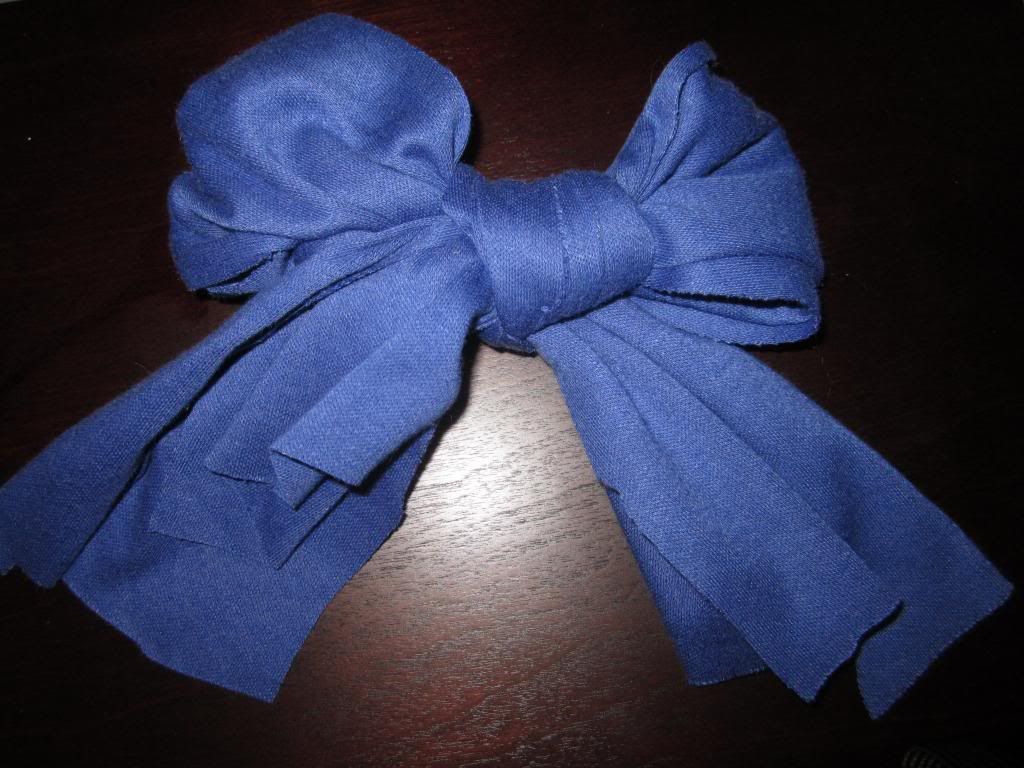
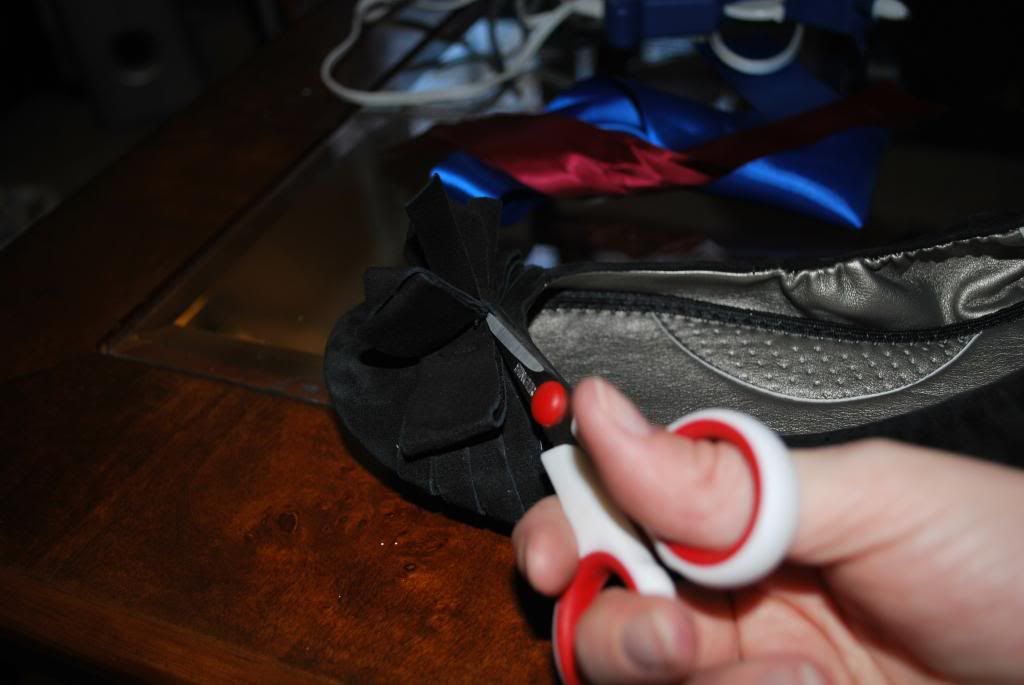
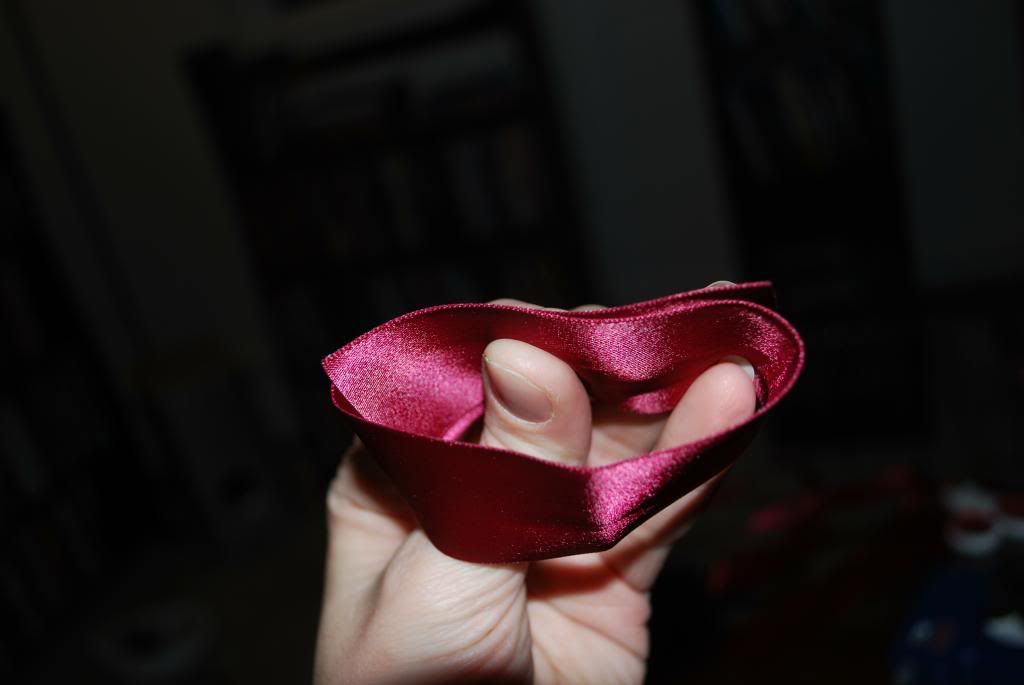
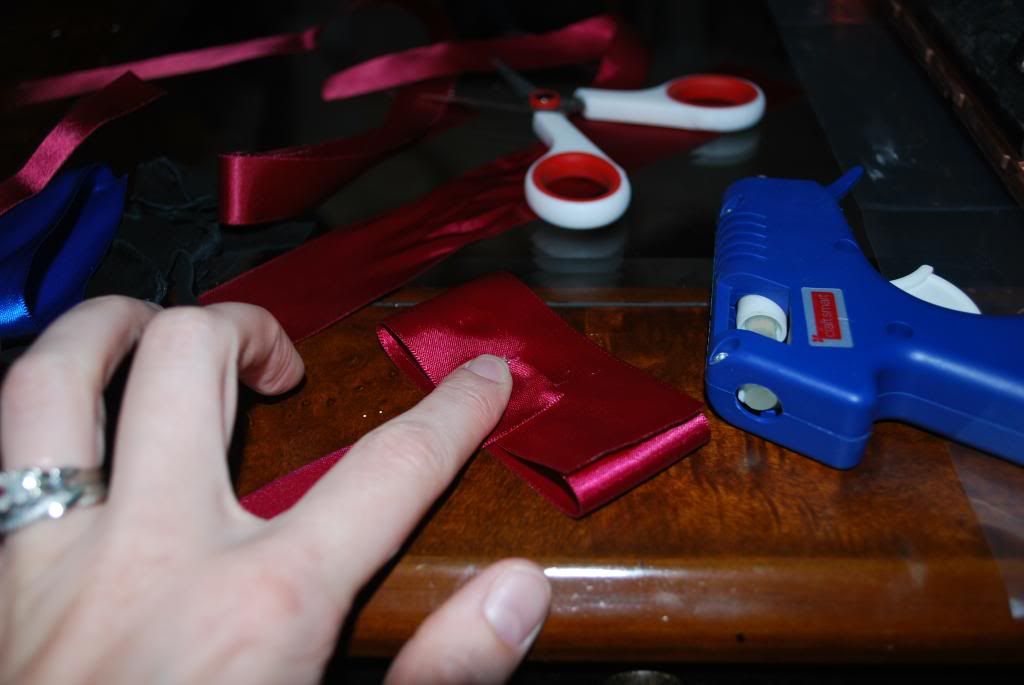
I decided to take some of the fabric left over from cutting the dress to length and make a bow, which was as simple as making two bunny ears and tying them into a knot (hello, Kindergarten).


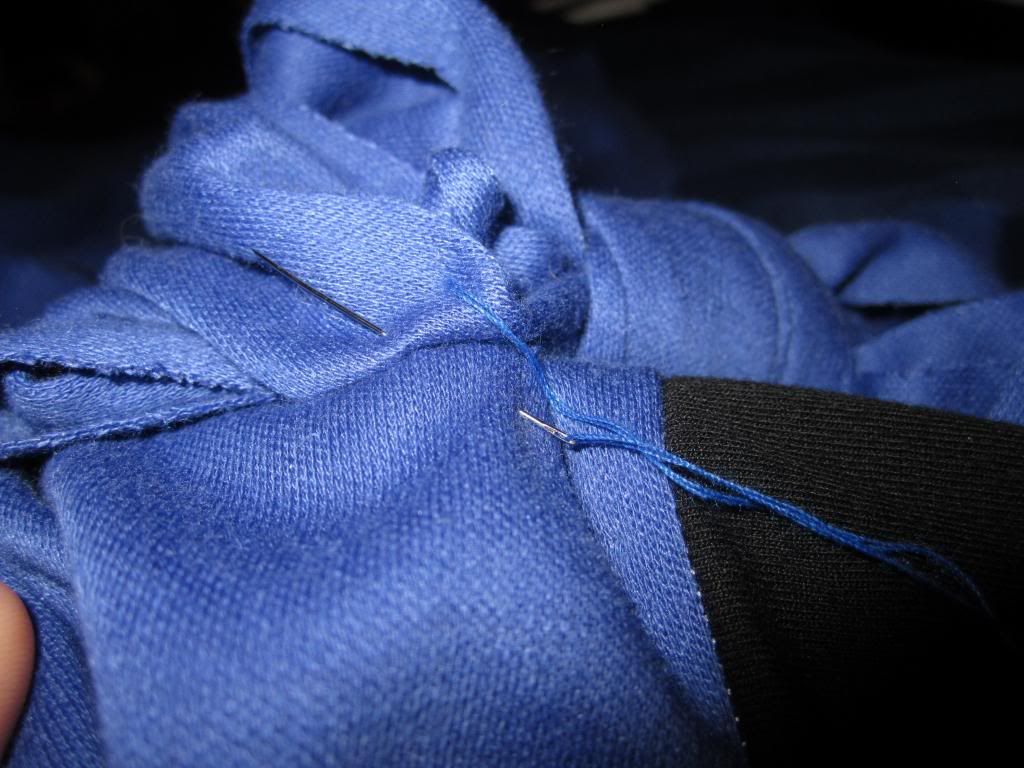
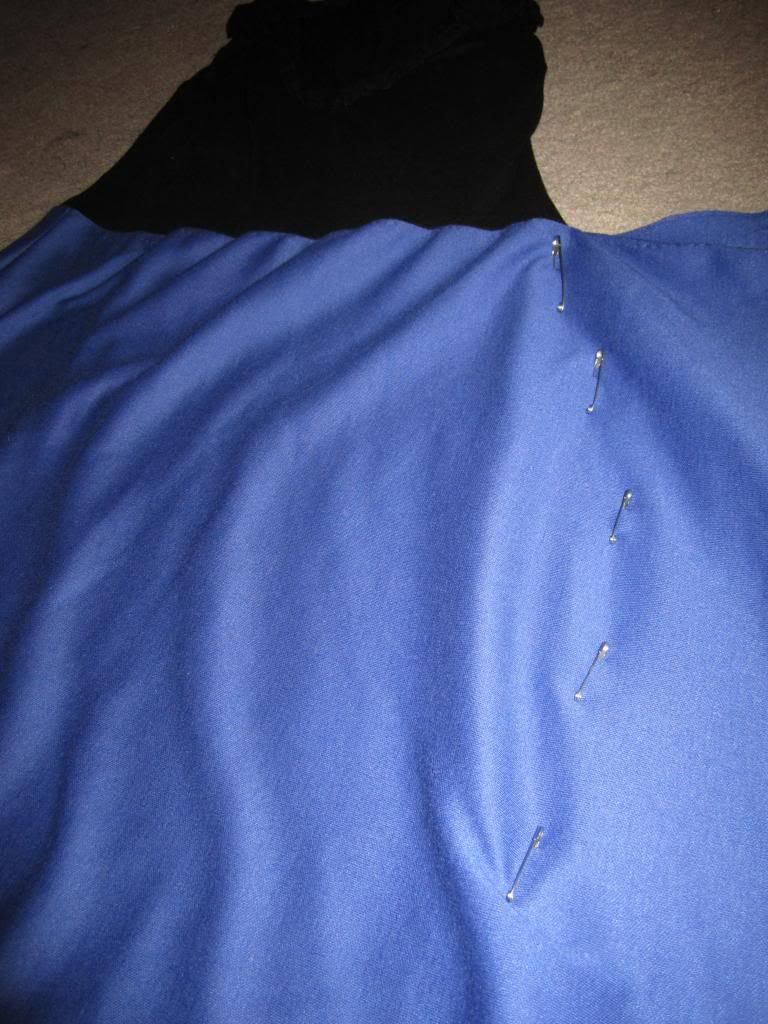
I used baby pins to pin the bow in place (using this opportunity to cinch any loose fabric into the folds behind the bow) and sewed the bow onto the dress along the edge of the bow loops.


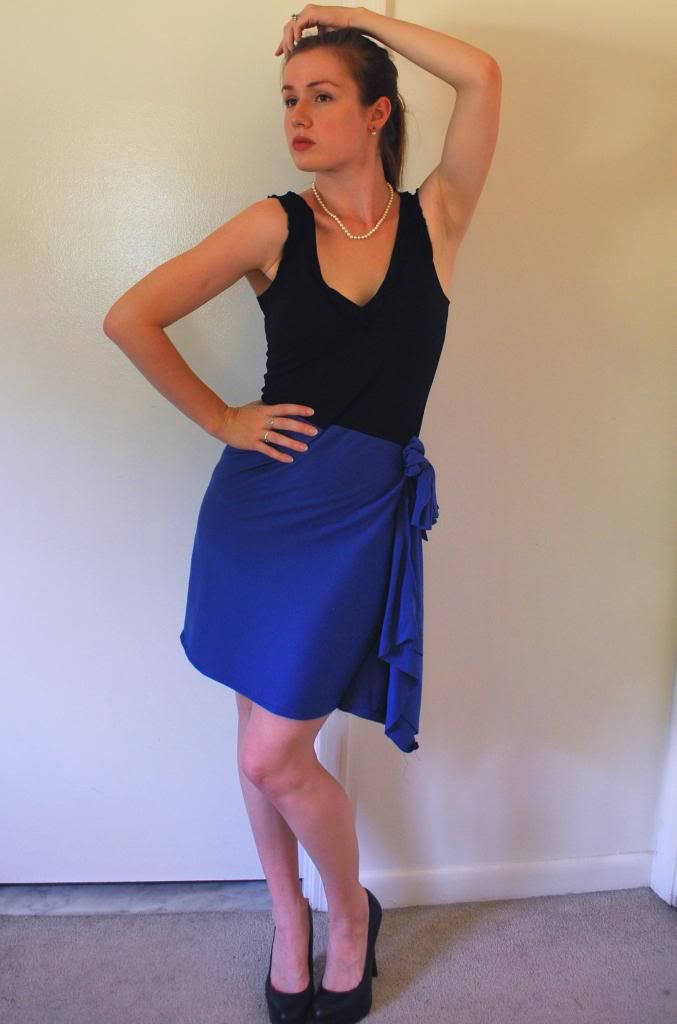
I'm really happy about this dress. I got to wear it to my sister-in-law's graduation. The best was that someone complimented on my dress and asked me where I got it. Oh, this thing? Y'know, from H&M and Joanne Fabrics … didn't you hear they were collaborating?

Thursday, March 14, 2013

Pinterest Fail: Cherry Blossoms Out of the Bottom of a Soda Bottle

I knew this wasn't going to work, but I wanted to try it anyway.


To be honest, I'm a little shocked with the outcome. Not what I was expecting.


So, for this gem, you dip the bottom of a liter bottle of soda into paint, and proceed to make cherry blossom stamps. Since canvases were $2 a pop at Michaels, I decided to get real fancy with this project.


Now, I was expecting a huge mess. What I got instead were little circles. No matter what I tried, or how much paint I used.


I even tried it on a harder surface than the canvas to see if that was the variable that was screwing everything else. And still -- little circles.


However, this is one failed project that I was able to save pretty easily. Using those little circles as a base, I simply painted in the rest of the "flower" -- probably what the original poster did, to be honest.


Even though it's not an authentic "soda bottle bottom cherry blossom", it's still quite pretty. I added "cherry blossom" in Japanese Nanji because -- hey, why not? A little something to make it mine.

Monday, March 11, 2013

DIY Alex n Ani Bracelets: Make Similar Bangles For 1/8th The Price


First there were the Livestrong bracelets, then Pandora -- now the biggest craze is the Alex & Ani bracelets. I think these are the most adorable bracelets. However, these bracelets can easily run you up to over $50 a pop (with the average bracelet still costing at least $25+). And these bracelets, much like charms on a charm bracelet, are meant to be collected, I could easily go broke trying to buy them all. So, I made a trip over to Michael's and made my own (low-end) version.


All I needed was:
- Beading wire (I suggest getting stainless steel, as aluminum is too flimsy)
- Charms
- Pliers (flat-nosed and needle-nosed, are preferred)
- Wire cutters


I first cut roughly 1 1/2 the circumference of the wire -- or roughly twice the circumference of my wrist.


I added a charm onto the bracelet and slid it to roughly the center part of the bracelet.


I bent the lower end of the wire up (so that the bent portion is touching the top wire).


After measuring the wire around said wrist, I used my needle-nosed pliers and curved the bent portion around the top wire.


Then, while holding everything in place, I used the flat-nosed pliers to squeeze the bend until the wire cannot move through it.


I then slid on whatever remaining charms for the bracelet.


I fed the free wire 1/3 of the way around the bracelet and repeated the process, only now on the bottom portion of the wire. After squeezing everything into place, I cut off the remaining wire and smoothed any rough bends.


I ended up making 4 bracelets with what I got: one is a Celtic spiral bracelet, another is a summertime bracelet, another is a religious bracelet, while one is just a mash-up of charms that caught my eye.


I spent a grand total of $16 for this project, including taxes. The cost for these four bracelets was less than the cost of just one Alex & Ani bracelet. They're definitely not as nice (and are lacking the signature "Made in America with love" et al), but, eh, details.
Related Posts Plugin for WordPress, Blogger...

09 10 11 12
Blogging tips