My husband's birthday was only 2 weeks after our anniversary trip. As you can imagine,
we were good and caked out after our trip, as we demolished 3/4s of our top tier within 6 days. I've been making my husband a cake for his birthday every year since we moved in together. I knew we both were tired of cake, but I still wanted to make him something.
And God bless
Buzzfeed, as they introduced me to the giant Kit-Kat Bar. After some Googling, I was also able to find a recipe for a giant Reese's bar.
First, the Kit-Kat bar. I needed (for each bar):
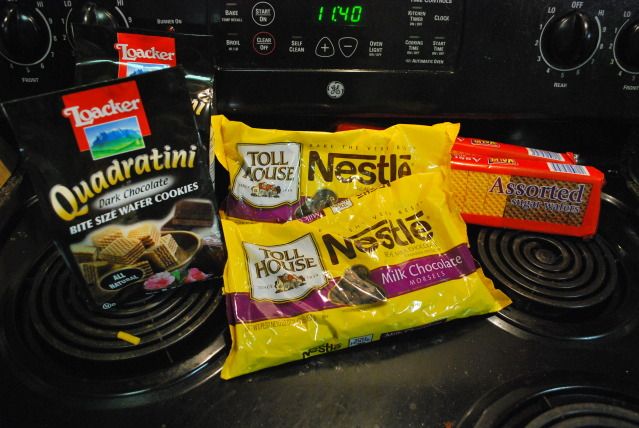
40+ oz of Milk Chocolate Chips
1 bag of chocolate wafers (I bought two just in case, with cheap-o back-ups in case I ran out)
Milk
Butter
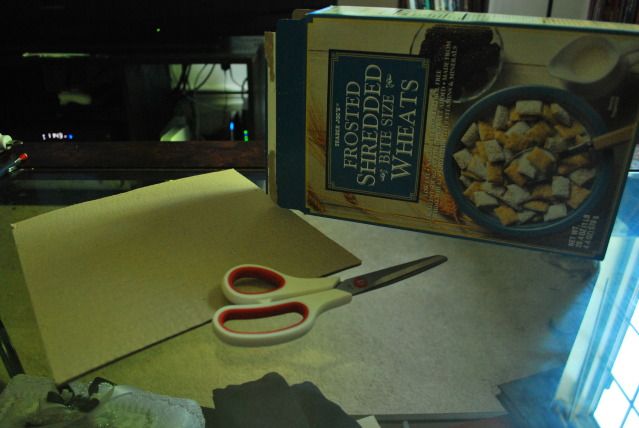
I first needed a container for this monstrosity. The website suggested a cereal box cut in half, and I followed along. It was actually really easy cutting the box in half: I'd cut one side all the way to the bottom, flip it over, and cut the other side to the bottom. I could then essentially fold the box in half and cut the bottom part as well.

Then was the Kit-Kat logo. I drew out the Kit-Kat on an extra piece of cardboard, cut the letters out, and scrapbook-taped them to the bottom of the cereal box/trough.

Looking back, I should've used something stronger than scrapbooking tape. Or I should've at least sprayed the box with Pam. But, eh, live and learn.

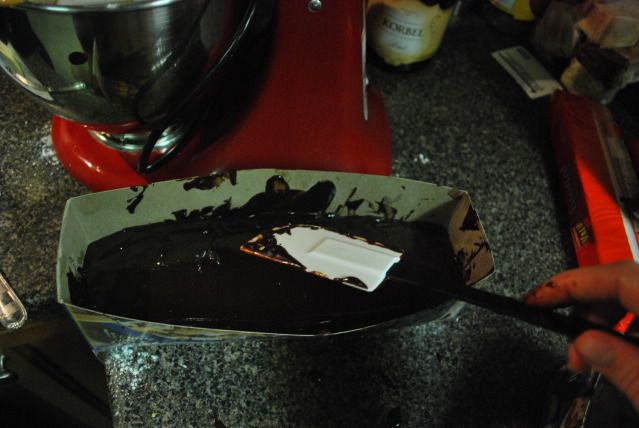
I didn't own a double boiler, but I was able to finagle one out of two sauce pans. I melted the chocolate halfway down before adding just enough milk and butter to keep it creamy.
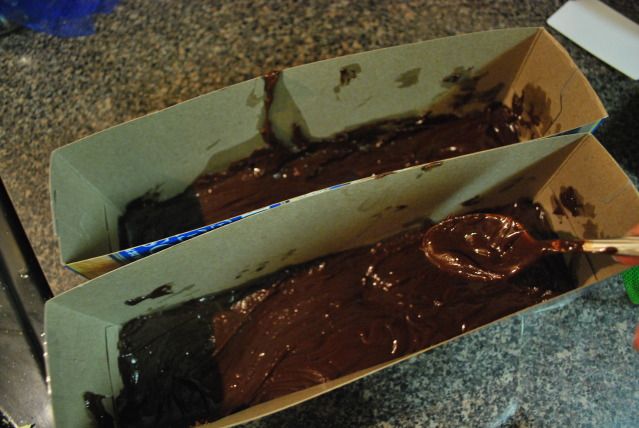
I then filled the cereal troughs about a centimeter deep with the chocolate. After smoothing it with the spoon, I set them in the freezer to harden.
While I was waiting for the Kit-Kat bottom to harden, I started on the Reese's Cups.

For this, I needed:
- tall pie tins
- 20 oz per Reese's cup of chocolate chips
- Milk and Butter
- Pure, unsalted peanut butter (meaning the only ingredient is: peanuts)
- Graham Cracker Crumbs
- Confectionary sugar (for those who don't speak kitchen, that's the extremely fine sugar, usually found absorbing oil on fried dough)

Like the Kit-Kat, I melted down the chocolate, adding butter and milk to keep it creamy. If ever I needed a reminder as to how
horrible candy bars are for you, creating these was definitely it for me!
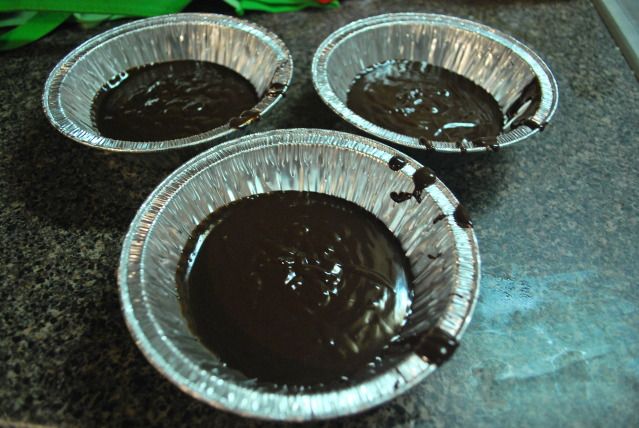
I then filled three pie tins with a centimeter of chocolate, and set them in the freezer to harden as well.

Now it was time to create the peanut butter concoction. I used an entire jar of peanut butter, 2 tbsp of butter, 3 cups of confectionary sugar, and 3 cups of graham cracker crumbs. I fully suggest starting with small amounts, mixing and adding things in until it's the same thick consistency as bread dough. And I suggest using a mixer, as this is a pain in the butt by hand and I gave up by stir #40.

The bottoms of the Kit Kat bars hardened after a few hours. I (very, very carefully) arranged two rows of chocolate wafers, adding levels until it was roughly an inch shorter than what I wanted the bar to be.
Pouring in the chocolate is supremely difficult, as the wafers don't like to stay in place. The best bet is to slowly spoon it into the sides until it is to the same level as the wafers before pouring in the top layer. And never, never, ever pour directly onto the wafers. They will scatter and it is a pain in the butt to get them back in their correct spots. I leveled the bars with the spatula and put them in the freezer again.

The sides of this box were incredibly flimsy, so I had to prop both sides with various things in the freezer.

To make the peanut-butter insides of the Reese's, I unrolled wax paper and shaped three inch-thick disks with the peanut-mixture. If the consistency is right, this is super simple to do. Once they are ready, it's as simple as placing them on top of the hardened chocolate.
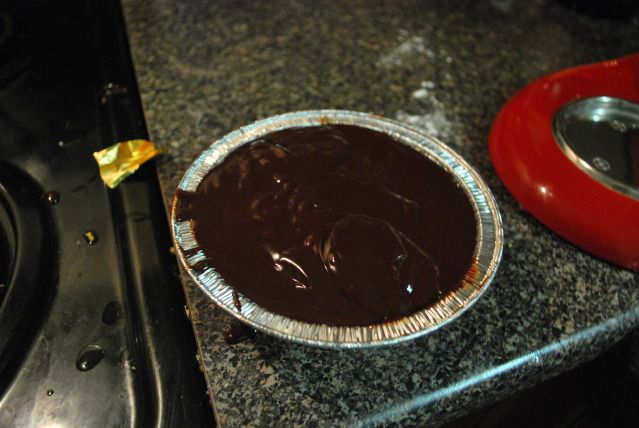
Thankfully, it is a LOT easier to pour in the rest of the chocolate with the Reese's than it is with the Kit-Kat.

As you can see, both are essentially hidden in plain sight. If my husband opened the freezer expecting to see what he always saw, he wouldn't find them. But if he rummaged around even just a little bit, the whole thing would be exposed.

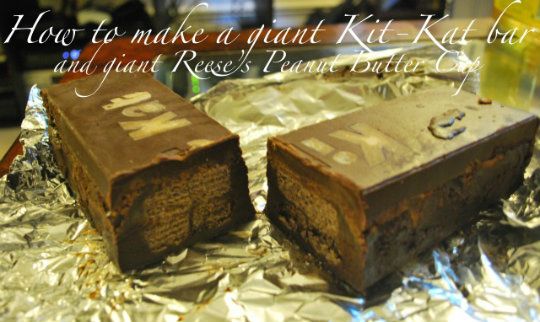
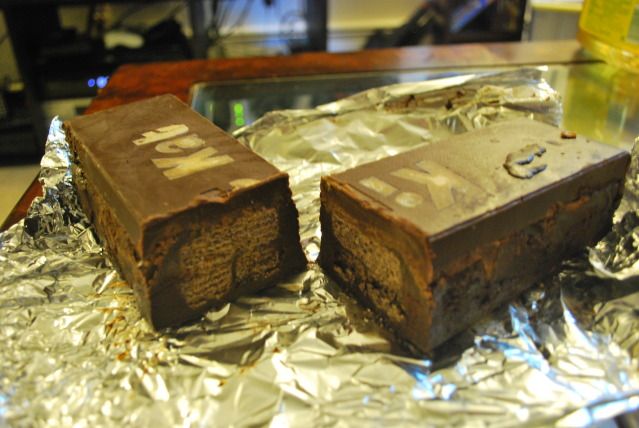
I let both sit overnight in the freezer. The next morning, I cut around the edges of the Kit-Kats with a knife and cut the corners with scissors. This was a very messy process and I was incredibly worried that the "top" part would be a mess.

Thanks be to God, the top part peeled off easily. The cardboard that created the logo stayed on, and no amount of picking would peel them off. Eh, live, learn, and get a better adhesive.

I wrapped the Kit-Kat in foil and, since I was running low on time thanks to an exhibition that week (more on that later), I just used wax paper as my Reese's wrapper. I combined that with the last two slices of our top tier (because, really, why not? It is a birthday, after all, even though these last two pieces got good and smooshed during our trek back home) and my husband's present, which was expertly wrapped in Disney Princess paper.
The treats were so decadent, and worth all the hard work. The entire thing, from set-up to clean-up, took about 5 hours total, but it was a labor of love. The best part was the look on my husband's face when he realized he had a giant Kit-Kat bar in his hands.

a glass bowl that fits but wont fall into the sauce pan works really well as a double boiler. i actually prefer the rounded edges of a bowl when working with chocolate. looks delicious!
ReplyDeleteno -_-
ReplyDeletejk thanks alot for this i really am greatful that i found this
ReplyDelete