

Friday, January 27, 2012
Wednesday, January 25, 2012
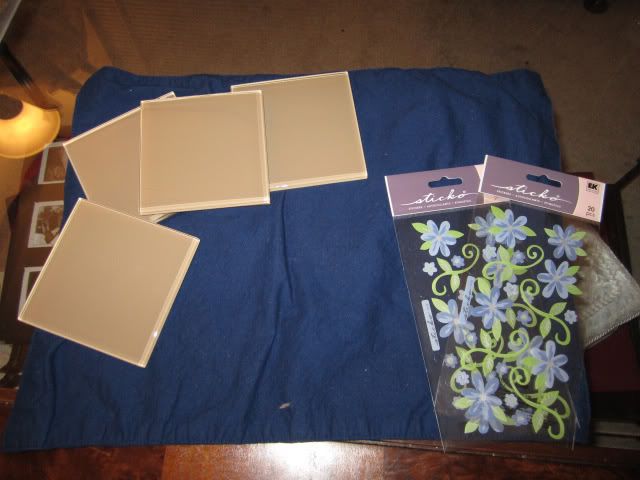
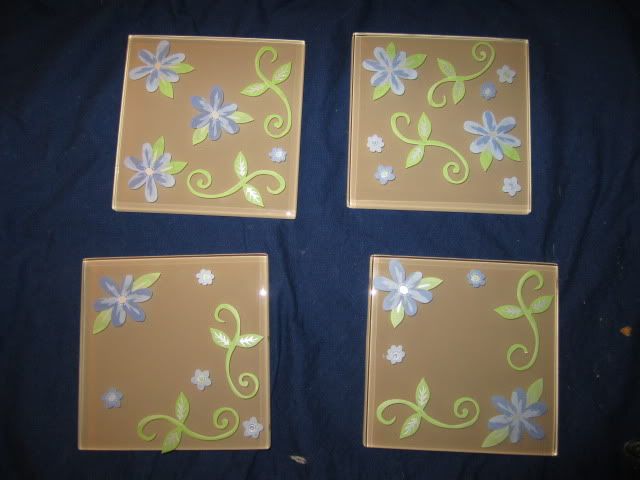
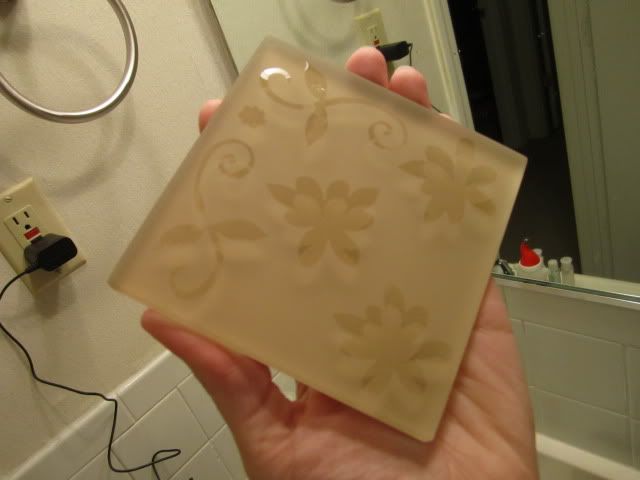
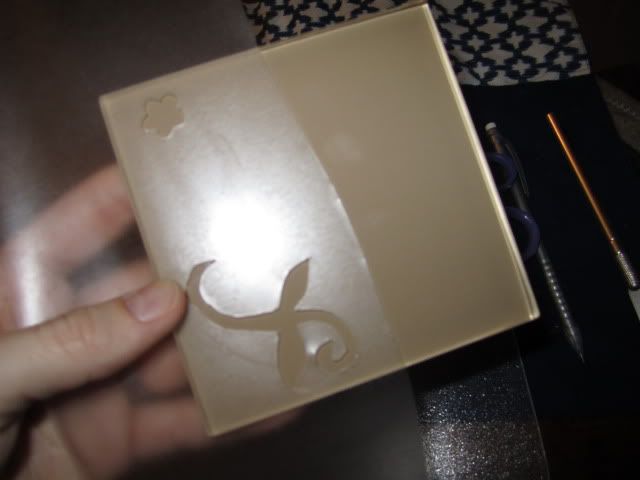
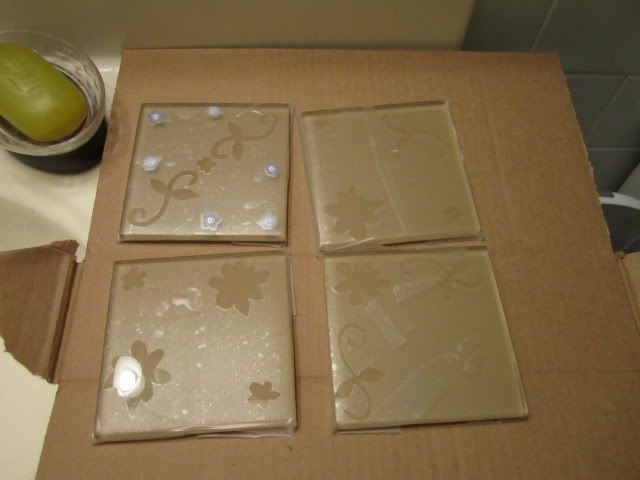
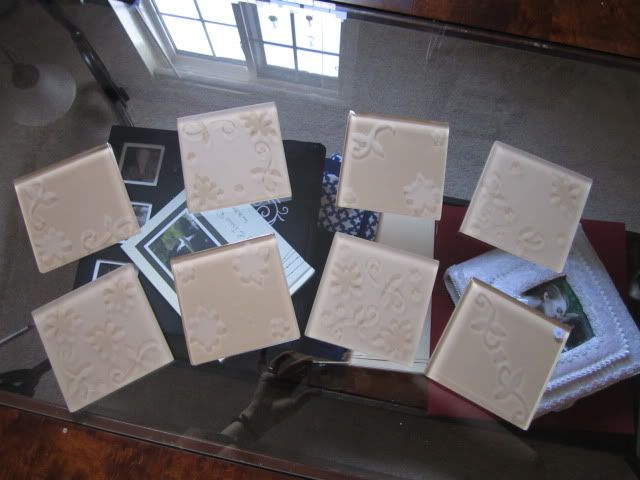
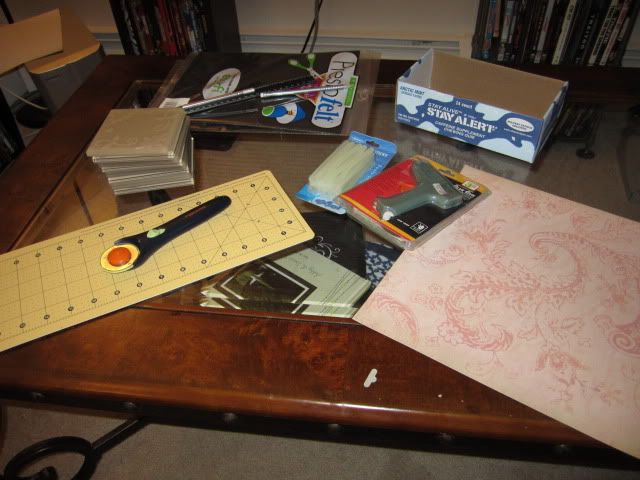
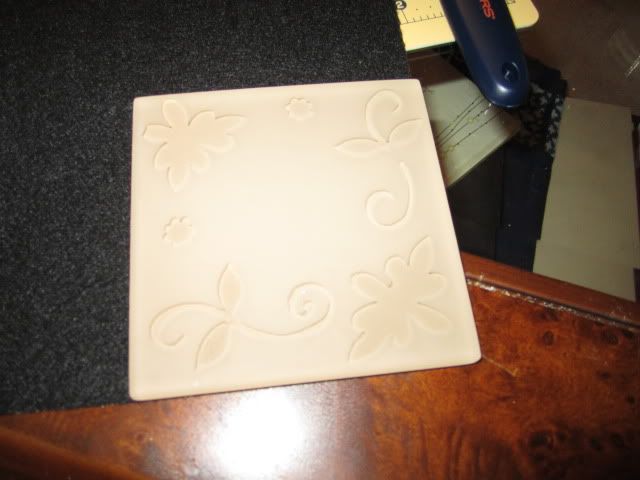
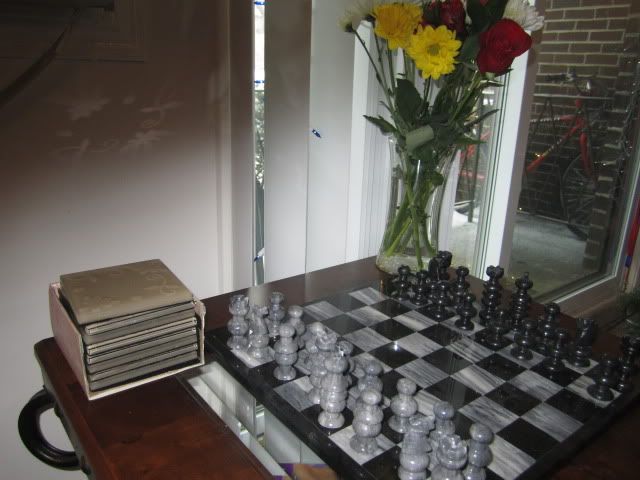
Etched Glass Coasters
Now that I've tried my hand at glass etching a frame, it was time to try making my own tile coasters.

Monday, January 23, 2012
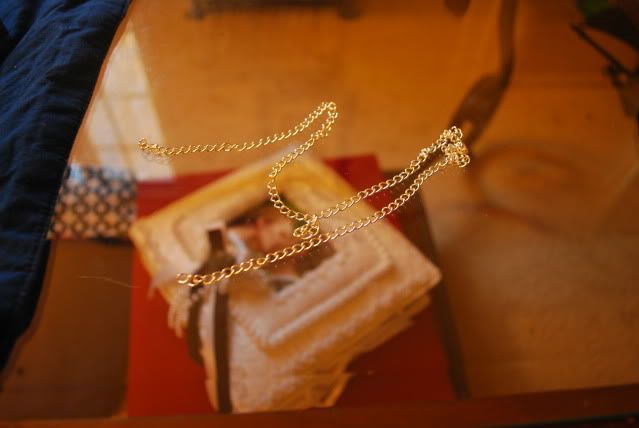
Making a Belly Chain, Part Two
Apparently, one belly chain isn't enough for me. This is what we call Spent-Too-Much-Time-in-Michael's-itis: when I find myself wandering down the jewelry aisle and finding a pendant that catches my eye, so I devise some type of craft to incorporate it. This belly chain is significantly simpler and quicker to make.

First, I measured how long I wanted my chain to me. To do this, I folded the chain in half and measured my waist with it (make sure not to measure your waste with it). Now, keep in mind that the pendant will hang on the ends, so measure how far down you want the chain to go. Use the wire cutters to clip accordingly.
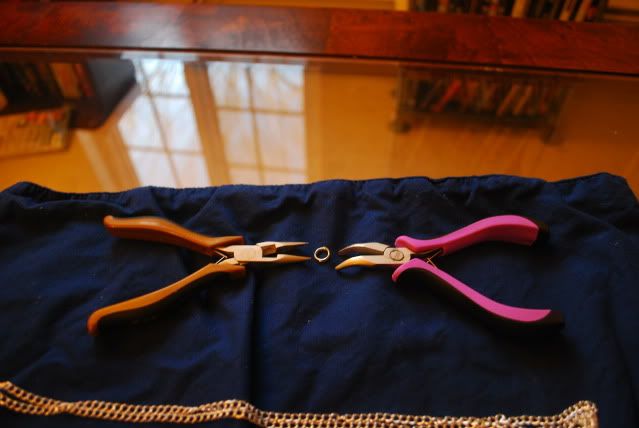
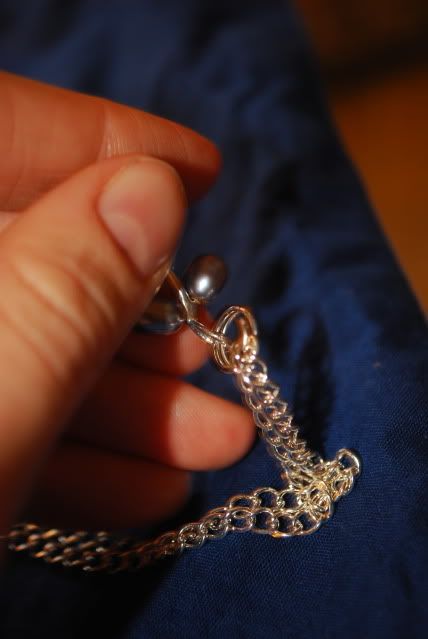
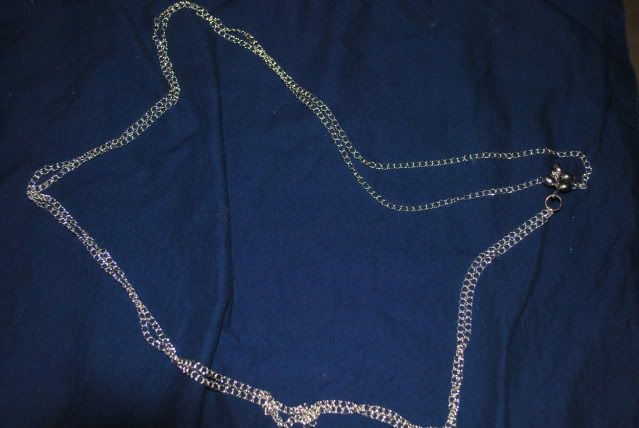
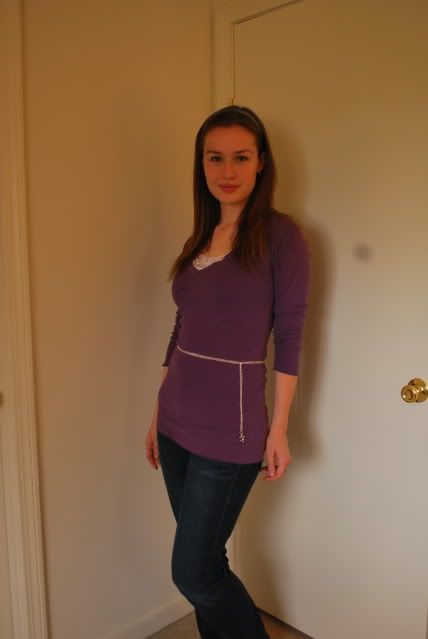
First, I measured how long I wanted my chain to me. To do this, I folded the chain in half and measured my waist with it (make sure not to measure your waste with it). Now, keep in mind that the pendant will hang on the ends, so measure how far down you want the chain to go. Use the wire cutters to clip accordingly.
Friday, January 20, 2012
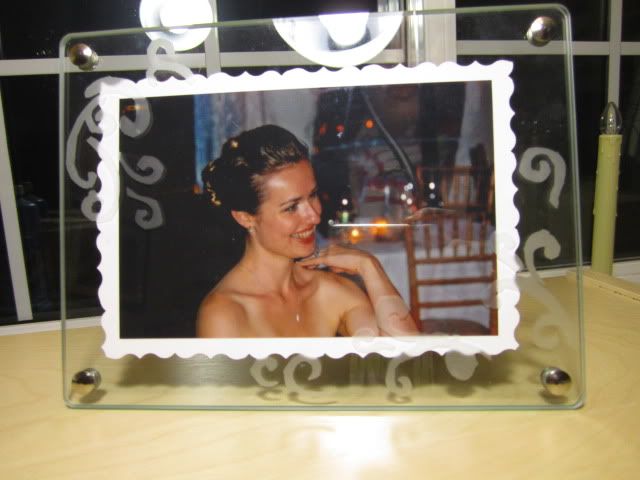
Etched Glass Frame
Ask any teacher who works with young kids what contact paper means to them, and you'll probably get the same answer: it is the crack pipe to our very masochistic addiction. From protecting posters from grabby hands to fake-laminating construction paper projects, we easily go through a kilometer's worth of it in a year. I was eager to do a project outside of school that involved contact paper. And that's where glass etching came in.
I used to do glass etching back when I used to go to camp. We'd design random glass bottles with whatever stencils the older kids had lying around. After camp, I kind of forgot about glass etching. But I stumbled across glass etching again and decided I needed to do glass etching again, starting first with making a spiral-etched frame.
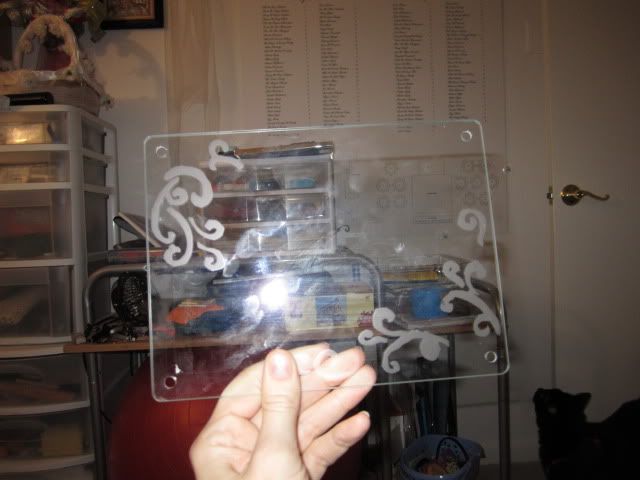
Now, to backtrack, one aesthetic I had in my wedding was, long, flawy, ivy-like spirals. I know that's not exactly the most original aesthetic theme for a wedding, but I loved it simply because it came about organically. I just naturally picked things that had this is ivy-on-the-brick quality about them. After the wedding, I went nutty and purchased a ton of frames with spiral-painted borders (much to my husband's chagrin).
I decided that, for the sake of practicing my glass etching, I should make an etched glass frame with spirals.
Obviously, I was only doing it for the practice.
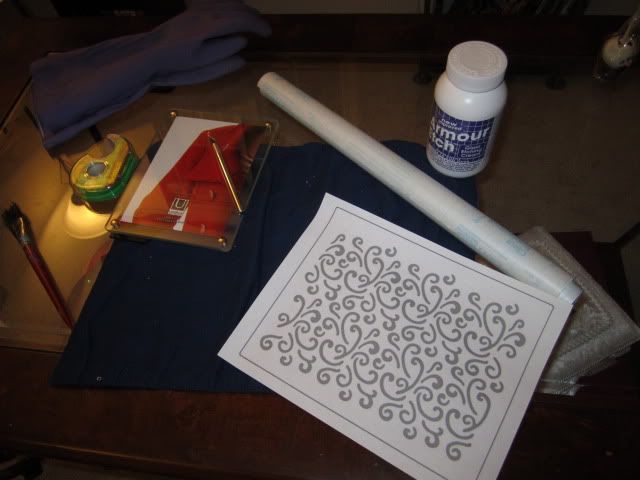
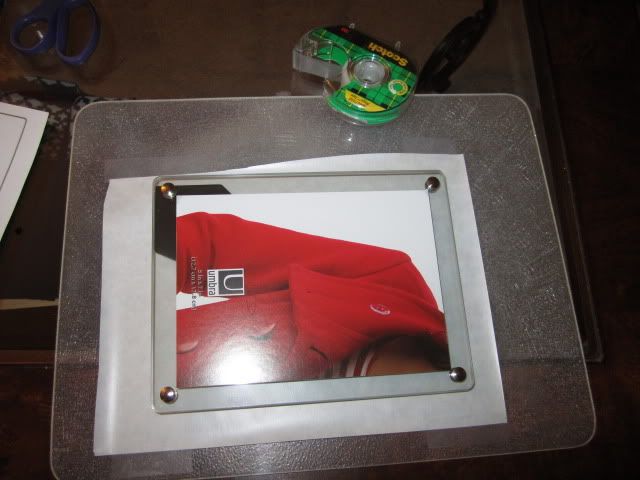
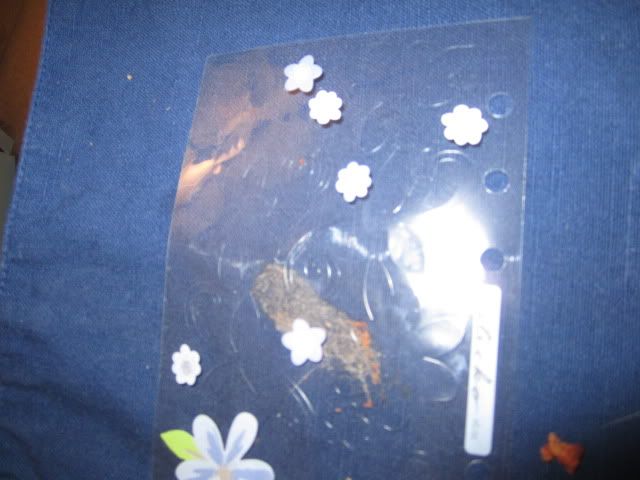
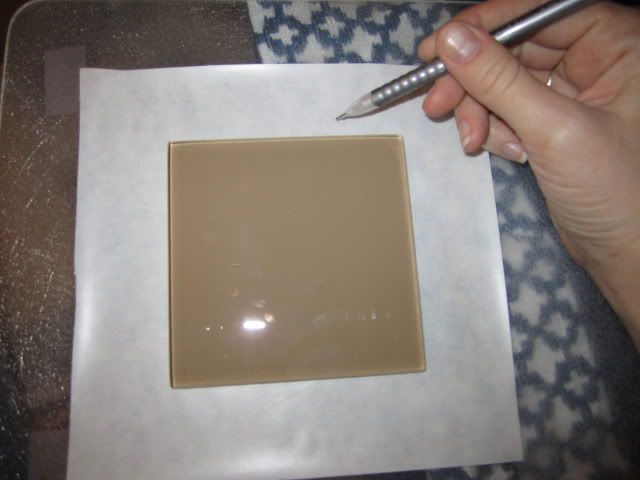
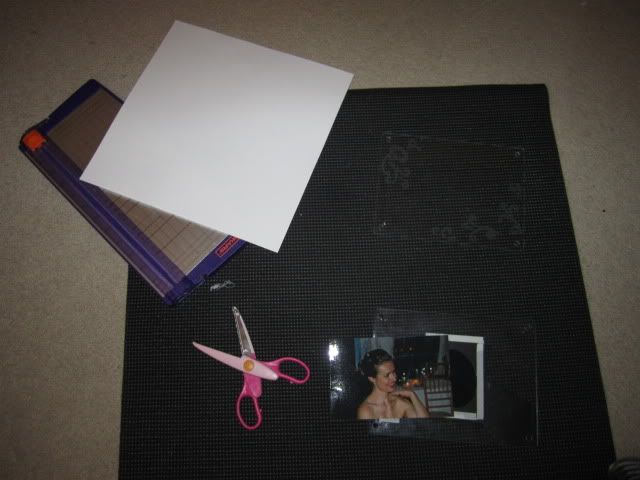
I outlined the frame on the contact paper in pencil so I could have a general idea of where things would go. I also kept the frame close by, as this particular frame had bolts at each corner, and I wasn't interested in having metal-etching as part of my design.
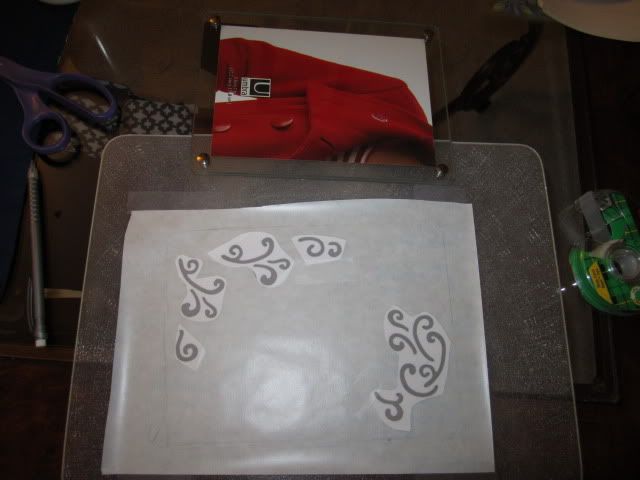
Cutting with an exacto knife isn't exactly the easiest, let alone cutting paper outlines of spirals that are only taped on with an exacto knife. By spiral 2, I was silently (and then not-so-silently) cursing myself, wondering why I couldn't have had a few basic squares as my main aesthetic.
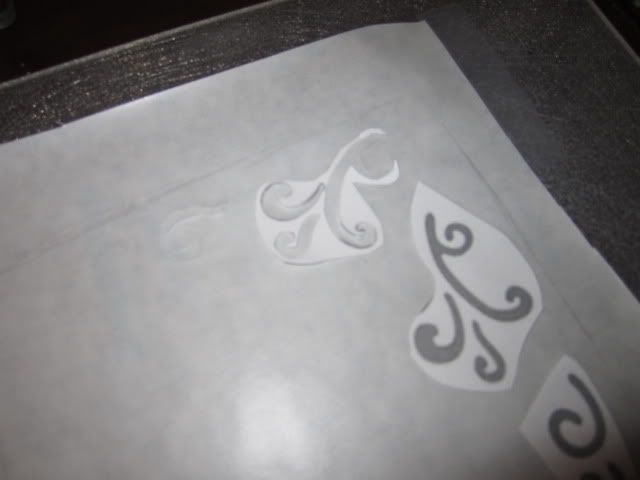
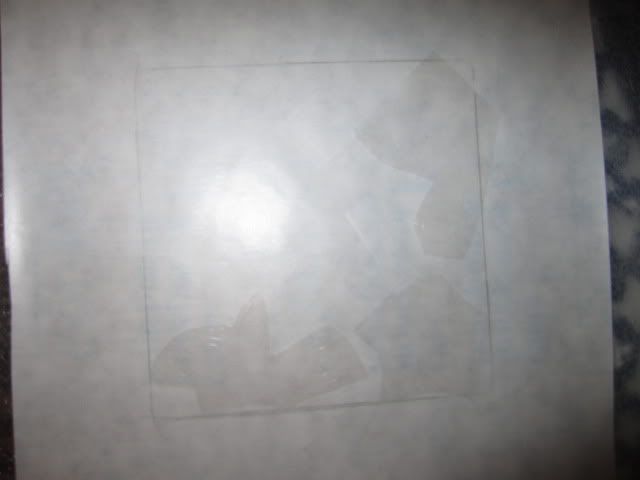
As I've learned, it's okay with you can only remove the plastic adhesive. The paper underneath it stuck like mad and, after spiral 2, I realized that there really was no need to cut out the paper as well, as the paper is removed from the plastic adhesive after I am done, anyway. It was easier to see what had been cut out and which hadn't when I removed the paper as well.
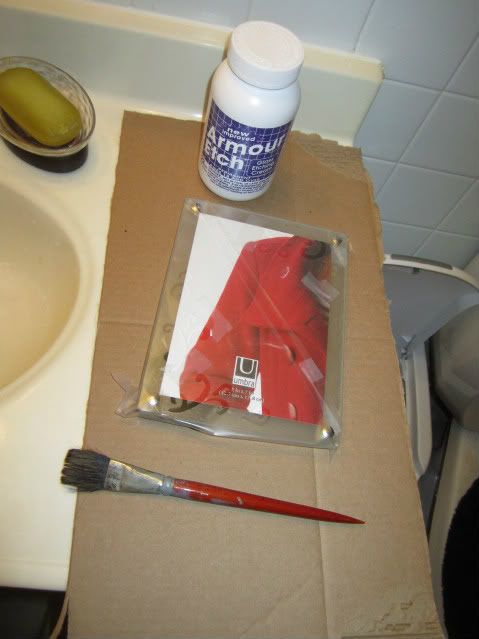
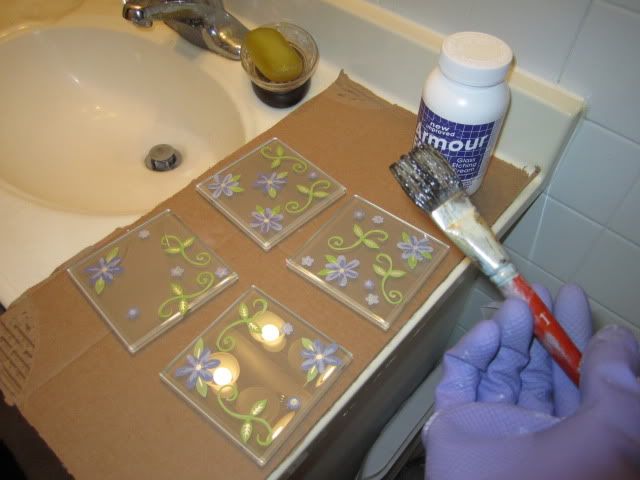
Aside from the wall-to-wall tiles and ceramic, I also used the bathroom for one big reason: its ventilation system. Etching cream smells like Taco Bell farts. It is equal parts sulfuric and plastic and it's not a smell you want emanating throughout your home.
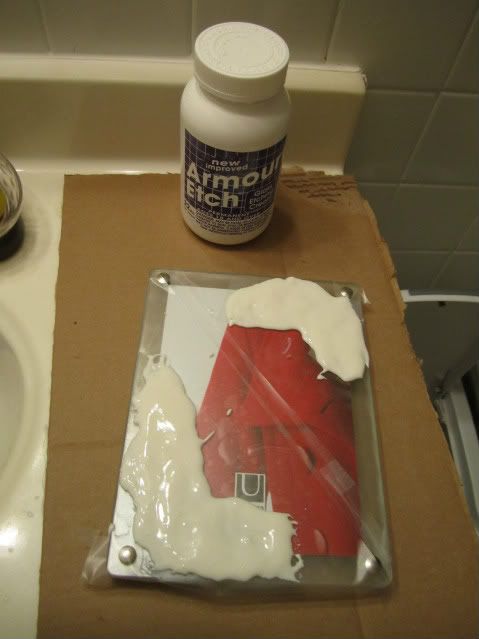
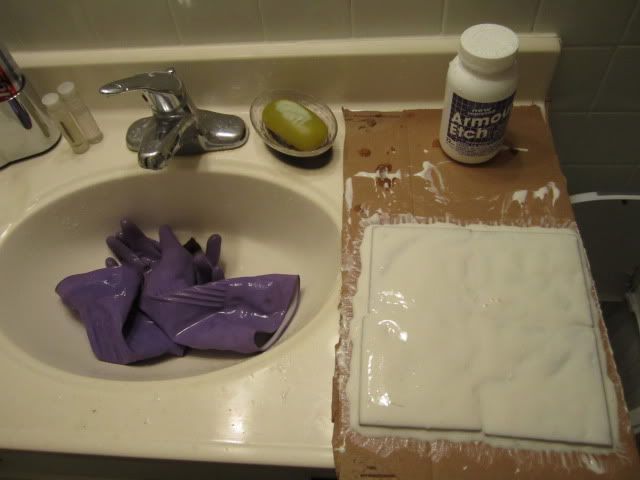
And now, you wait. For some etching cream, the wait time is 5 minutes. For others, it's as quick as 30 seconds. I actually flubbed completely and let it go as long as 10, but I thankfully didn't come into my bathroom to find disintegrated glass. From what I read up on later, leaving it on for long periods of time doesn't do any harm and might actually make the spirals more pronounced.
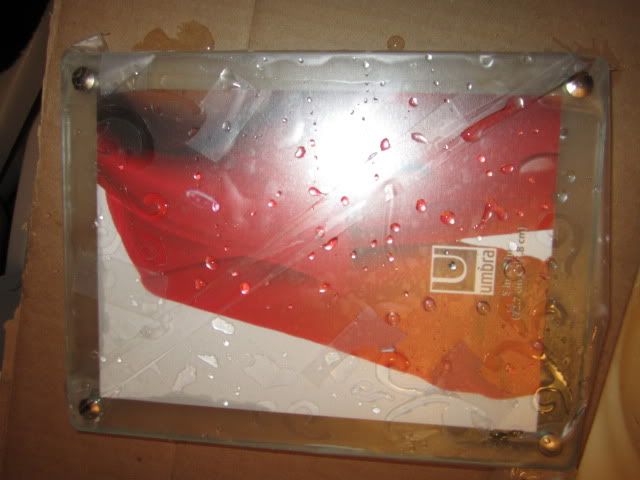
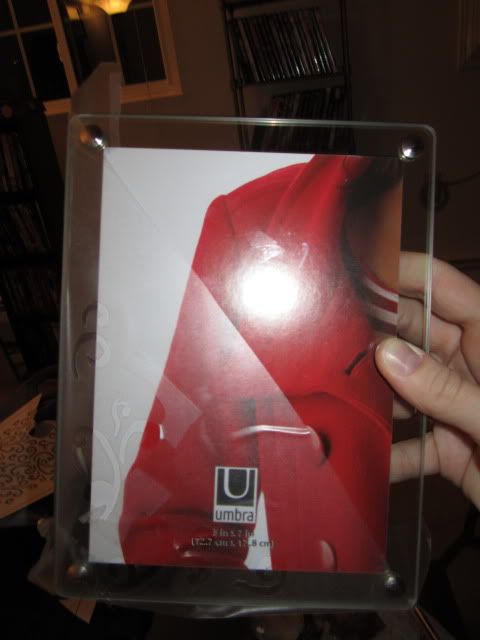
The frame I purchased (which I got off of Amazon) is meant for a 5 x 7 photo. I decided that, since the spirals are better seen when there isn't a photo in the way, I would choose a 4 x 6 picture instead. I choose a picture of myself right before the garter toss. It might seem narcissistic, but it was leftover from the pictures I ordered after the wedding and I'm pretty sure my husband would downright faint if I had ordered even MORE prints -- even if it was for the sake of practicing my glass etching.


I used to do glass etching back when I used to go to camp. We'd design random glass bottles with whatever stencils the older kids had lying around. After camp, I kind of forgot about glass etching. But I stumbled across glass etching again and decided I needed to do glass etching again, starting first with making a spiral-etched frame.
Now, to backtrack, one aesthetic I had in my wedding was, long, flawy, ivy-like spirals. I know that's not exactly the most original aesthetic theme for a wedding, but I loved it simply because it came about organically. I just naturally picked things that had this is ivy-on-the-brick quality about them. After the wedding, I went nutty and purchased a ton of frames with spiral-painted borders (much to my husband's chagrin).
I decided that, for the sake of practicing my glass etching, I should make an etched glass frame with spirals.
Obviously, I was only doing it for the practice.
I outlined the frame on the contact paper in pencil so I could have a general idea of where things would go. I also kept the frame close by, as this particular frame had bolts at each corner, and I wasn't interested in having metal-etching as part of my design.
Cutting with an exacto knife isn't exactly the easiest, let alone cutting paper outlines of spirals that are only taped on with an exacto knife. By spiral 2, I was silently (and then not-so-silently) cursing myself, wondering why I couldn't have had a few basic squares as my main aesthetic.
As I've learned, it's okay with you can only remove the plastic adhesive. The paper underneath it stuck like mad and, after spiral 2, I realized that there really was no need to cut out the paper as well, as the paper is removed from the plastic adhesive after I am done, anyway. It was easier to see what had been cut out and which hadn't when I removed the paper as well.
Aside from the wall-to-wall tiles and ceramic, I also used the bathroom for one big reason: its ventilation system. Etching cream smells like Taco Bell farts. It is equal parts sulfuric and plastic and it's not a smell you want emanating throughout your home.
And now, you wait. For some etching cream, the wait time is 5 minutes. For others, it's as quick as 30 seconds. I actually flubbed completely and let it go as long as 10, but I thankfully didn't come into my bathroom to find disintegrated glass. From what I read up on later, leaving it on for long periods of time doesn't do any harm and might actually make the spirals more pronounced.
The frame I purchased (which I got off of Amazon) is meant for a 5 x 7 photo. I decided that, since the spirals are better seen when there isn't a photo in the way, I would choose a 4 x 6 picture instead. I choose a picture of myself right before the garter toss. It might seem narcissistic, but it was leftover from the pictures I ordered after the wedding and I'm pretty sure my husband would downright faint if I had ordered even MORE prints -- even if it was for the sake of practicing my glass etching.
Monday, January 16, 2012
Recycling Old Clothes, Part 1 (Technically 2): Kitty Superhero Cape
I’ve reached that age where my parents want my childhood bedroom back. Although I can’t take everything until I own a home, I have been bringing a few things back with each visit: some old books here, a out-of-tune guitar there. After Christmas, I came home with a garbage bag filled with old clothing. And by old, I mean old -- middle school old. Junior high old (and yes, I did go to both a middle school and junior high).
I got to thinking about what I wanted to do with these clothes. Since I had such a history with them, I didn’t want to just donate them or throw them out (because, as we’ve already established, I’m a pack rat).
Thankfully, I got a sewing machine for Christmas. I quickly decided that I could both practice my sewing skills (which are about 10 years out of practice) and find a use for my old clothing by creating something new with my old clothing.
Thanks to this website, my first sewing project was making a tote bag out of an old tank top:

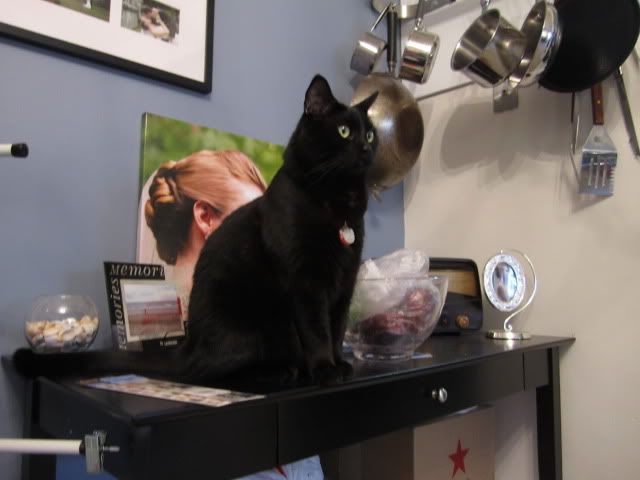
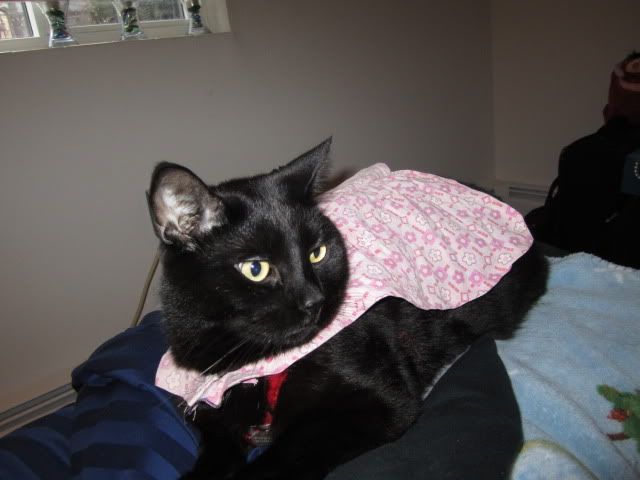
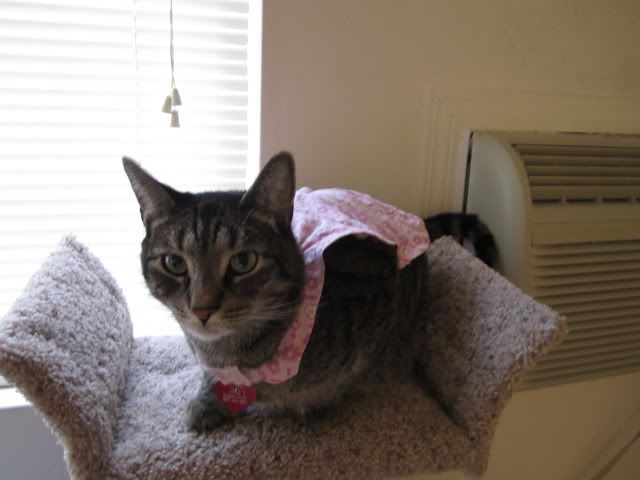
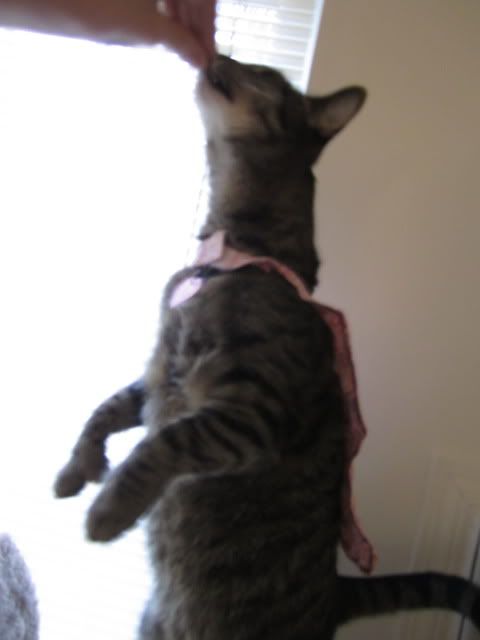
I have two cats, Salem & Milo, one of whom you've already met. Now, suddenly, a tote made out of a tank top seemed pathetic compared to a superhero cape for my cats, which inspired my next sewing project: A superhero cape for my cats.
Sadly, I don’t wear much red to begin with, and I squandered my one red shirt on the tote. After some thought, I decided – hey, I’m making a cape for my cats, I might as well go big or go home.
The result?
I started by cutting off the elastic and setting it to the side. You never know when you might need an elastic.
You’ll be amazed how hard it is to find a cape pattern online, especially one meant for cats. I managed to find this site and based my design off of their pattern.
Since I’m still starting out, I don’t have many of the sewing essentials, like fabric markers or sheers. So, crayola marker and paper scissors will have to do.
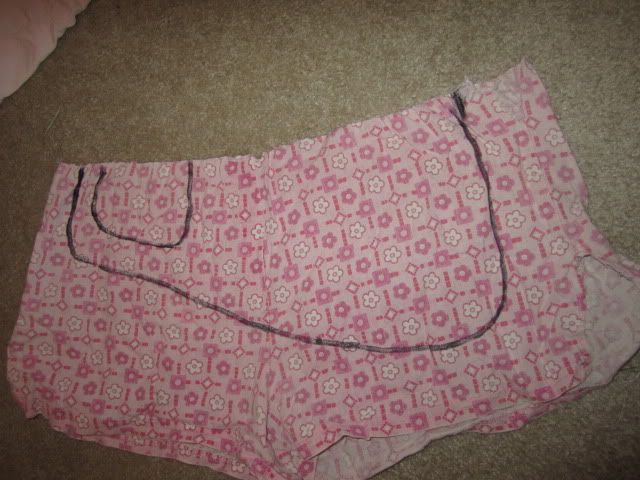
I realized after a few snips that I needed to cut at least an inch around the border so I would have some sort of a hem. Eh, live and learn.
After cutting came the pining of the outer hem. As can be imagined, the side without the marker was the hardest to pin, as I had to eyeball the hem the entire way.
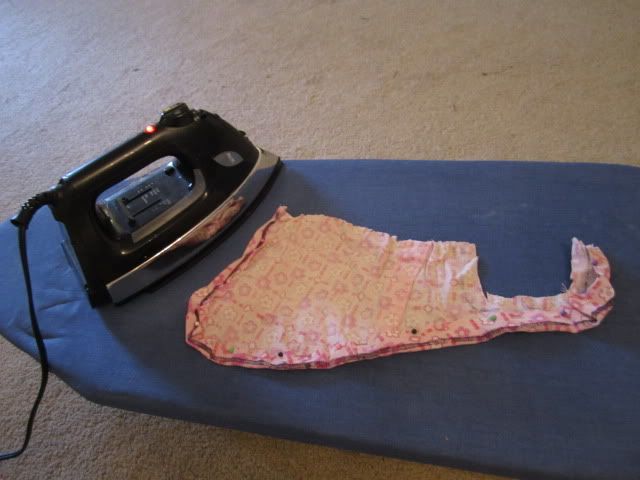
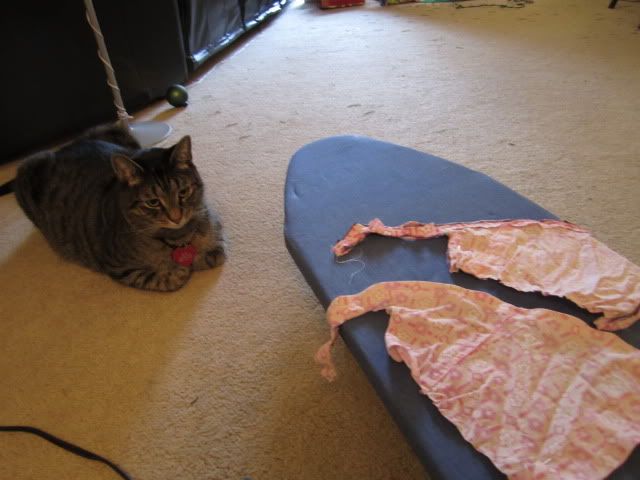
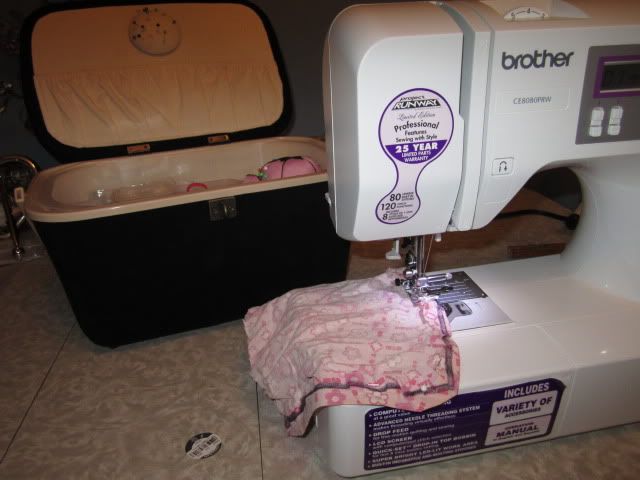
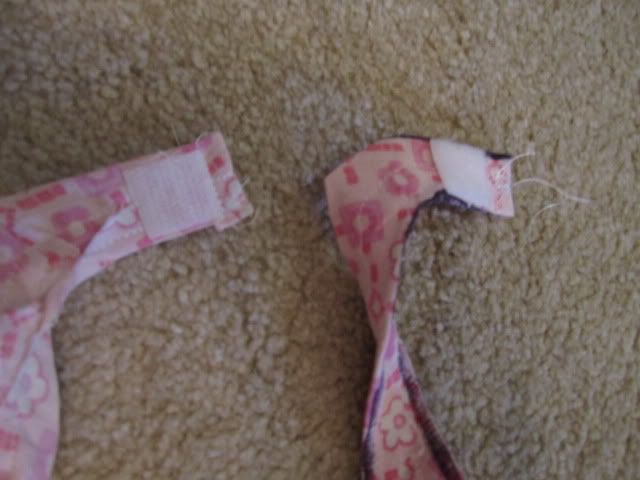
After the outer hem was in place, I pinned, ironed, and stitched the inner hem.
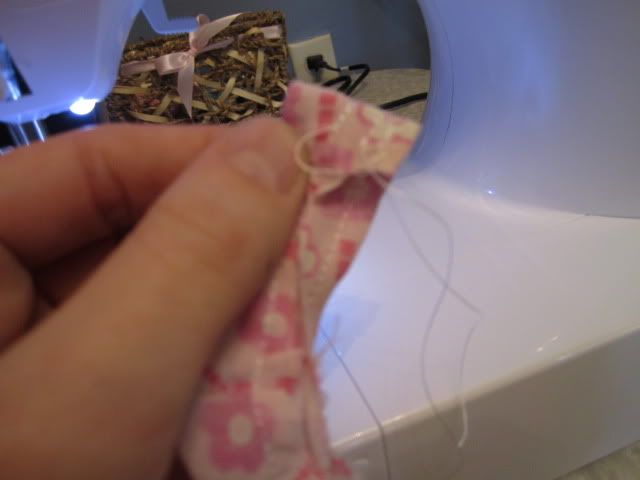
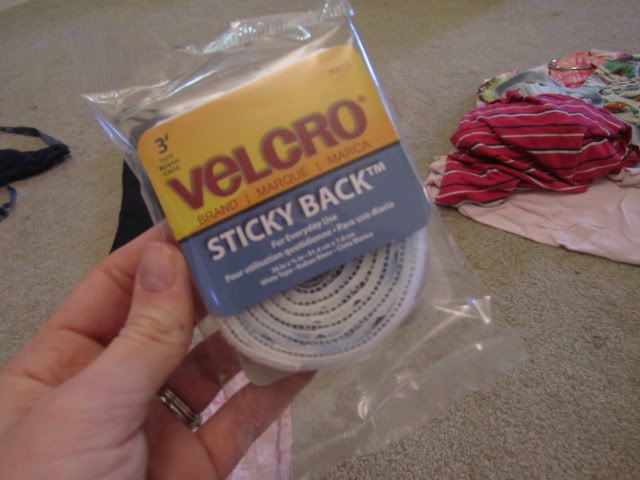
Sticky-back Velcro is honestly my crack. I use it by the metric ton as a teacher. I also love it because the Velcro stays in place when you sew it on.
I must stress, though: the adhesive is great if you’re putting Velcro on a wall, but it will come off within the first use on fabric. The Velcro must be sewed on.
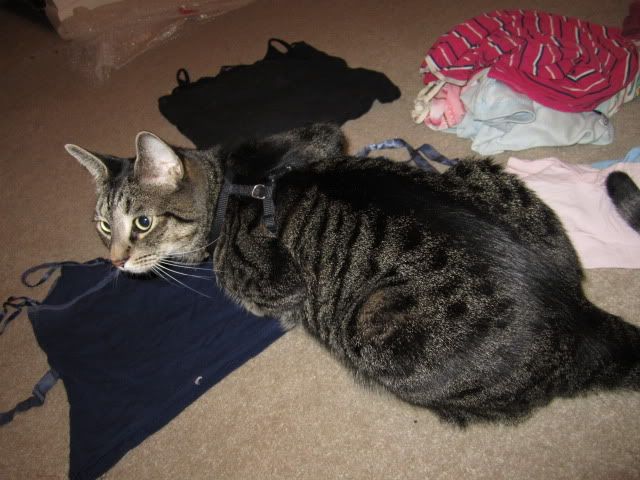
The finished result: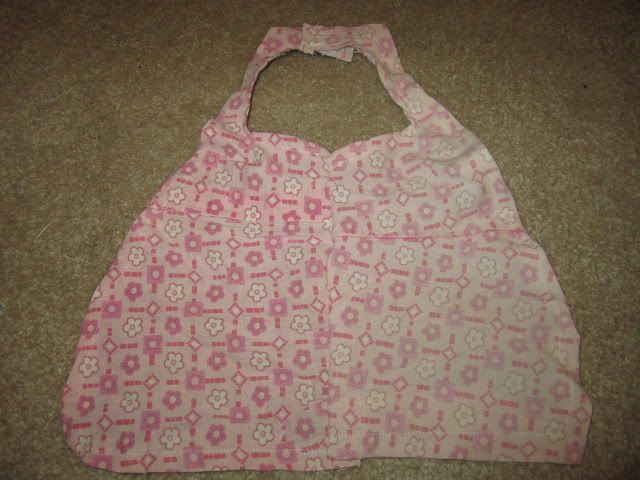
The cats were not exactly thrilled about the cape, but they certainly did not act negatively like I expected. It helped that I gave them plenty of treats before, during, and after.
I got to thinking about what I wanted to do with these clothes. Since I had such a history with them, I didn’t want to just donate them or throw them out (because, as we’ve already established, I’m a pack rat).
Thankfully, I got a sewing machine for Christmas. I quickly decided that I could both practice my sewing skills (which are about 10 years out of practice) and find a use for my old clothing by creating something new with my old clothing.
Thanks to this website, my first sewing project was making a tote bag out of an old tank top:
I have two cats, Salem & Milo, one of whom you've already met. Now, suddenly, a tote made out of a tank top seemed pathetic compared to a superhero cape for my cats, which inspired my next sewing project: A superhero cape for my cats.
Sadly, I don’t wear much red to begin with, and I squandered my one red shirt on the tote. After some thought, I decided – hey, I’m making a cape for my cats, I might as well go big or go home.
The result?
I started by cutting off the elastic and setting it to the side. You never know when you might need an elastic.
You’ll be amazed how hard it is to find a cape pattern online, especially one meant for cats. I managed to find this site and based my design off of their pattern.
Since I’m still starting out, I don’t have many of the sewing essentials, like fabric markers or sheers. So, crayola marker and paper scissors will have to do.
I realized after a few snips that I needed to cut at least an inch around the border so I would have some sort of a hem. Eh, live and learn.
After cutting came the pining of the outer hem. As can be imagined, the side without the marker was the hardest to pin, as I had to eyeball the hem the entire way.
After the outer hem was in place, I pinned, ironed, and stitched the inner hem.
Sticky-back Velcro is honestly my crack. I use it by the metric ton as a teacher. I also love it because the Velcro stays in place when you sew it on.
I must stress, though: the adhesive is great if you’re putting Velcro on a wall, but it will come off within the first use on fabric. The Velcro must be sewed on.
The finished result:
The cats were not exactly thrilled about the cape, but they certainly did not act negatively like I expected. It helped that I gave them plenty of treats before, during, and after.
Subscribe to:
Posts (Atom)