As a girl who suffers from what I call Audrey Hepburn Syndrome, I have an obsession with pearl necklaces. And, after saving
that excess bit of chain from the second belly chain, I knew exactly what my next project would be.
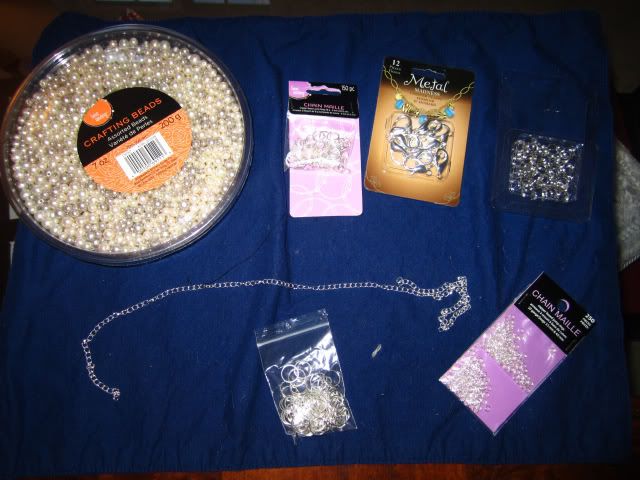
For this, I needed: the excess chain, lobster clasps, split rings, small jump rings, medium jump rings, pliers, wire cutters, and fake pearl beads.
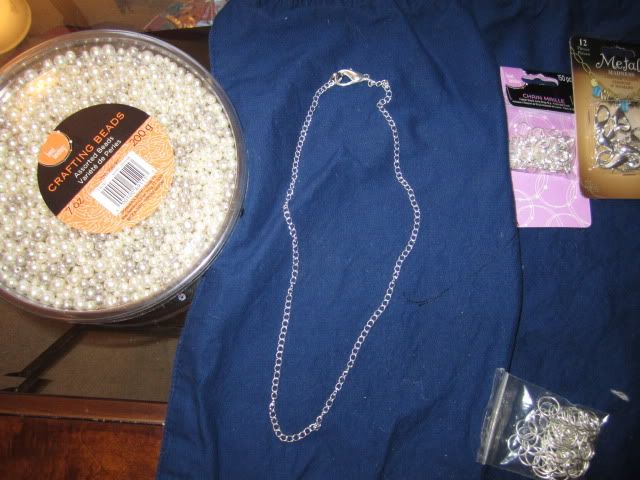
I first measured exactly how long I wanted the necklace to be and clipped accordingly. I used small jump rings to attach the clasp and loop to their respective ends of the chain. I purchased large lobster clasps because there's nothing more frustrating than those tiny clasps that most necklaces have. And since I have more split rings than I know what to do with, I decided use to one of them as my loop.
I recommend putting on your chain immediately after and see if the length is to your liking. Now is the time to clip the chain and reattach the clasp.
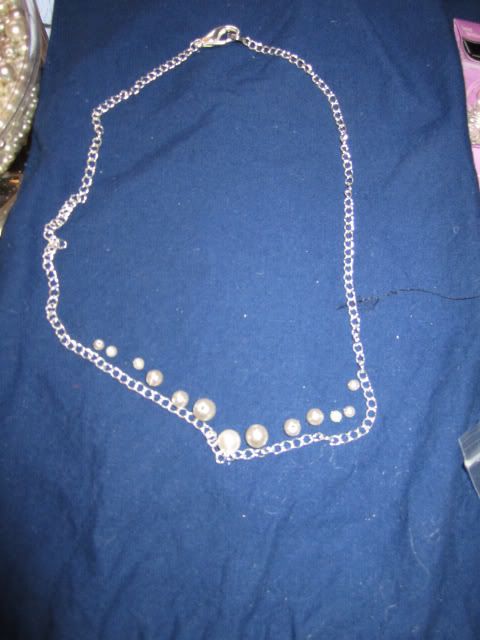
To figure out the pearl bead's layout, I placed the beads inside the chain according to what pattern I wanted. I say the inside because, if placed anywhere else, they'll roll away and leave you frustrated.
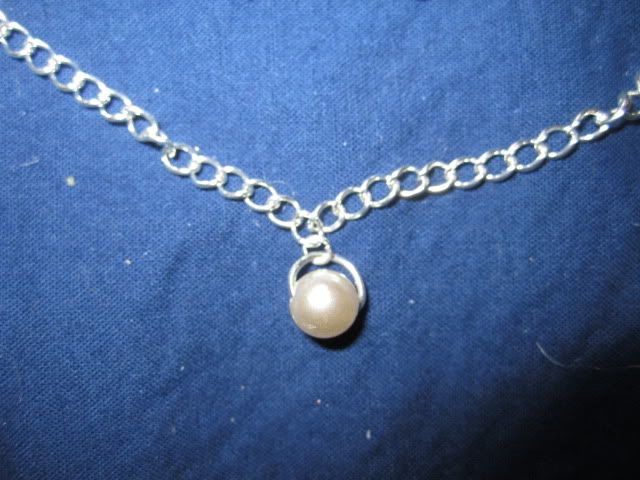
I made sure to attach the center bead first. I found the exact middle of the chain and attached the middle pearl onto the chain with the small jump rings before working my way out.
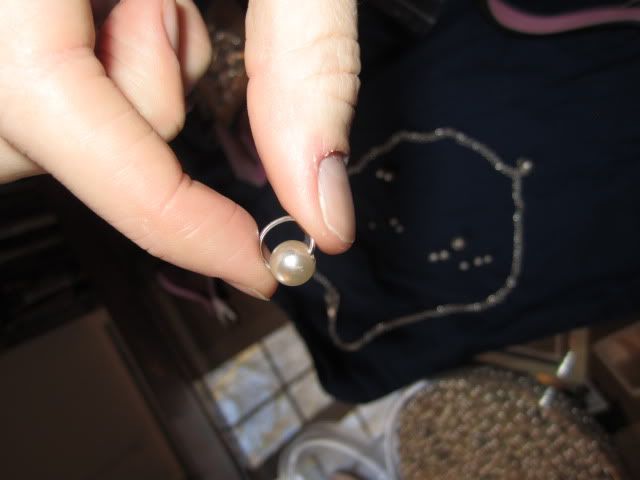
To attach the medium jump ring to the pearl: open the jump ring with pliers. Hook one end into the bead. Then, using your hands (since a slip of the pliers will quickly strip the bead of its luster), bend the other end of the jump ring to the other side of the hole. Tighten (carefully) with pliers, and attach to your chain with the small jump rings.
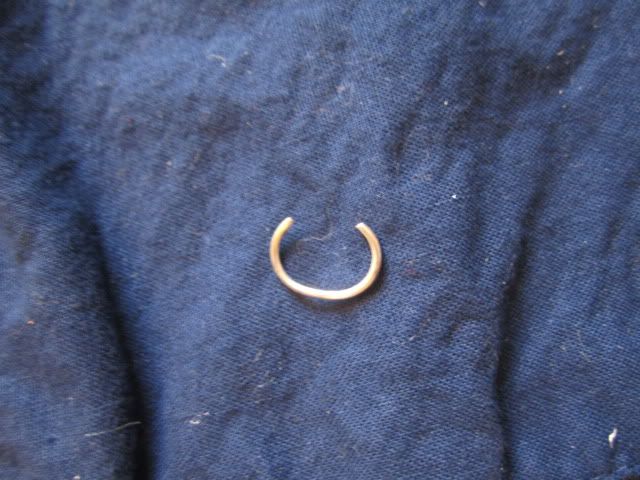
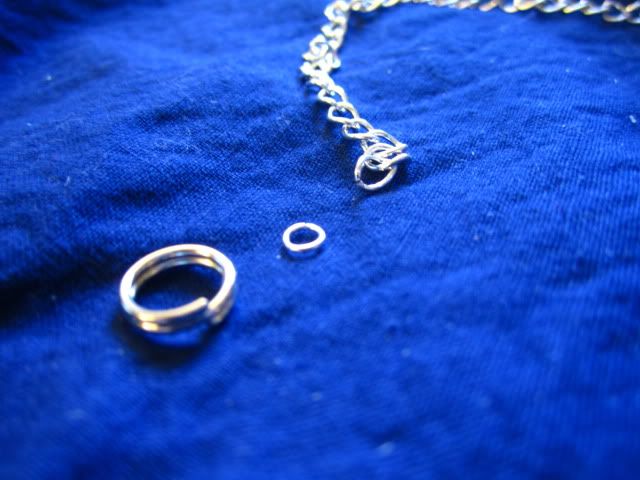
And when I say "open the jump ring" -- I mean "turn it into the letter C" (as pictured).
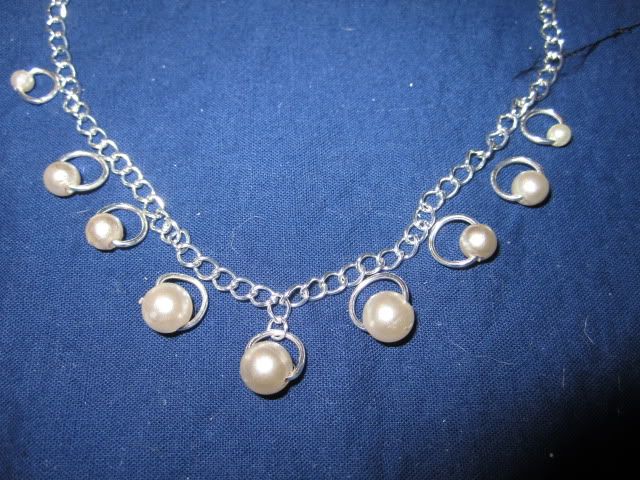
The best way to go about the rest of the beads is to count out how many chain links distance that each bead should be. Just eyeballing it will give you a headache. Mine are space 4 chain links apart.
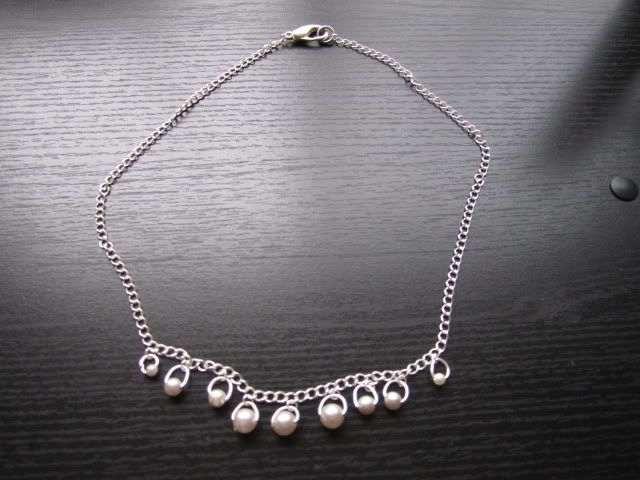
The smaller the bead, the smaller the beading hole, and the more frustrating the beading experience. Hence why I nixed the last 4 small beads in my design. After getting tiny bead #2 hooked on a jump ring, I declared my beading done and tossed the other tiny beads into its bin.
At some point I might gain the gumption to attach those last 4 tiny beads on the necklace, but definitely, definitely, definitely not now.

It's a different take on the pearl necklace, and I must admit I'm thrilled to find an excuse to wear it. It's not exactly something you'd wear on, say, a breakfast trip to Tiffany's, but it's a great workplace accessory.

No comments:
Post a Comment