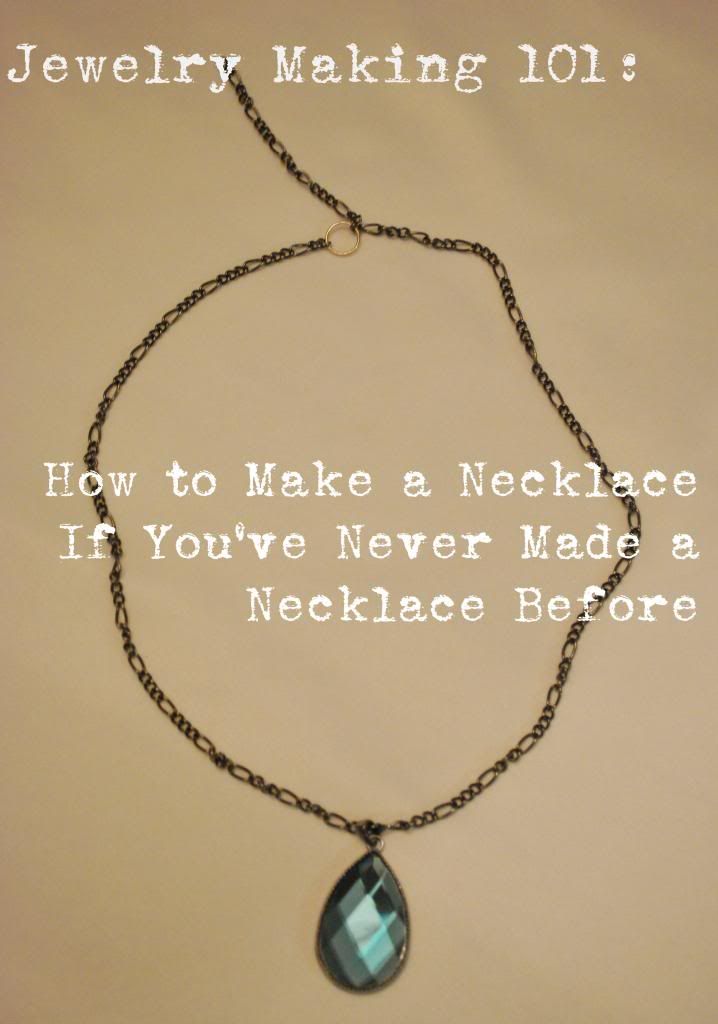
This project is for the absolute beginner.
I remember dabbling with jewelry, way, way back in the day. I didn't know what I was doing and ended up
buying split rings when I wanted jump rings. The hardest part is that most blogs and craft websites show tutorials for complex projects -- but they never teach you the basics.
And I must admit: I almost never talk about the basics during any of my jewelry posts.
So, here we go: the basics.
First things first:
unless you're already skilled at what you're doing, buy jump rings for all your connecting needs. They are easy to open, easy to close and, to be frank, an essential for jewelry making. Almost everything -- from pendants, clasps, charms -- is attached to the necklace chain by jump rings.
Next thing:
Buy pliers. Buy two sets of pliers. I like having one bent-nose as well as one needle-nose. Does it make a difference for projects of this level? Not really. You can buy two of the same if you want (or scrounge around for two random ones in a toolbox somewhere). I just like having some variety in case a project calls for one and not the other.
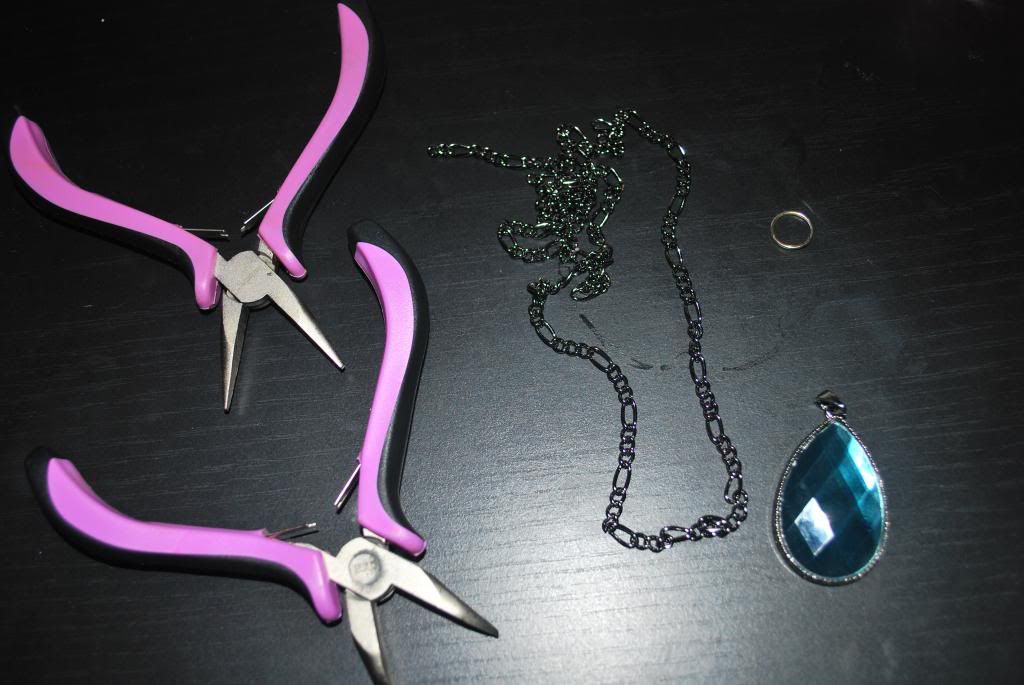
For this project, you will also need a chain, a pendant, and the above mentions pliers and one (count it: one) jump ring. Like I said: very, very simple. Go long (literally) for this project and get a 24" chain. This necklace will have no clasps, which means it needs to slip over your head easily. If you have a very long (30"+ chain), you can bring it down to size by breaking one of the links with wire cutters at the 6" mark.
The first (real) step is the simplest: slide the pendant onto the chain.
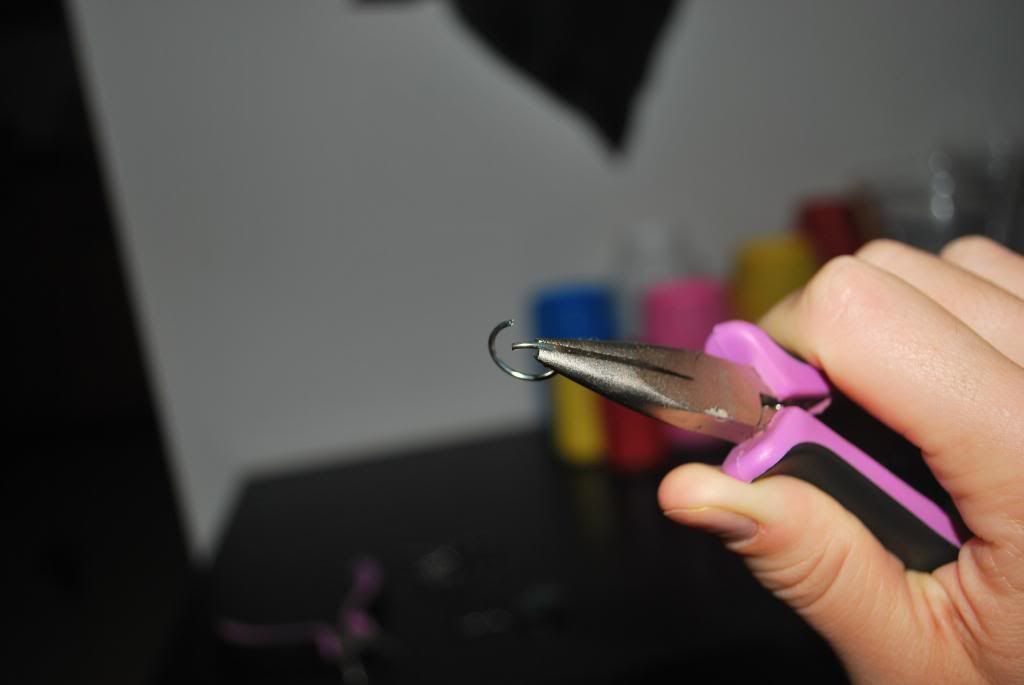
Now, we need to connect the two pieces of the chain, which we will do with our jump ring. Opening a jump ring is very easy. With a set of pliers in each hand, clamp onto opposite sides of the jump ring, with the "opening" of the ring facing up. Twist one hand clockwise and the other counter-clockwise. It'll look like someone hacked a half a spiral off.
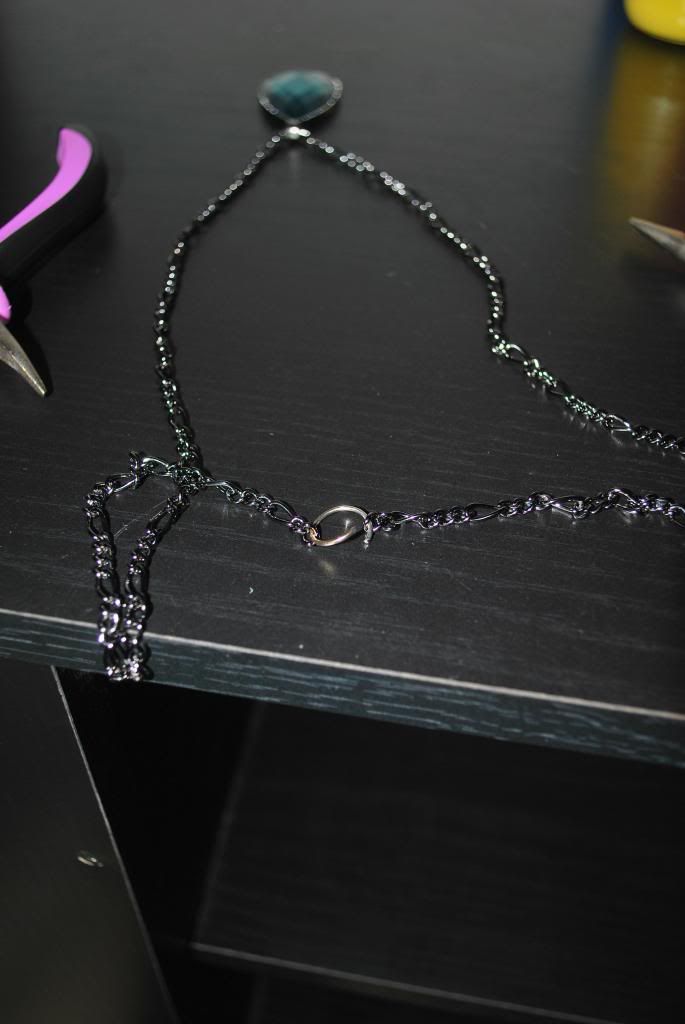
The next step is almost as easy as the first one: loop each side of the jump ring through each of the last respective link's holes.
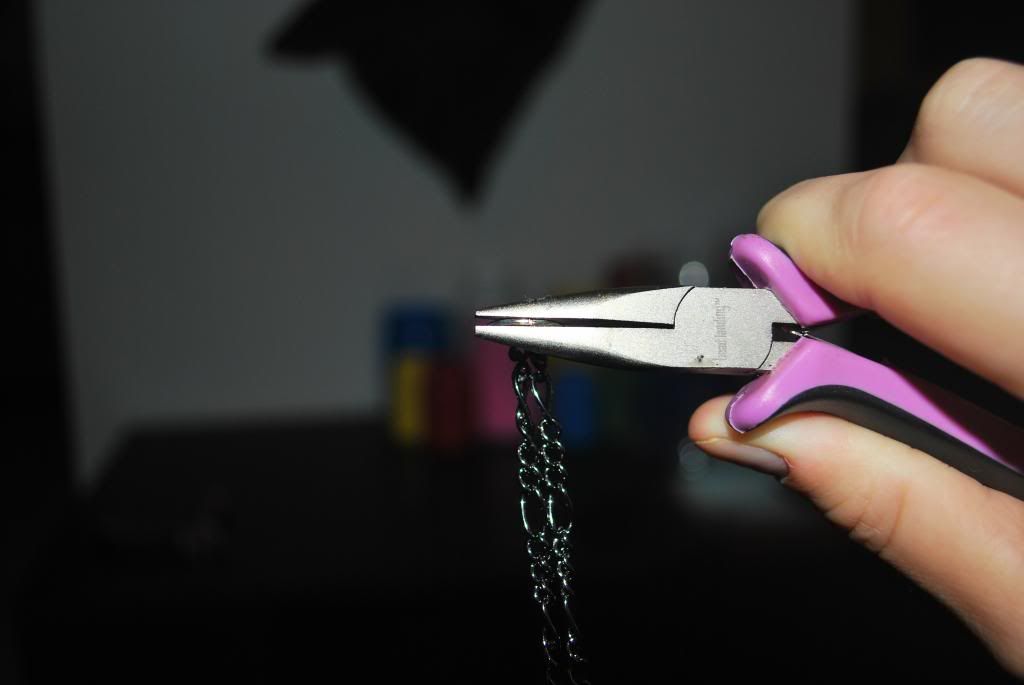
Closing the jump ring is just as simple as opening it: with a set of pliers in each hand, twist in the direction opposite of how you opened it. You can also cheat and just squish the jump ring with one of the pliers, but you're likely to get an uneven closing.
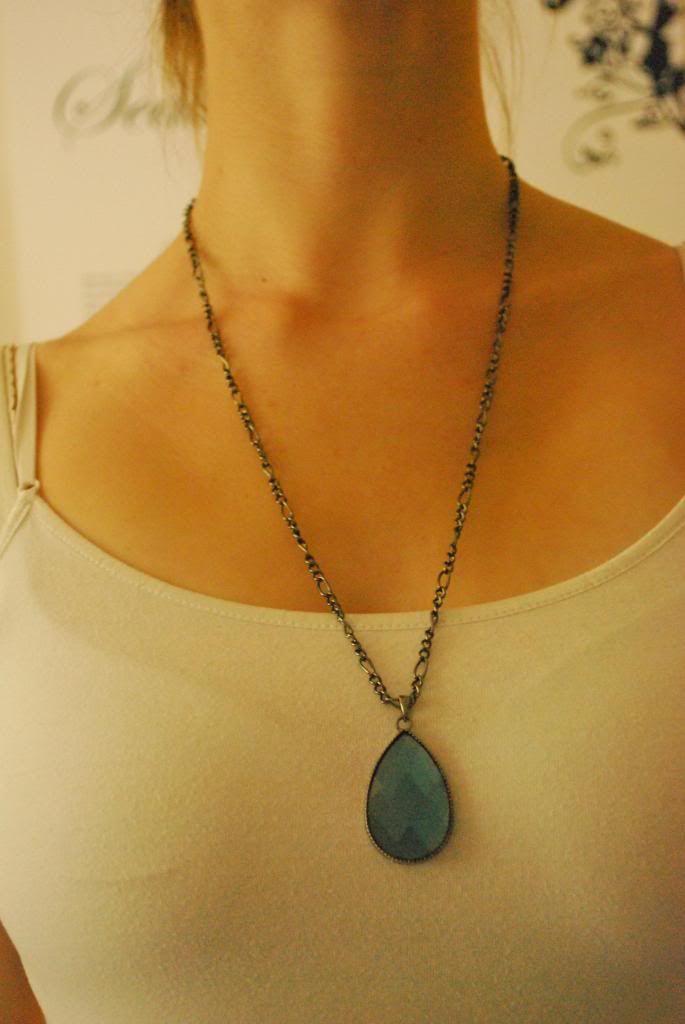
Now you have a beautiful, hand-made necklace. You've learned the basics, so now it's time to challenge yourself. Create a necklace with a clasp (instead of connecting the two ends of the chain with a jump ring, use smaller jump rings to connect the end of the clasps to each end of the chain). Or try a few of the creations I have made on this site (under the tag of "jewelry").

This is great! I hate how on other tutorials everyone assumes that the basics are just common sense! I have always wanted to get into jewelry making but it honestly intimidates me! I go to the craft store and walk around the bead section and get so overwhelmed. I think I am gonna try to make a simple necklace and see how it turns out! lol
ReplyDelete