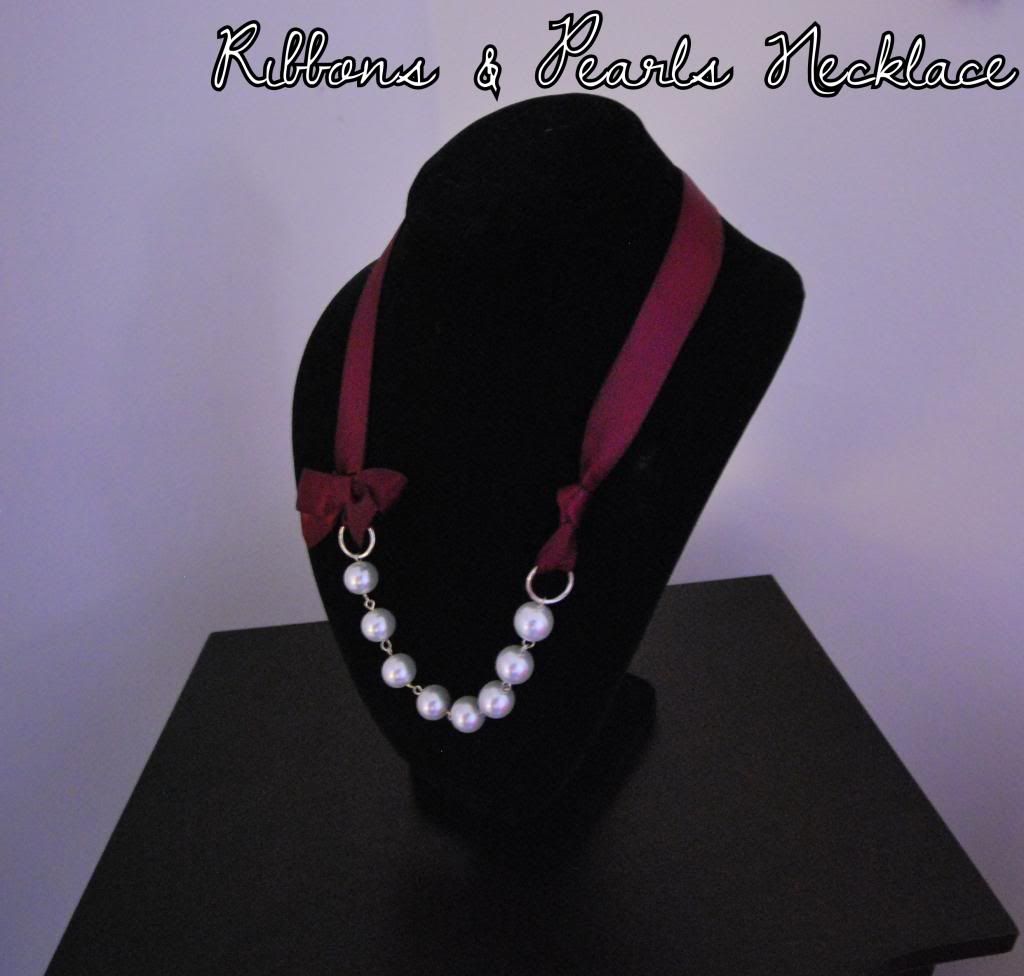
Just after making the
tile necklace, a friend of mine showed me a picture of a necklace with one simple request: figure it out.
Like many things of Pinterest, my friend found it in the crafts section, only to find out that the picture did not link to any tutorial. I spent a little while breaking down what I would need and went to work making two of these necklaces (one for me, one for my friend's daughter).
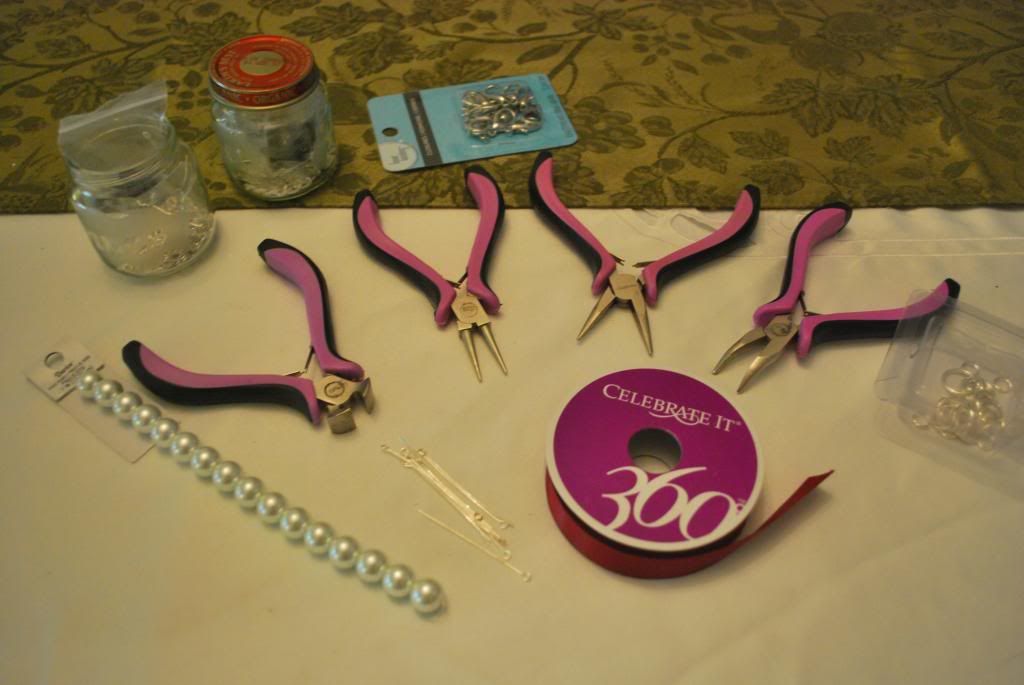
For this, you will need:
- needle nosed pliers, two sets of flat-nosed pliers (or flat-nosed and bent-nosed, if you're me), and wire cutters
- fake pearl beads
- eyelet wires
- jump rings
- ribbon clasps
- ribbon
- lobster clasps
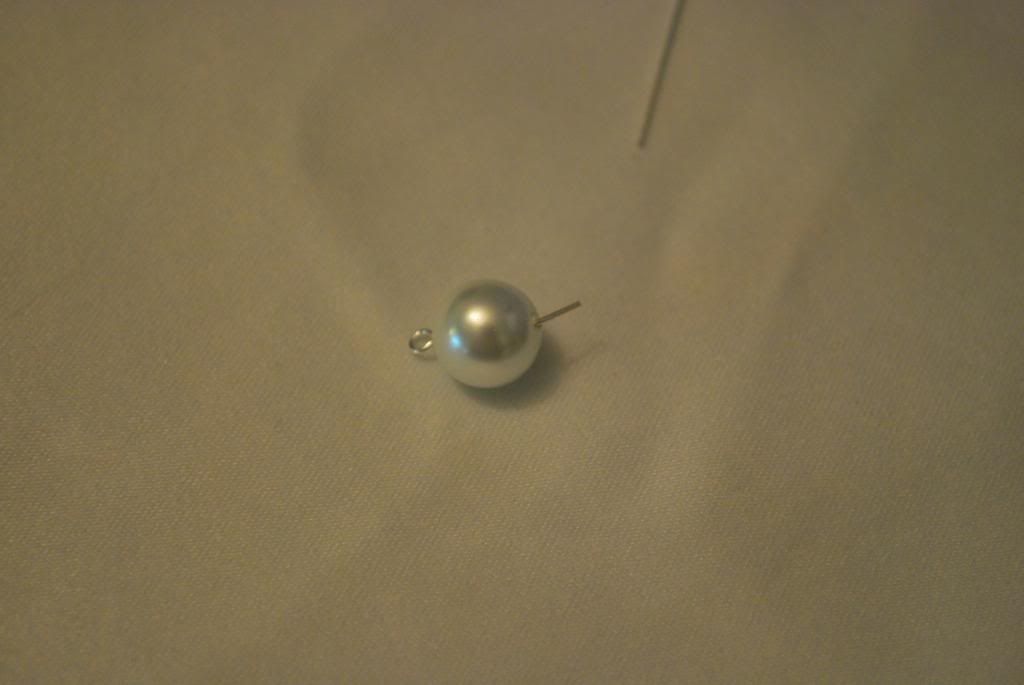
Since this is my second eyelet tutorial, I'll try not to repeat myself too much: Thread the eyelet through the bead, bend the wire 45*, and cut the wire roughly a centimeter from the bead.
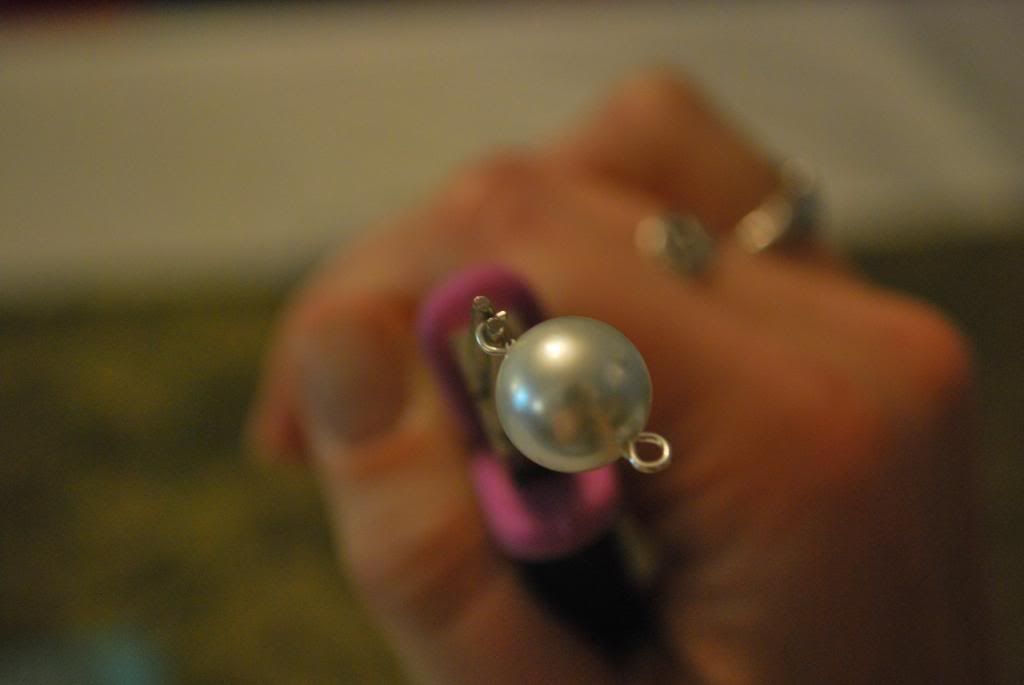
Using your needle-nosed pliers, twist the wire in the direction opposite of the bend. Once you have a second pearl ready, link the wire with the loop of the first pearl before closing it completely, like with the
tile necklace.

Once you have attached 4 to 8 beads (depending on your aesthetic preferences/whether or not you're making a kid's necklace), open two jump rings and attach one to each end.
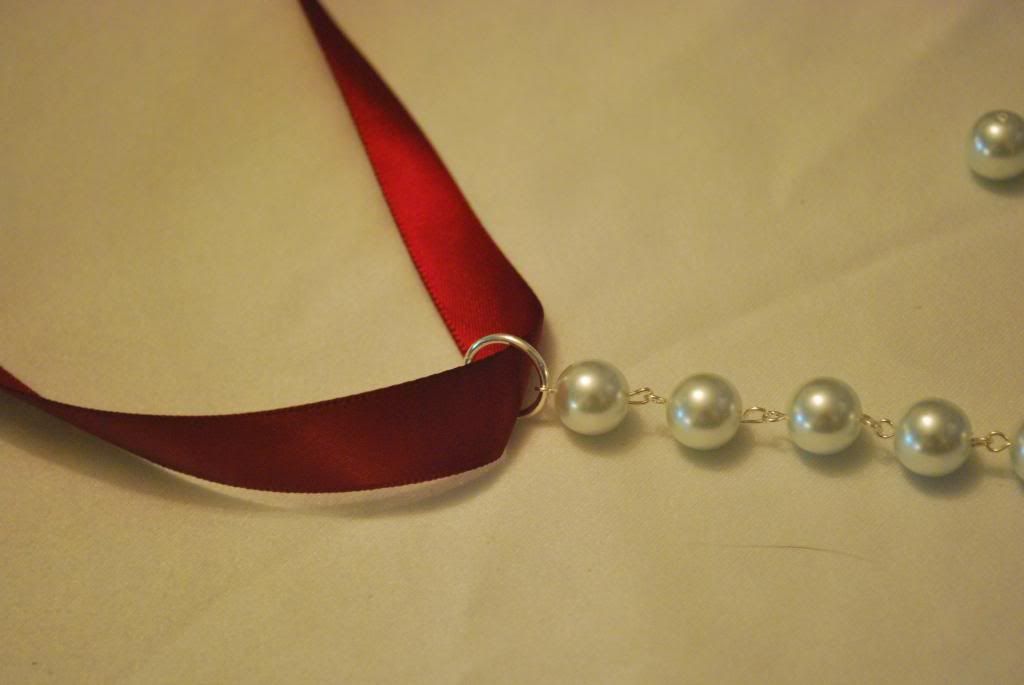
Close the jump rings and thread ribbon through each jump ring's hole. Give yourself at least 10" of folded ribbon. You can always trim the ribbon; you can't make ribbon reappear.
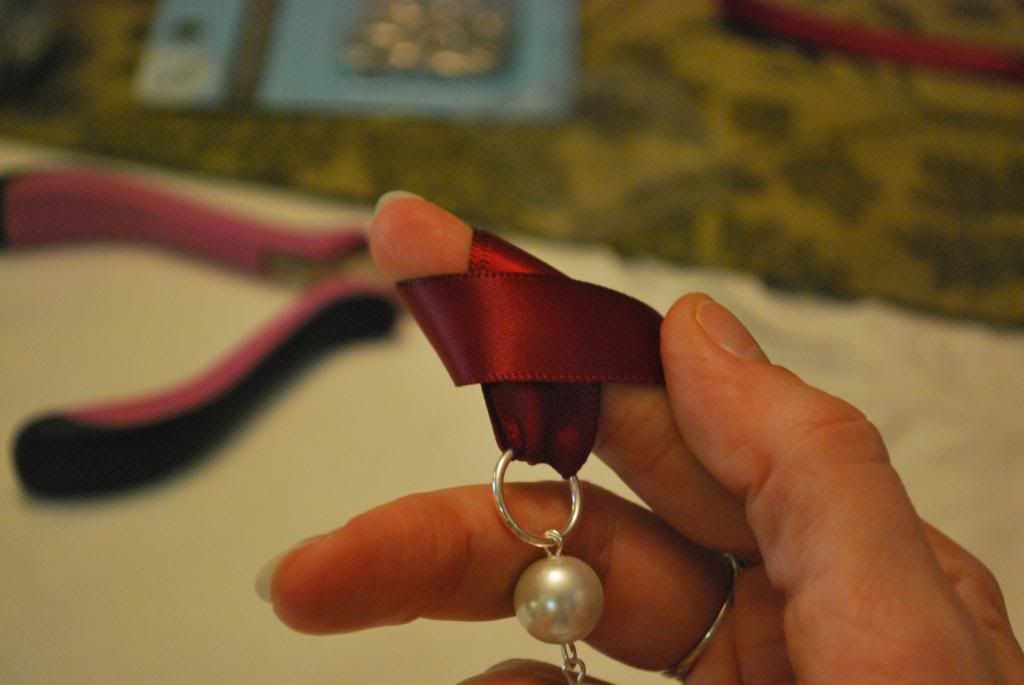
Knot the ribbon on one side. The best way to get a neat knot is to wrap the folded ribbon around your finger, keeping the ribbon flat. Gently remove your finger and feed the ribbon through the hole you created.
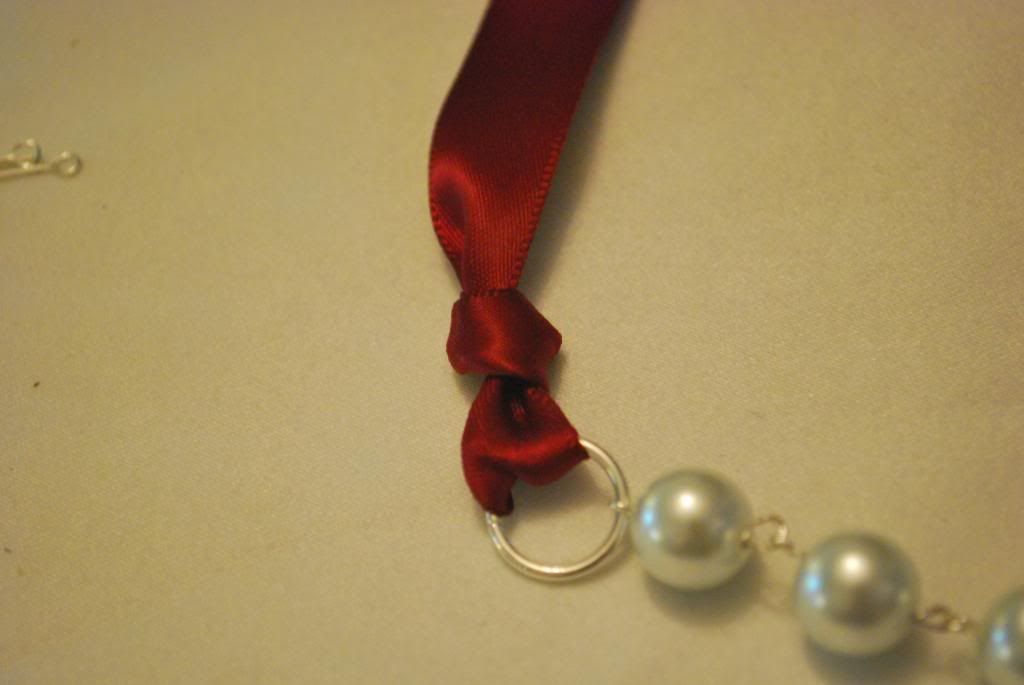
Try to keep the knot as close to the jump ring as possible.
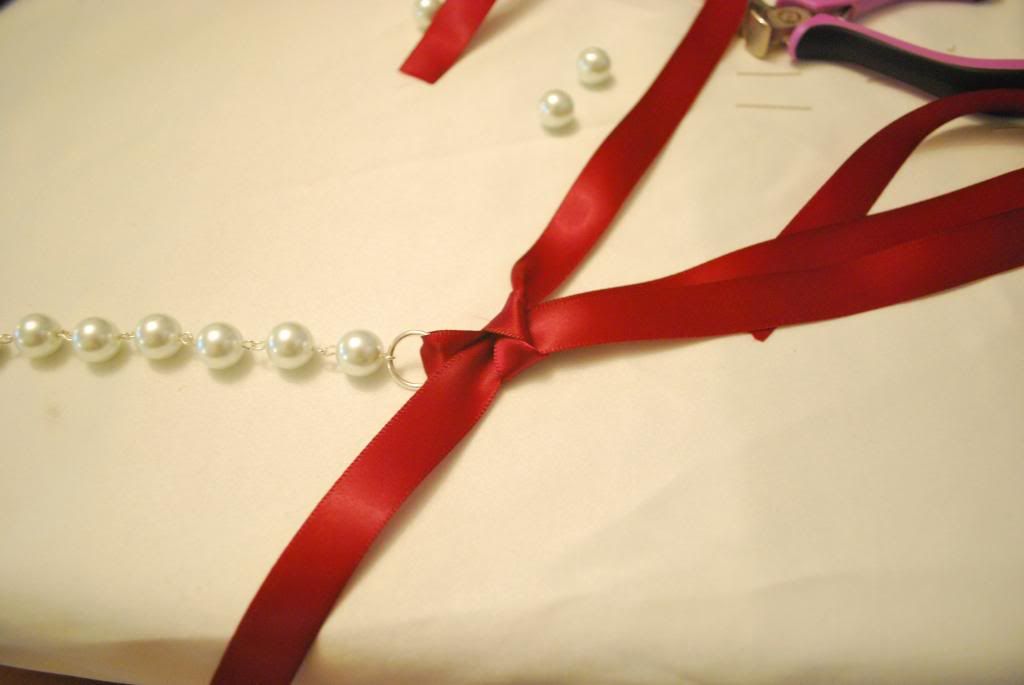
Create a bow on the other side. Cut roughly 6" of ribbon (however, always err on the side of longer) and tie a simple knot around the folded ribbon, so that the short ribbon is perpendicular with the folded ribbon.
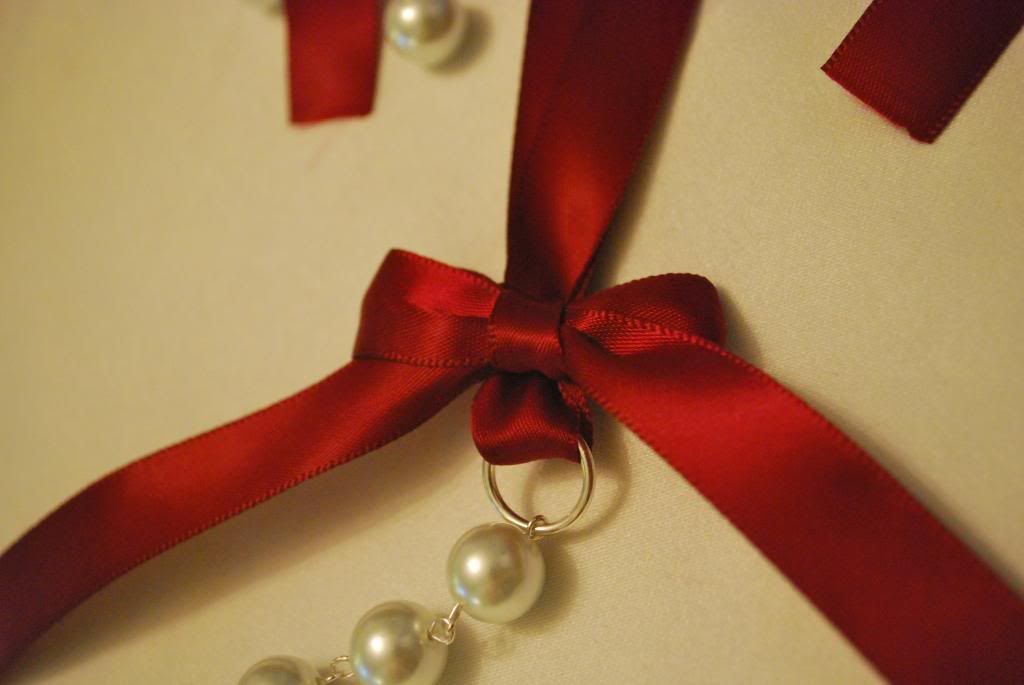
Tying the bow will take a little finagling. Some find that doing "bunny ears" instead of "around the mountain and through the cave" makes a neater bow. Find what works best for you and trim the excess. Sew a quick stitch or two along the seams of the center portion of the bowl to keep it in place.
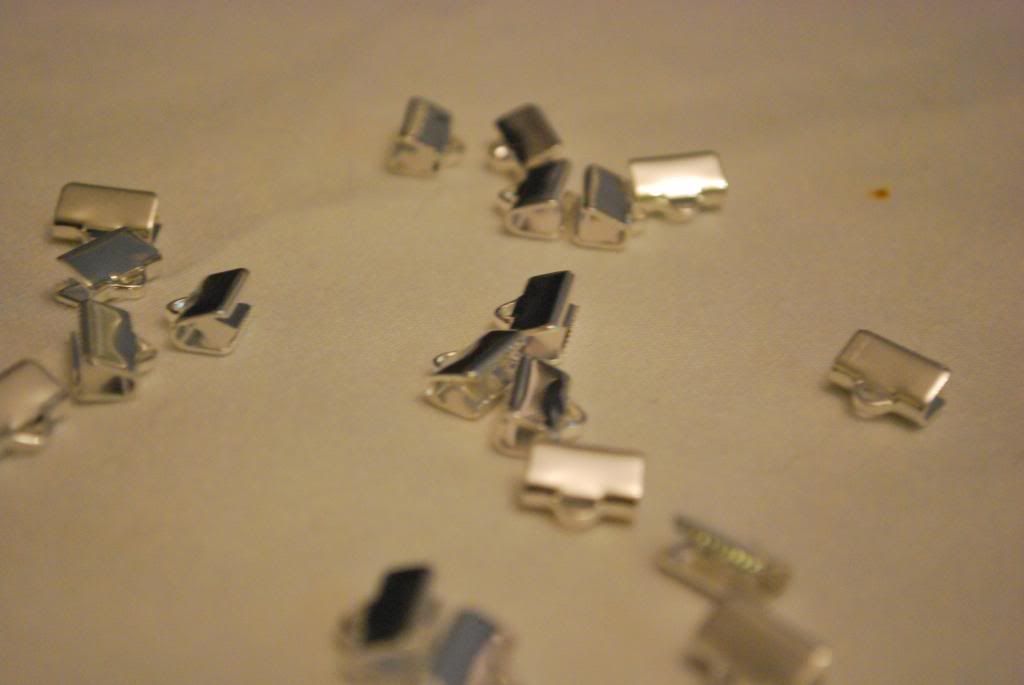
And now, the ribbon clasps: I ended up having to order these online, because I could not find them anywhere. Word to the wise: measure your ribbon with a ruler before ordering the ribbons. I eyeballed the length and ended up with slightly smaller ribbon clasps.
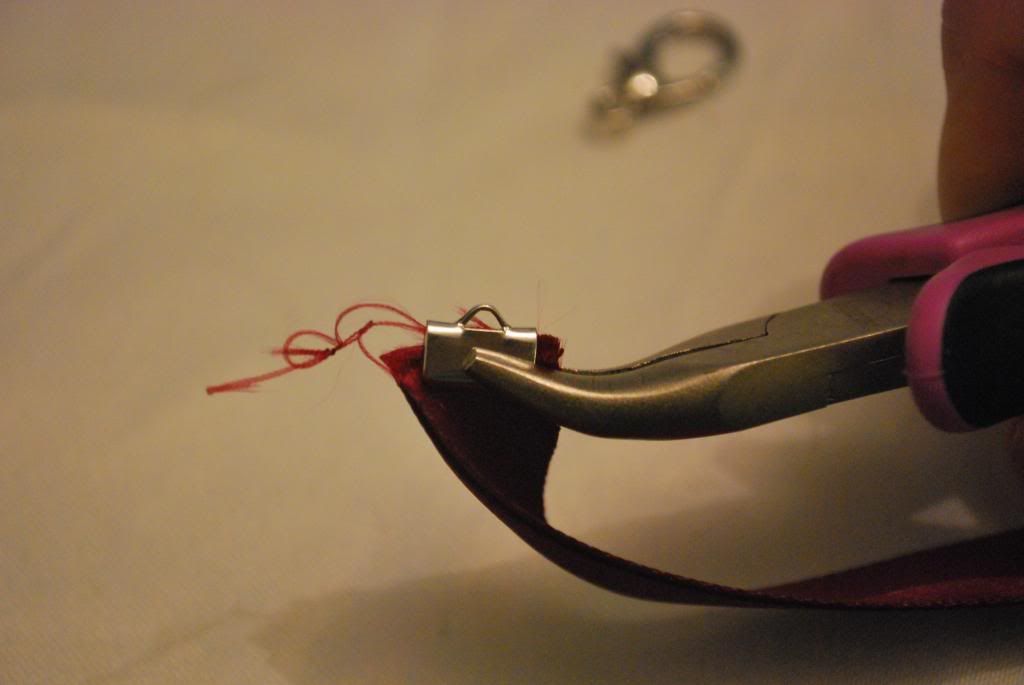
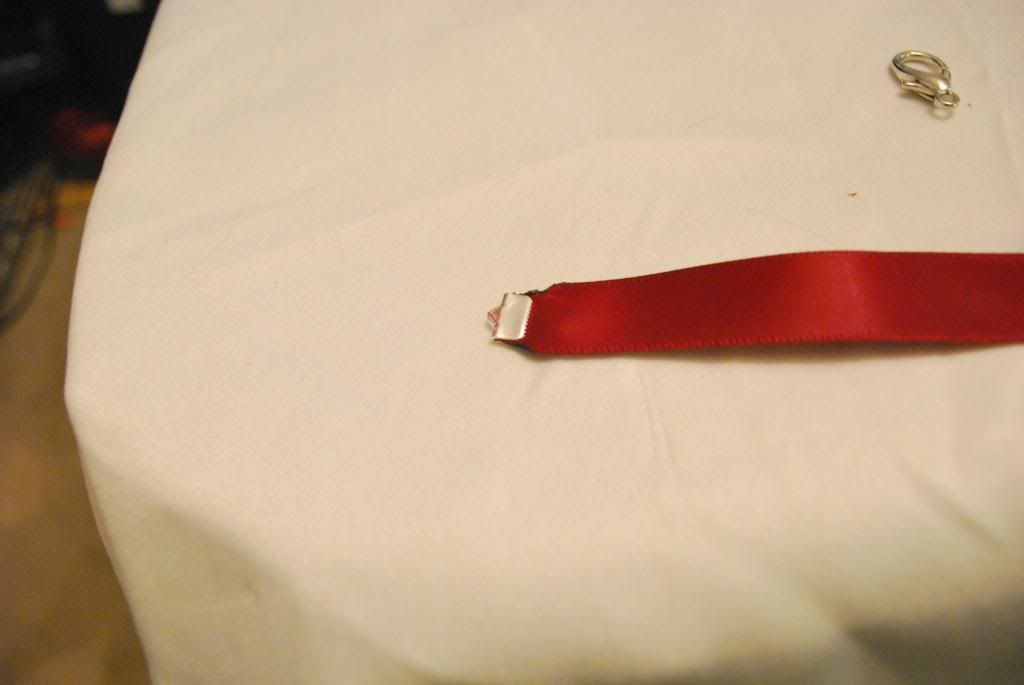
Trim the folded ribbon and line it up with the ribbon clasps. Squeeze it shut using pliers. Squeeze at different areas of the clasp. Give the clasp a gentle tug to make sure it stays on.
Now, if you're me and bought clasps that were too small, you can use a grill lighter (or any lighter/fire) to solder the ribbon. I suggest doing this as well to the edges of the bow to prevent any fraying.
Just be careful to only singe the ribbon. Actually lighting it on fire will result in more ribbon than you anticipated getting soldered.
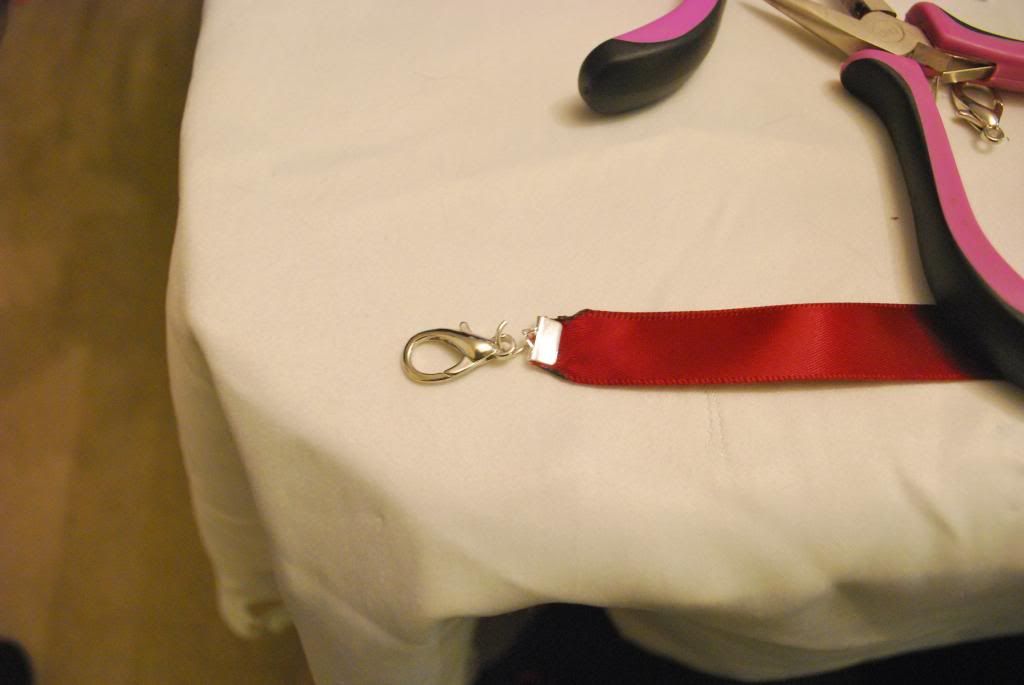
Open a jump ring and attach a clasp on one end, and the loop on the other.
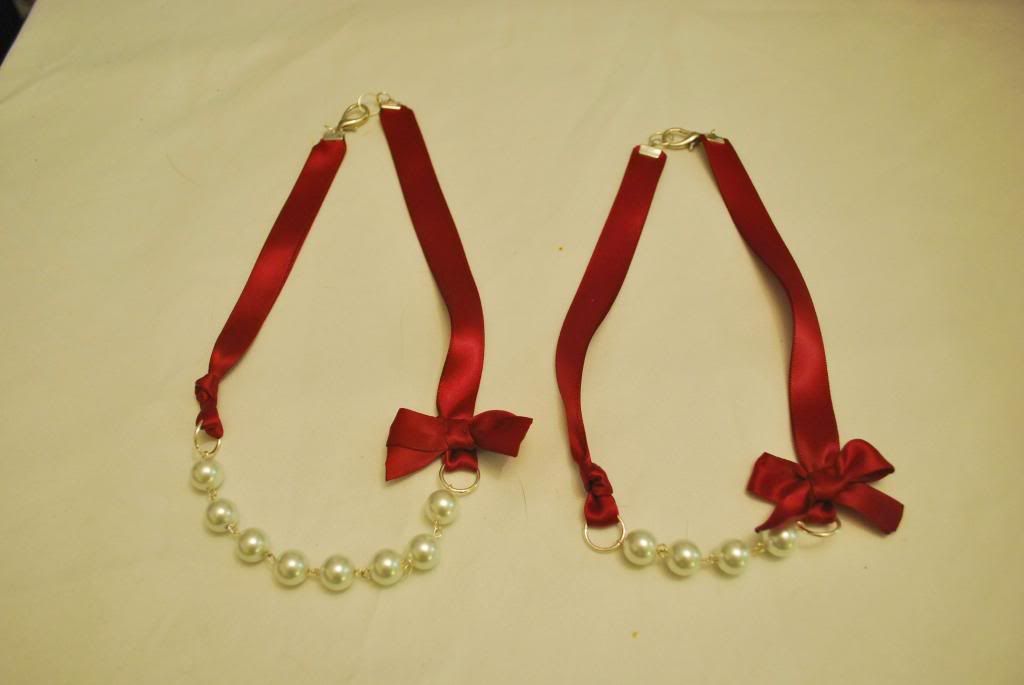
And there we go! I made my giant one first, figuring out the kinks, and then proceeded to make my friend's daughter's necklace.
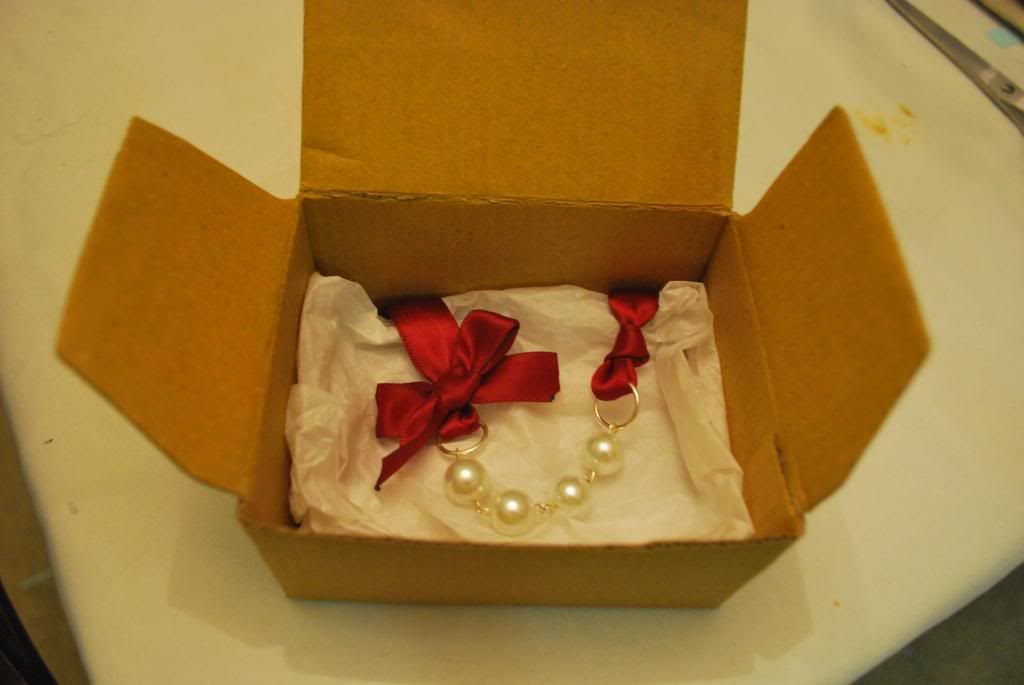
It was just luck that I had a small box hanging around from a recent order. I packed it with tissue paper, tucked the back portions into the underbelly, and wrapped it up. Perfect little accessory, and just in time for her second birthday to boot!

No comments:
Post a Comment