I have a lot of shirts that I absolutely love, but really can't ever wear again. These are shirts that I bought when I was 16. At 16, these shirts were already too short for me to wear (when you're 5'11" and all torso and the current trend in shirts is "almost midriff-baring!", clothing shopping can be tough). After a late-in-the-game, 2 inch growth spurt at 17, these shirts became far too short for me. I was okay showing off half of my midriff as a teenager, but I'm not-so-okay showing it off now, at 26. I definitely can't go into my classroom wearing them. So I decided that the only thing to do (aside from the altruistic act of giving them to charity) would be to cut up my shirts and piece them together, like a cotton version of Frankenstein.
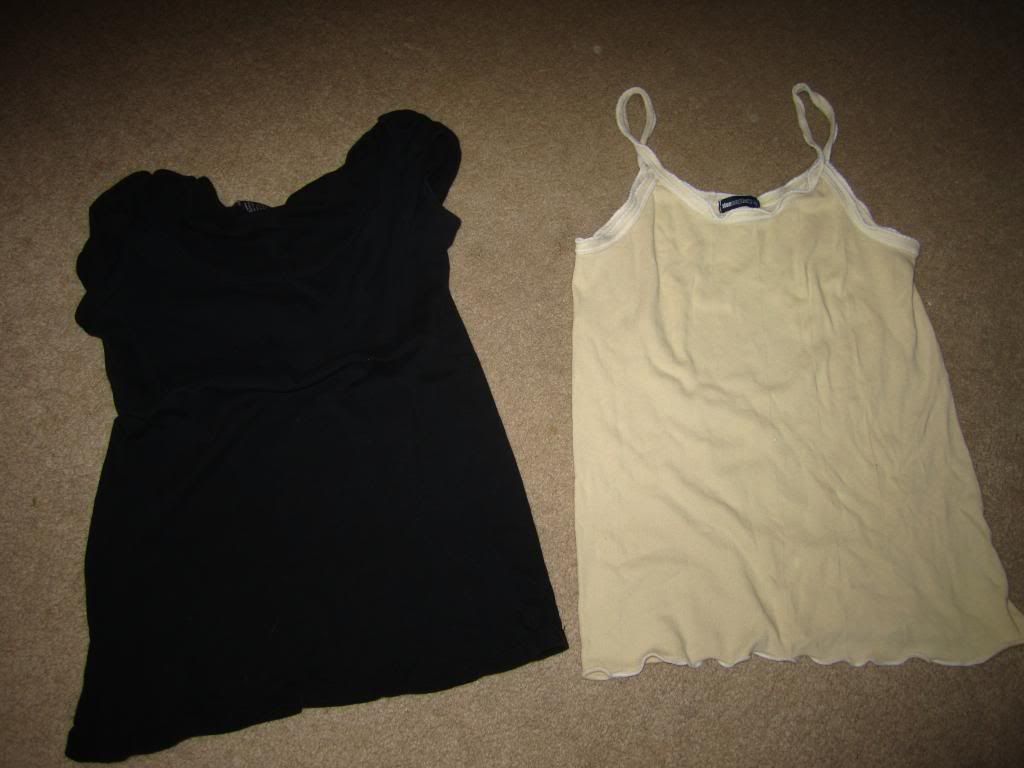
For this, I need two things (aside from my sewing paraphernalia): a shirt whose top I loved, and a shirt whose bottom I could use (hehe, "bottom I could use…").
Since I don't have fancy things like
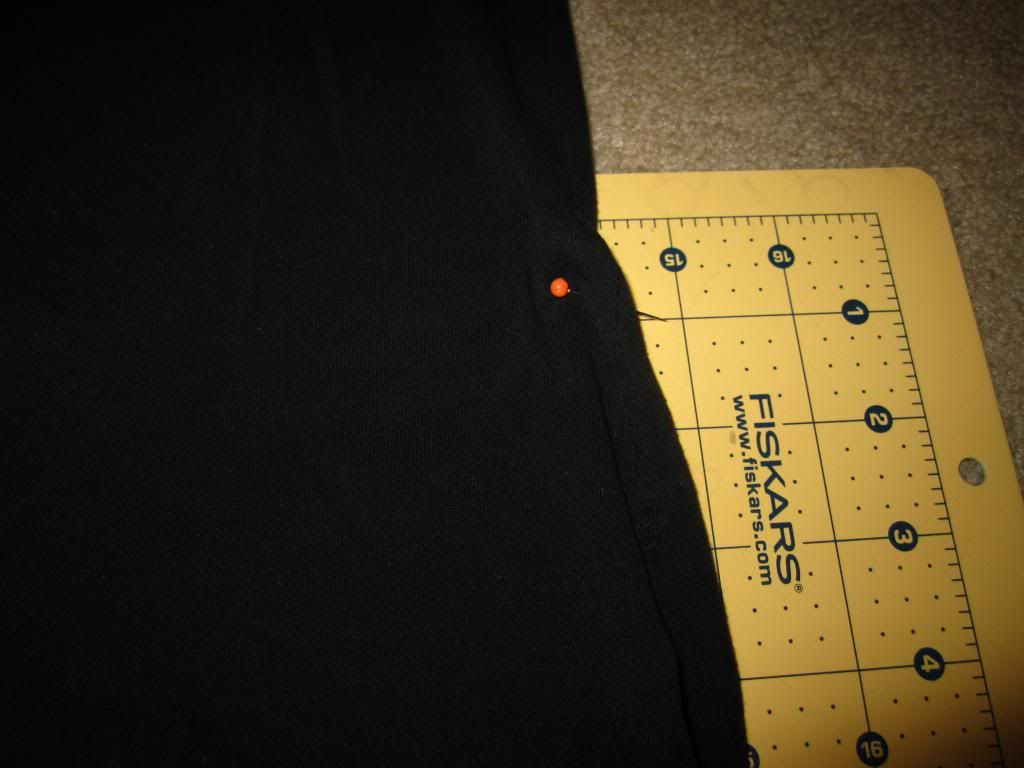
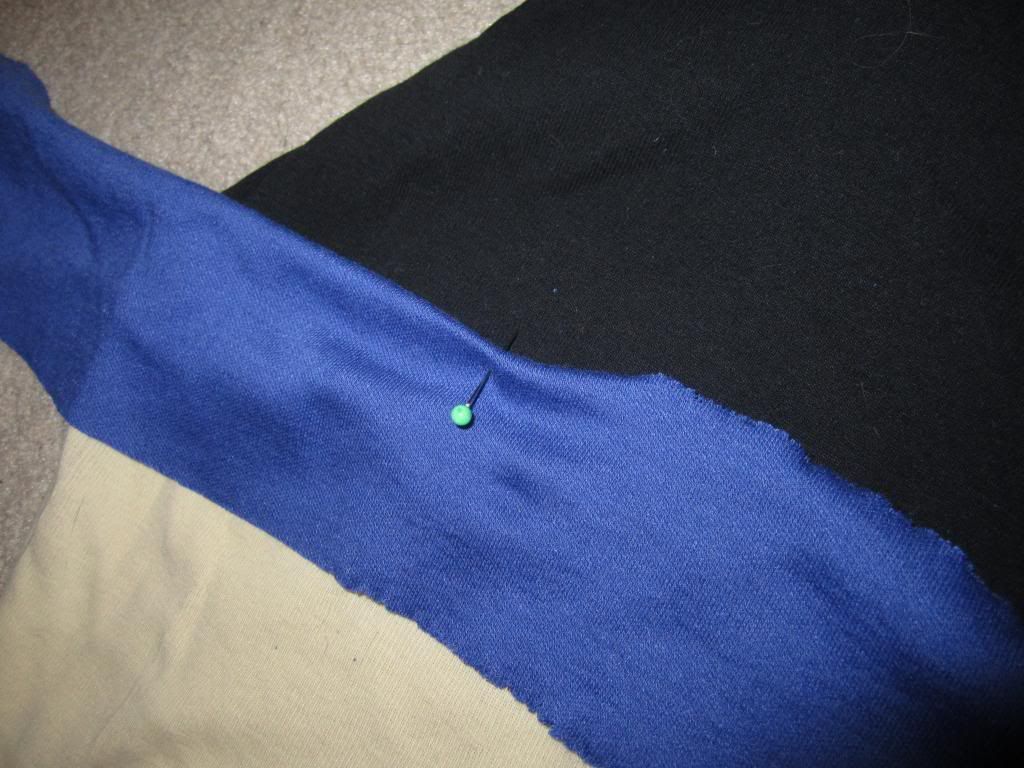
wardrobe chalk, I marked where I would want to cut the shirts with a pin. I put on the shirt, pinched a piece of fabric on the latitude where I'd want to cut it, pin it, and (very carefully) took the shirt off.

Using my rotary cutter (because I can't cut a straight line with scissors to save my life), I cut both shirts.
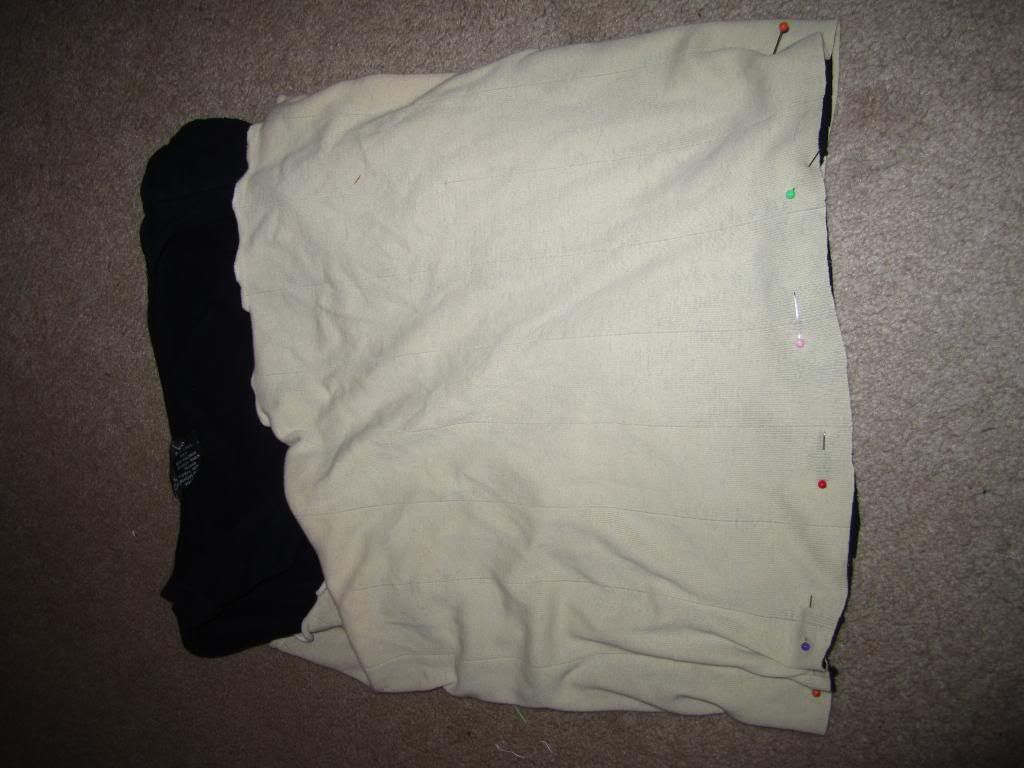
In order to sew the shirts together, I turned the the bottom section inside-out and slid it bottom-side first over the (rightside-out) top section. I then pinned the shirts into place. I recommend carefully unraveling the shirt before sewing everything in place, just to make sure the pinned sections look right (and no section is accidentally inside-out). A pin or two might fall out, but it's a small price to pay to make sure everything is in place.
I realized something was missing after I sewed the shirts together. The shirt needed something else added to it. Thankfully, I have a plethora of scrap fabric, so I cut a long piece of navy blue fabric to act as a mid-waist ribbon. I positively HATE sewing hems, so I decided to cheat and just fold the fabric over and pin it to the center of the shirt. It wouldn't look as clean as if I had properly pinned, ironed, and hemmed the piece, but, I'm willing to deal with that.
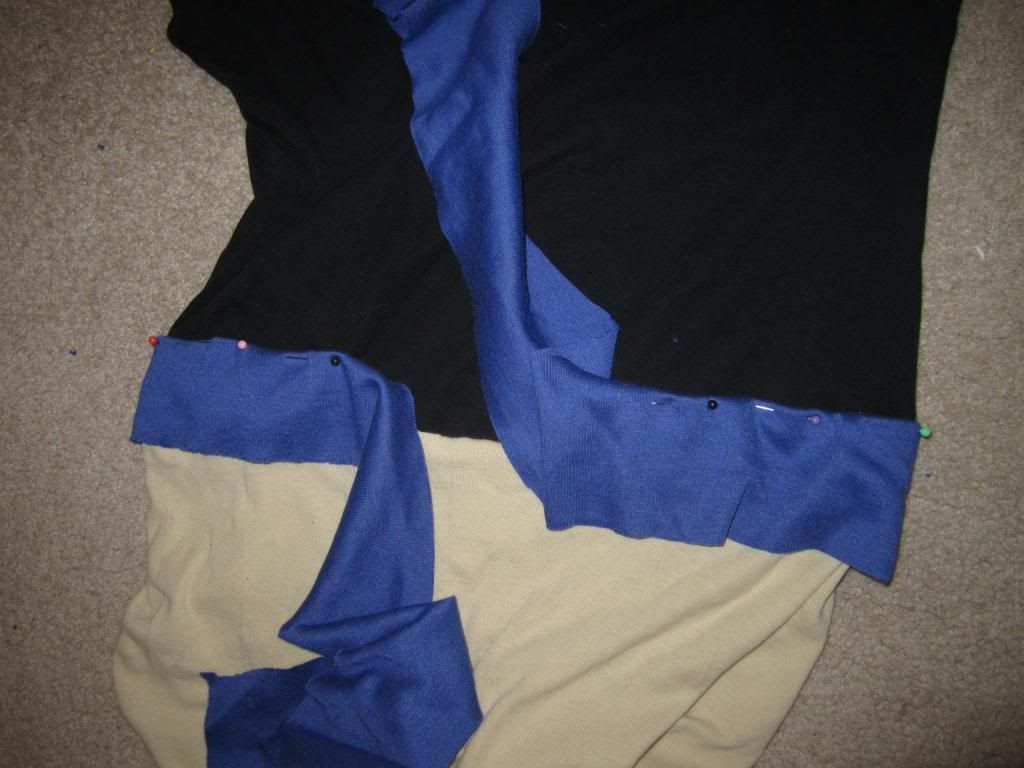
I pinned both sides of the ribbon about 5/6th of the way around the shirt, leaving a nice 5 in gap in the back. This is where the ribbon would tie, cinching the shirt and restoring whatever shape I lost by sewing two completely different shirts together.
I very, very, very slowly sewed everything into place. I even (reluctantly) sewed hems onto the edges of the fabric piece that would be used as the bow.
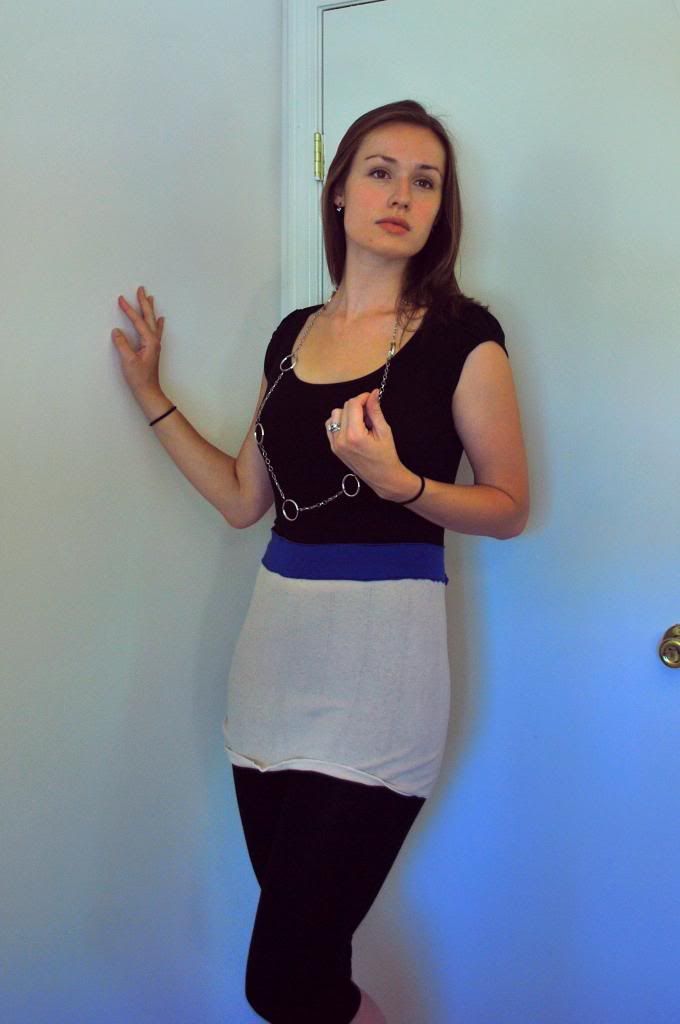
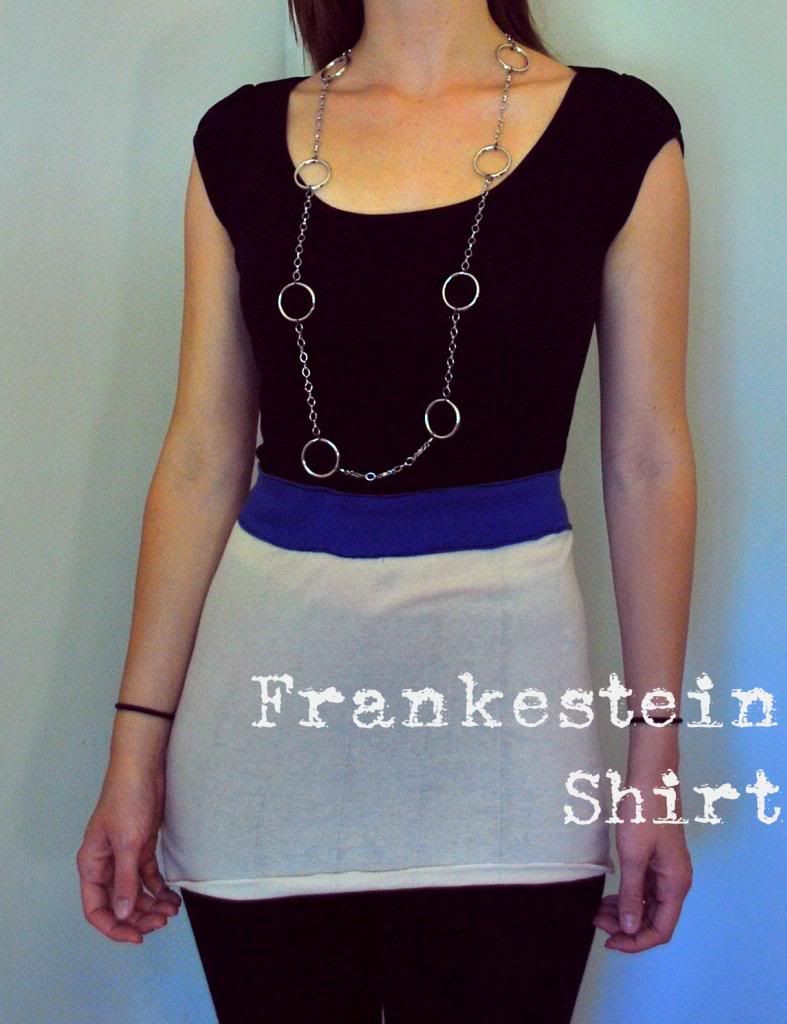
If there are two things I love most in fashion it's long shirts and color blocking. And this takes care of both. Looks like I'll be dicing up more shirts in the future. Thankfully, unlike Frankenstein's creation, this shirt won't follow me from town to town, killing innocent people and haunting my every moment. Pair it with a necklace made from giant split rings (more on that later) and I'm good as gold.

Hi Sir, You are really good writer.
ReplyDeleteIt is very well information about on trialanderrorcreativity.blogspot.com .All people always want to know all about things that you have been described. It is very valuable & very nice posting! I will bookmark this blog as I have Welcome to Rugstar.com.au, Australia's favorite online rug buying groceries in Australia: we get direct deals from the producer to you! We sell an implausible range of Australian favorite floor rugs, carpet rug, by way of shopping on-line you'll keep on shaggy, modern, wool, traditional and lots of different rug designs.
Thank You Very Much For a Nice & Cool Article.