Or "My Magnum Opus: Ten Years of Concerts"
It breaks my heart to know that so many people decide not to scrapbook just because they don't know how to do it like the professionals. A friend will find out I scrapbook and go, "That's so cool. I want to scrapbook someday. Maybe when I have time to take a scrapbooking class or something."
Here's the thing about scrapbooking: it's not engineering. You don't need textbooks and courses and professors to teach you how to scrapbook. Will scrapbooking classes help you
improve on scrapbooking? Sure.
But here's the thing:
you don't need advanced scrapbooking acumen to scrapbook. Just some photographs or random paper goods that you have saved.
Whether they're pictures or postcards or concert tickets -- or, if you're anything like me -- anything even remotely related to the wedding-planning experience (fun fact: for my "wedding planning" scrapbook, I scrapbooked both the stationary samples AND the tags to my flower girls dress!), it doesn't matter. Anything that is connected to a memory, anything that you feel deserves more than just being shoved into a shoebox for all eternity.
And after that, you only need five things:
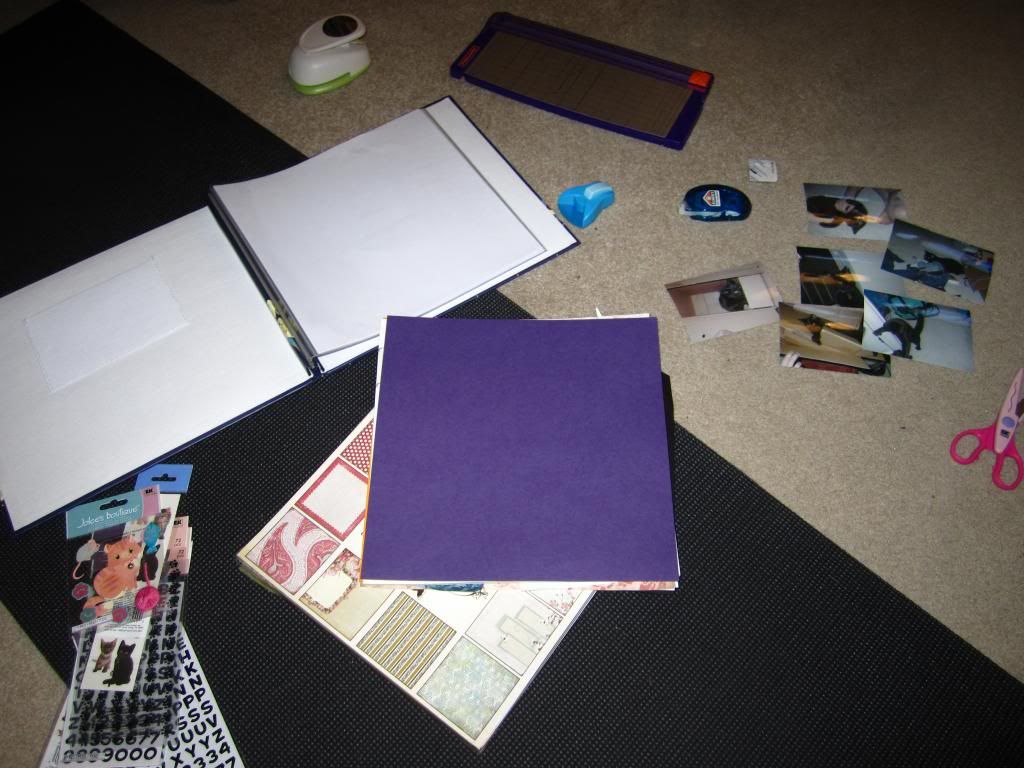
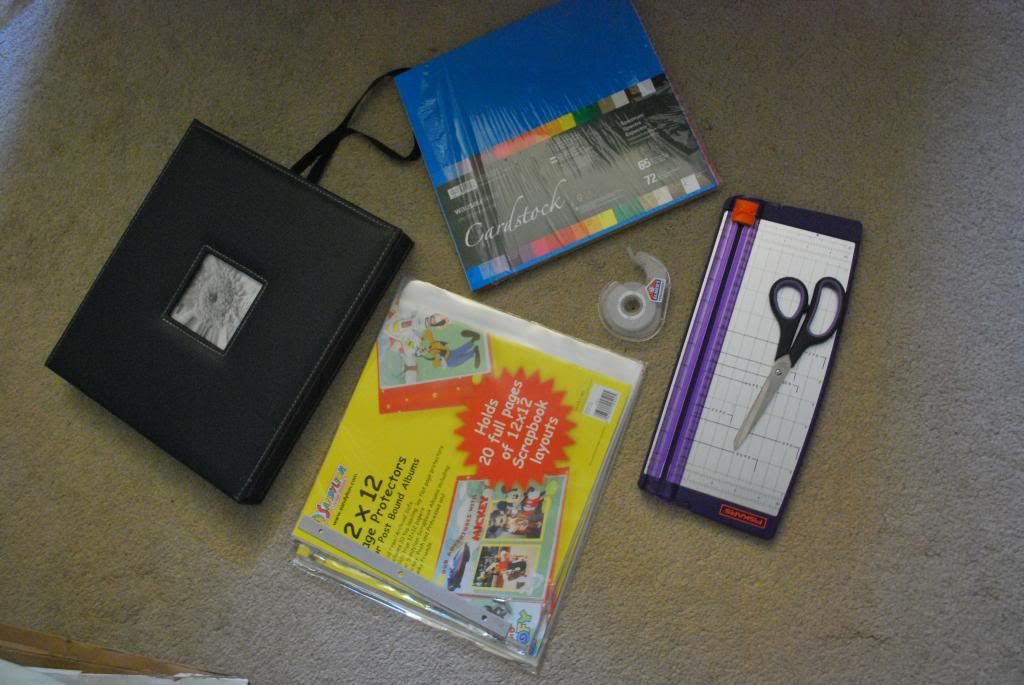
a scrapbook (or even a three-ring binder; you don't have to get too fancy, especially your first time around),
cardstock (or even just construction and printer paper if you prefer),
sheet protectors (the same size as your paper and scrapbook -- 12" x 12" for cardstock and sheet protectors are the norm. However, if you are using a regular 3-ring binder, your best bet is 8 x 11 paper/sheet protectors. And some sheet protectors come with white cardstock inserted into the protectors. So, hey, kill two birds with one stone),
Scissors and
Glue/Tape. Feel like getting fancier? You can get things like scrapbooking tape (I recommend sticking to brands you know and love. Elmer's and Scotch have yet to let me down, whereas the lesser-known brands have), or a
paper trimmer, go right ahead.
But do not let that overwhelm you. There are a million do-dads for the art of scrapbooking. Let that stuff happen as it does. Keep it simple at first.
And, really, scrapbooking is as simple as taping/gluing the paper products onto cardstock. Now -- you can add borders and trim and punch-outs of shapes and letter stickers and corner embellishments and blah blah blah blah blah. Don't be afraid to figure out this noise as you go along. What's the worst that can happen -- your earlier work won't look as nice as your later work?
Oh no. That has never happened to anyone else, ever.
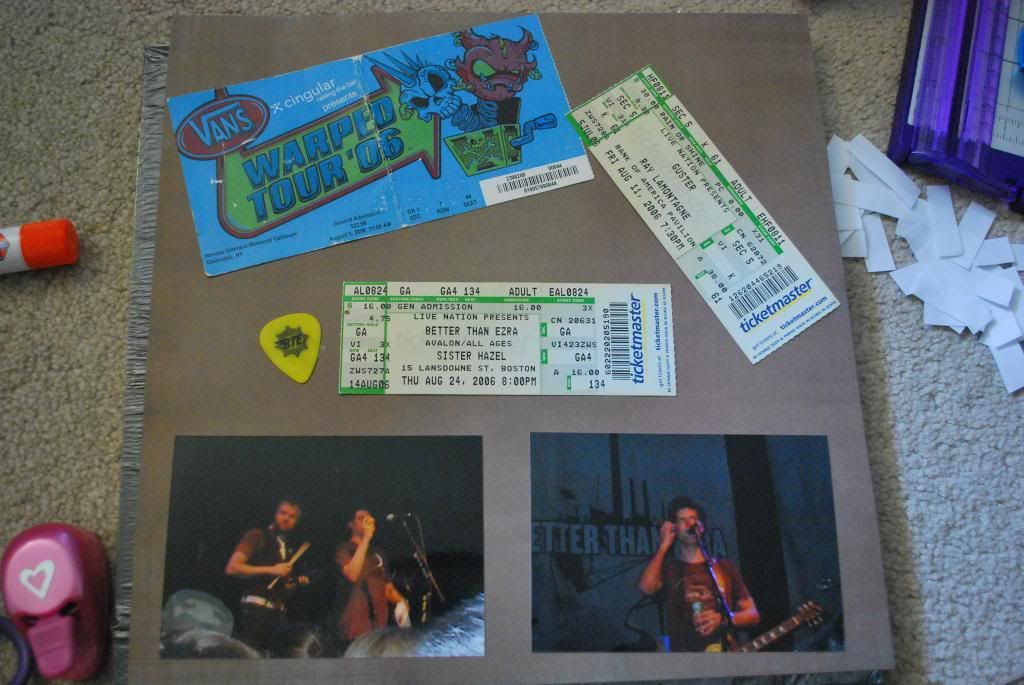
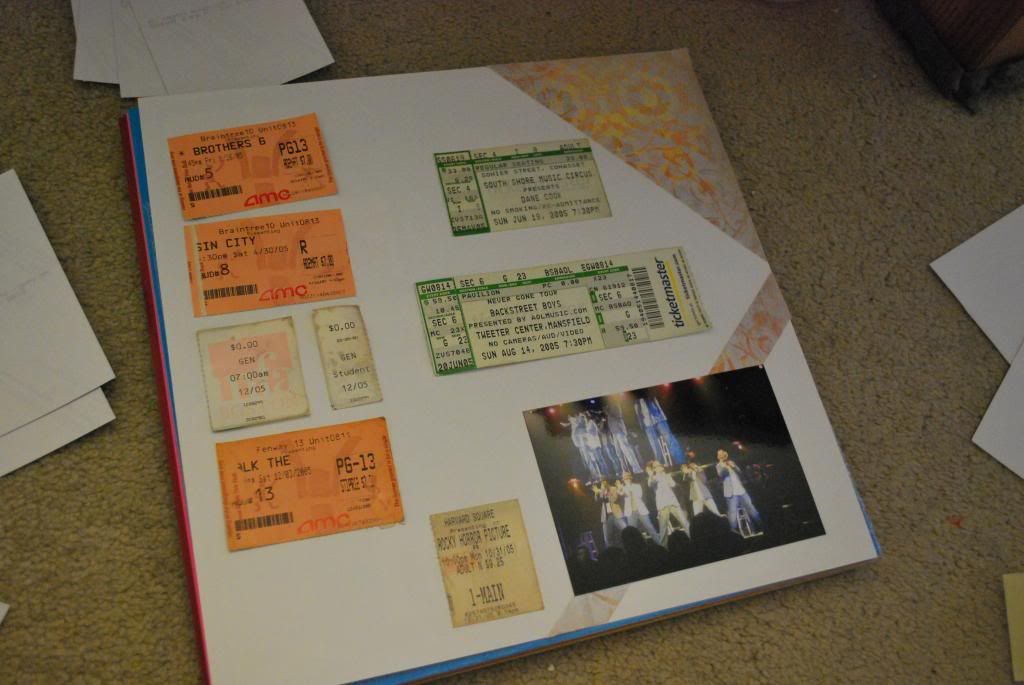
For this particular scrapbook, I decided to dump out my shoebox of concert, movie, and theatre tickets and finally sort them out and display them like I should.
Now, to backtrack: growing up, my parents gave me a pretty stellar Catch-22: I was not allowed to go to concerts unless they came with me, and they saw no need to ever go to a concert. As a result, as soon as I turned 18, I went to every concert that caught my eye for the next 5-6 years. I've calmed down in my older years (I think my last concert was Backstreet Boys's "This Is Us" tour. Hey, I don't judge your music tastes), but my collection still grows, just at a slower rate.

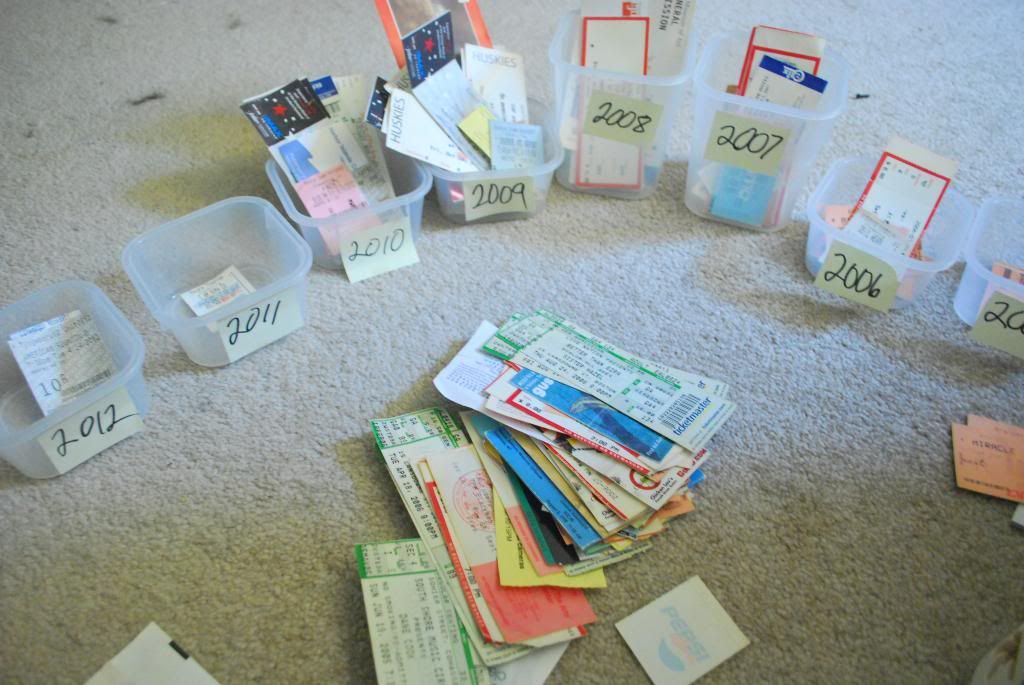
First, I needed to sort out my tickets. I did so by labeling small Tupperwear containers with each year, from when I started going nuts with concerts until present day. I used two tall containers for 2007/2008, which was the height of my concert-going experience.
Slowly, but surely, my "concerts" scrapbook become "any type of event that I bought through Ticketmaster" scrapbook, which morphed into "really, anything with tickets." So, everything, from comedy shows to hockey games, ended up in this scrapbook.
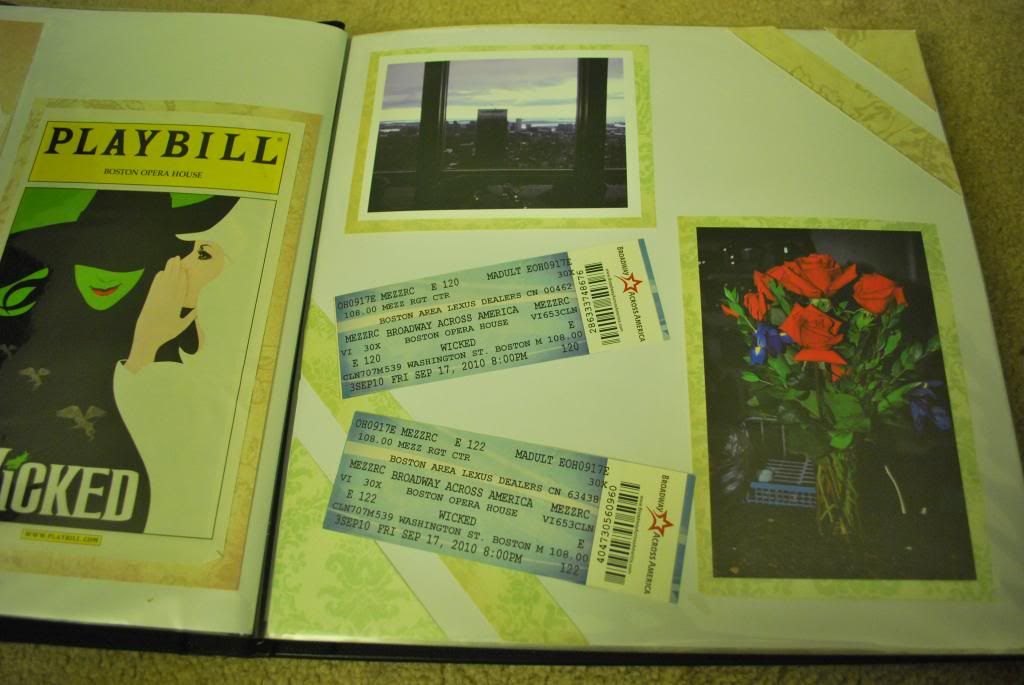
I found the tickets to Wicked -- which was the show my husband and I went to after my husband proposed (side story: I remember walking into the show, all dolled up, flowers in hand, and one of the ushers going, "A show
and flowers? You better marry this one!" I got to hold up my hand and go, "I'm planning on it!"). Those tickets got scrapbooked into my engagement/wedding planning scrapbook so fast, Martha Stewart's head would've spun.
It's all about what interests you. Feel like putting a quote into your scrapbook? Write/type that quote out and tape it to your cardstock! Want to put a border around a picture? Do it! Again, I truly believe that you can create something that fits perfectly into your personal aesthetic if you just don't
think about it.
Really -- do whatever you want. I decided to decorate one corner with some patterned cardstock, then, on whim, I cut another section of the same patterned cardstock and decorated another corner. Why? Because I felt like it!
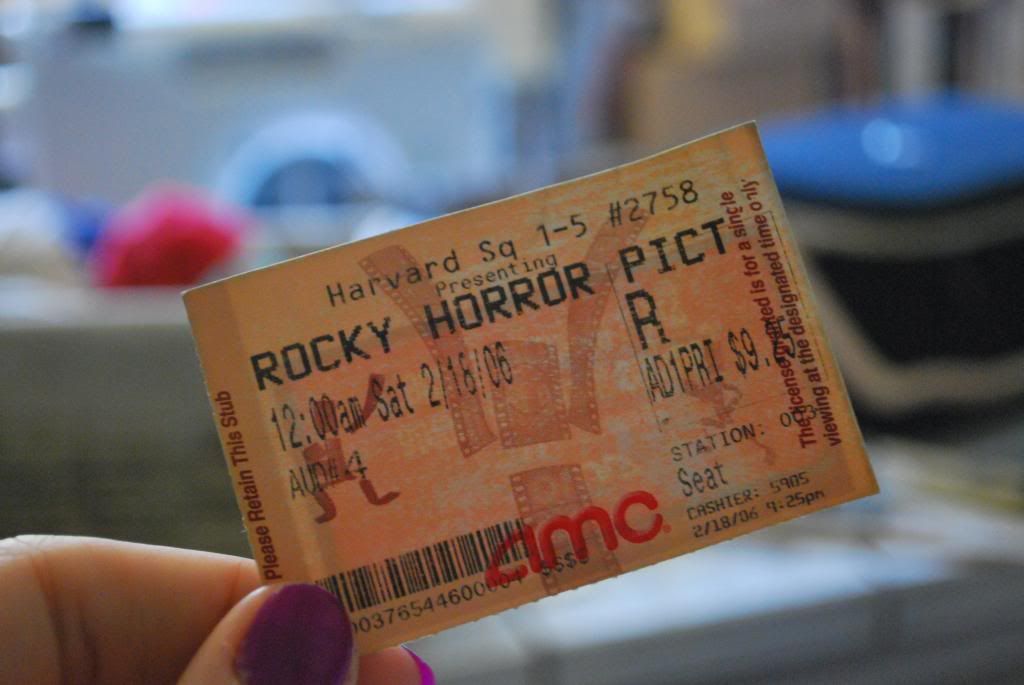
In the midst of the sorting, I also found the ticket to a midnight showing of the Rocky Horror Picture Show -- the night that I met my husband. This particular ticket was given a special little border around it in my scrapbook -- which was then bordered by a copious amount of heart cut-outs.
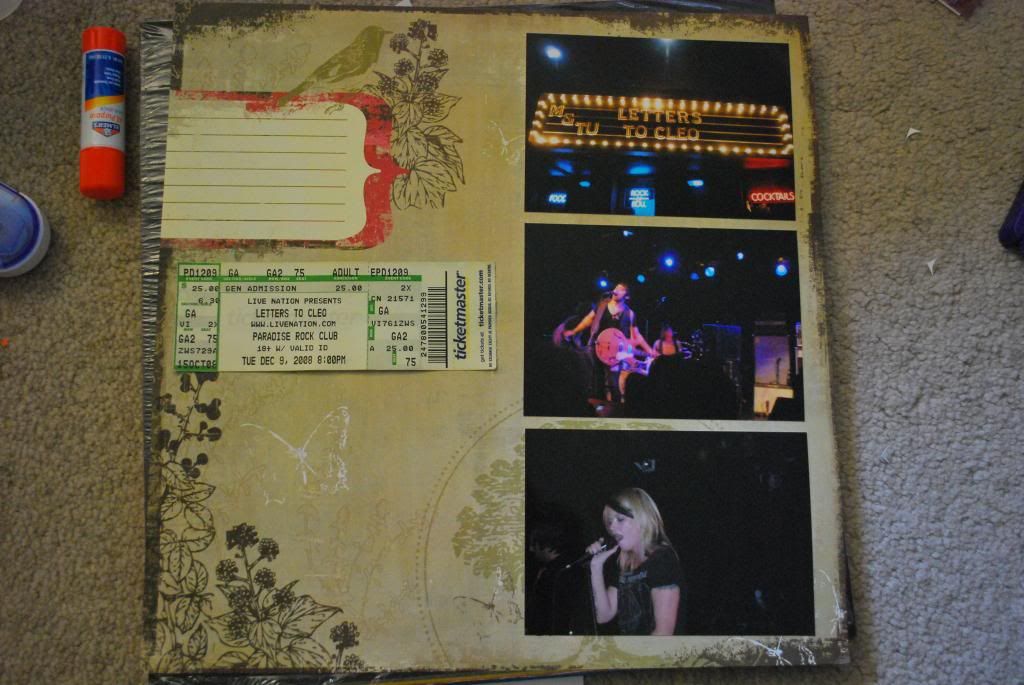
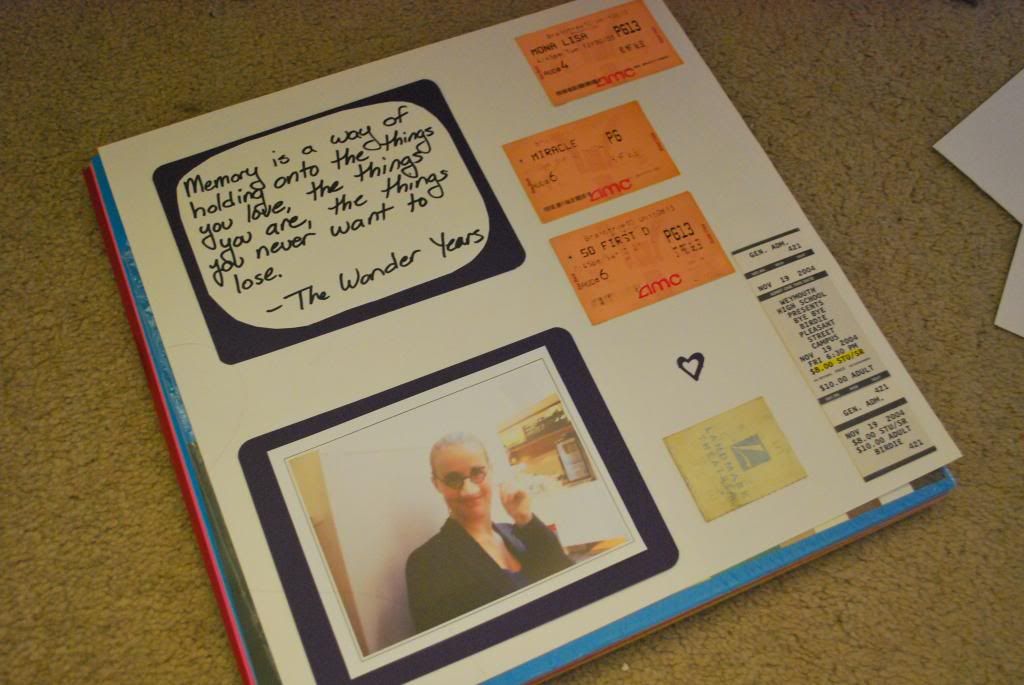
I love pairing random paper souvenirs -- business cards, tickets, etc -- with pictures. For an especially good concert, why not just tape that one ticket and fill the rest of the page up with pictures? I order the pictures for scrapbooking at 3.5" x 5", simply because they're smaller and I have more room for stuff.
You can get pretty ornate with a scrapbooking page -- or not. Remember: you don't need to look like the handmade version of Snapfish. It's about having fun, cherishing a memory, and wasting yet more money at Michael's.

genial scrapbooking! love it! how many pages did you make?
ReplyDeleteI should do my own one! I usually put ticket in cronological scrapebooking/diaries/photo album but I have lots of tickets from my "youth" simply storaged in a small box...