(or should I say: how I
organized my
kitchen.)
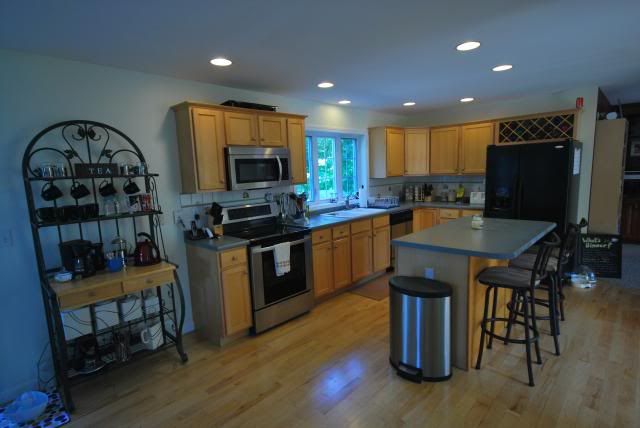
I'm still in shock that the house is finally settled. Some of the rooms were easy to set up -- put a dining room table in a dining room and call it set -- while others took a bit more time. One of the more intricate rooms was the kitchen.
You don't realize how daunting of a task organizing a kitchen will be until you actually set out to do it. When I first moved to New Hampshire, we were in such a rush to get everything settled that we basically put anything anywhere. We also didn't have a proper set of drawers in the kitchen (you have to love apartment kitchens), so we had to improvise. This resulted in a scattered mess that we put up with, but was never really fond of.
So, after agonizing where everything should go, I finally have a nice, organized kitchen. And I'm sharing it with you guys in case any of my readers are moving/reorganizing their kitchen soon.
Remember, this is just how
I organized
my kitchen. Everyone will have a different scheme that works for them. But I noticed there are few articles out there about how to organize kitchens, so this might help those who are Googling up a storm.
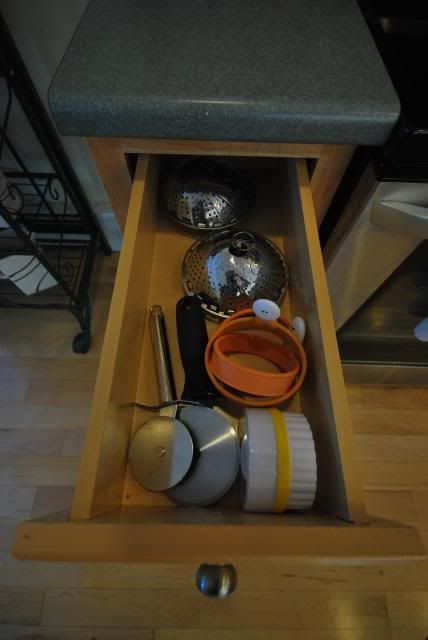
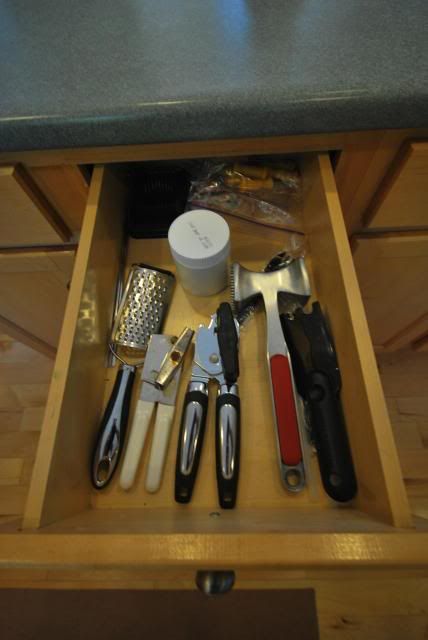
Let's start with the drawers and work our way around. This is the very first drawer, by the patio door and next to the stove. Ideally, this would've been a place for heating pads and oven mitts, but it's not quite wide enough. So, instead, it's more of an oven helper: things we use frequently with the oven (steamers, pizza cutters, biscuit cutters, egg circles).
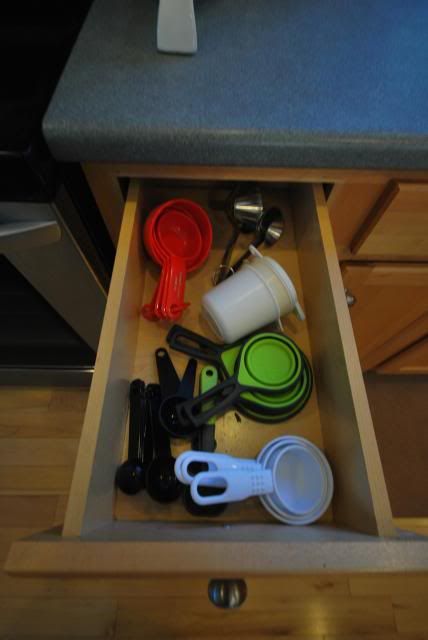
The one to the right of the oven holds our measuring cups and spoons, as we've somehow amassed five different sets of measuring cups over the years.

The one next to
that (as well as to the left of the sink) holds our sometimes-used oven and cooking utensils. Basters and spatulas and pie cutters.
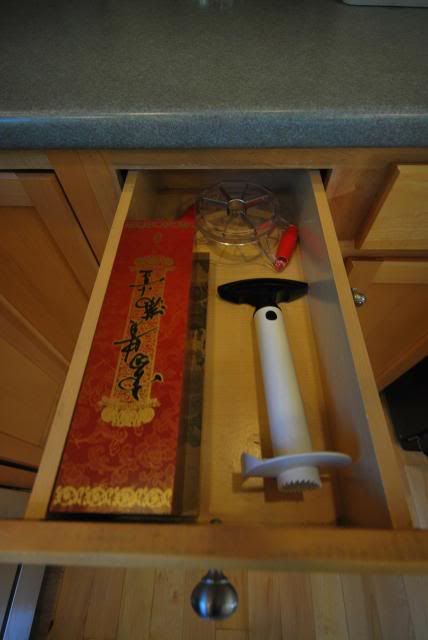
This one is a little bit of a catch-all. For our kitchen items that get used, but for very specific occasions (like our pineapple and apple slicers and my chopsticks).
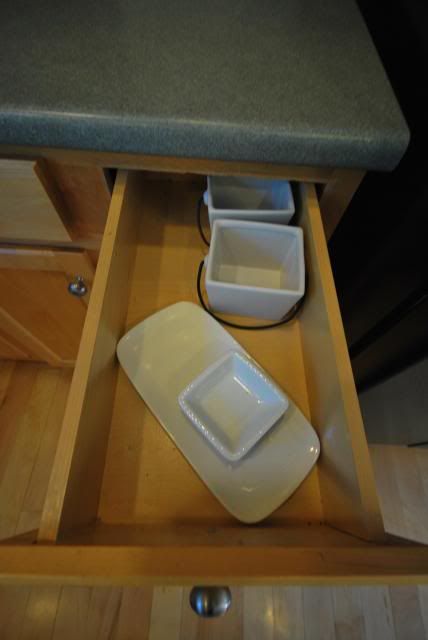
I have to admit: I forgot I had this drawer when I was first organizing everything. I went from practically no drawers (insert underpants joke here) to more than I knew what to do with. So this one became a continuation of the one next to it, with items that are used for very specific occasions (like my sushi plates or stirfry boxes). I also ended up putting a wrapped up cell phone charger in here, as the island has electrical outlets and we always seem to use our phones to the point of exhaustion.

Now onto the island. I figured the best place for the utensils would be in the island, across from the sink, and right by the fridge. It was all about intuition -- although my intuition was completely thrown off, as I had spent the last two years using a cabinet for my utensils.
The one after that was for our lesser-used utensils -- meat tenderizer, handheld cheese shredder, corn-on-the-cob holders. You never realize how many kitchen items you have until you have to pack and unpack them all.
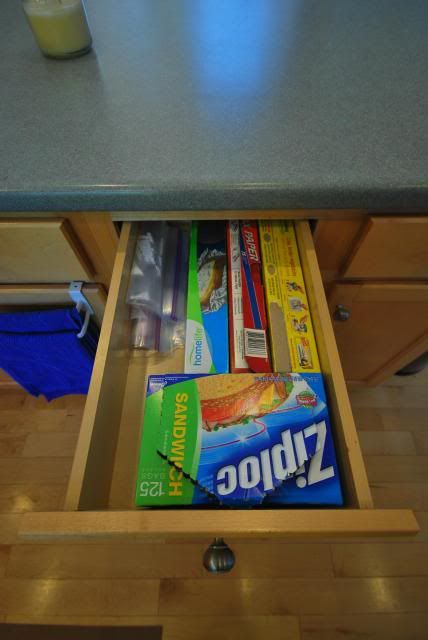
The one next to that one holds our bags, aluminum foil, etc. It's across from the stove, but in the middle of the island. Perfect for if I need aluminum while baking or if I'm making a sandwich on the island and need a sandwich bag.
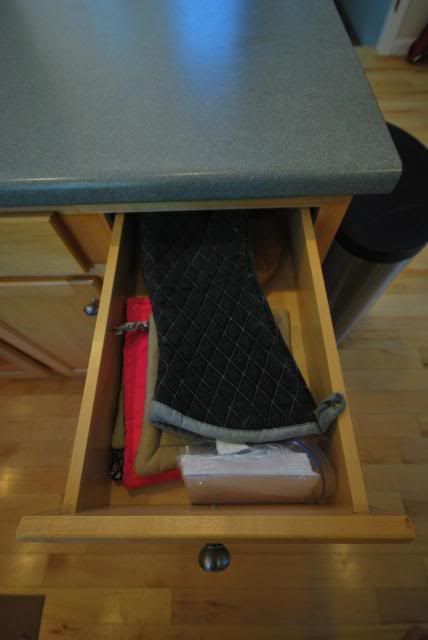
At the end of the island is where we put our oven mitts and heat pads. If you can't have them next to the oven, then across works as well.
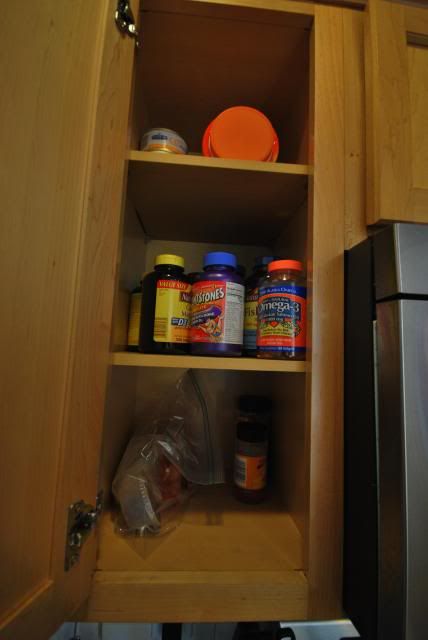
It seems a little silly to have a medicine cabinet in your kitchen, but I've found I'm more likely to take a daily vitamin if the bottle is right there in the kitchen. Make some coffee, clear a few dishes ... and take a Flinestone's tablet, because we are never too old for Flinestone's.
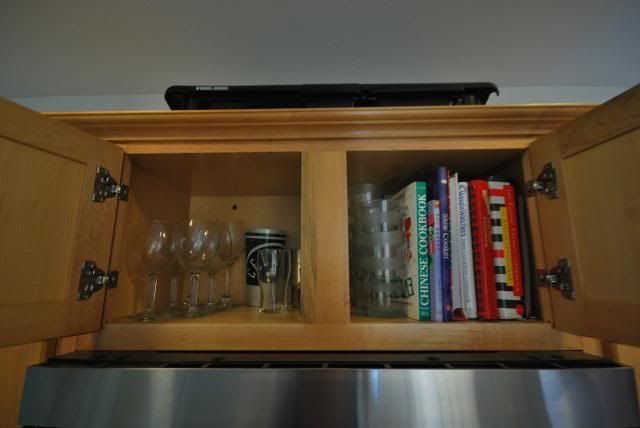
The top of the stove is used for delicate items and cookbooks.
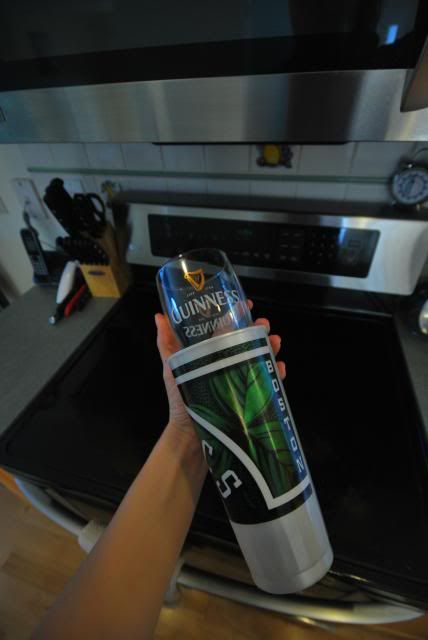
Here's a way to better protect the glass items you treasure: keep the cups you get for free at theatres and sports events. They're usually the size of a bucket and and provide that extra bit of cushion for your glass. Here, a cup I got at a Celtic's game protects a Guinness glass that I might've *cough* pilfered from the oldest bar in Belfast.
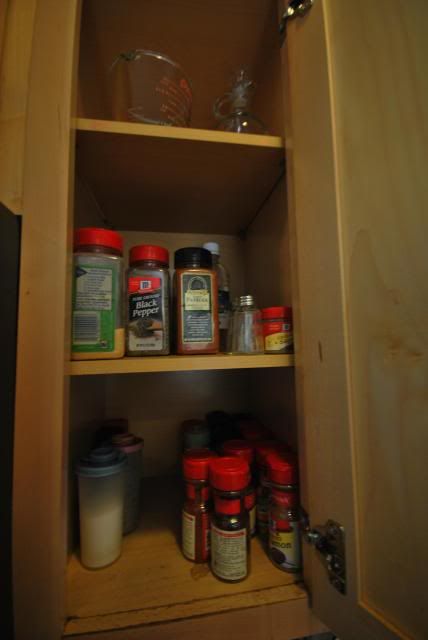
If you are right-handed, the cabinet on the righthand side of the oven is perfect for all your spices. If you are left-handed, switch it to the left side.
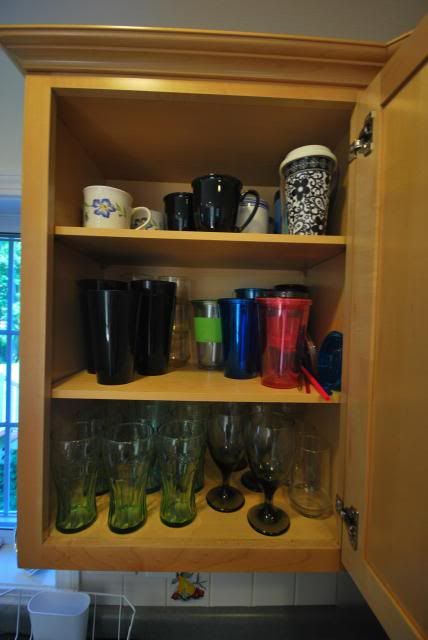
In an ideal situation, there would be a large cabinet on both sides of the sink. One side would hold dishes; the other, cups. But I made the best of my kitchen's layout and put my cups on the first big cabinet, which happened to be to the right of the sink.
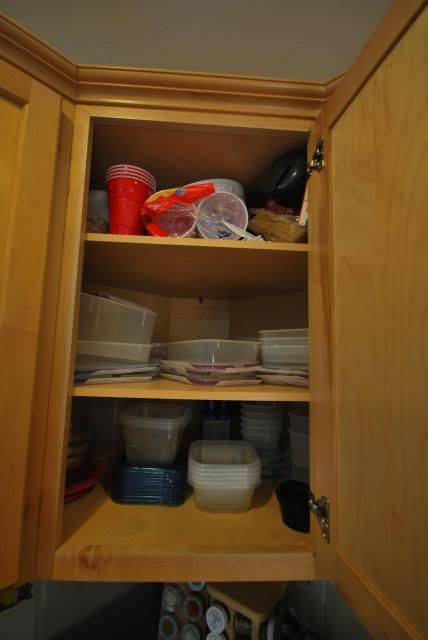
The corner cabinet, once a place for our utensils at the apartment, is now where we store our tubberware and disposable party items.
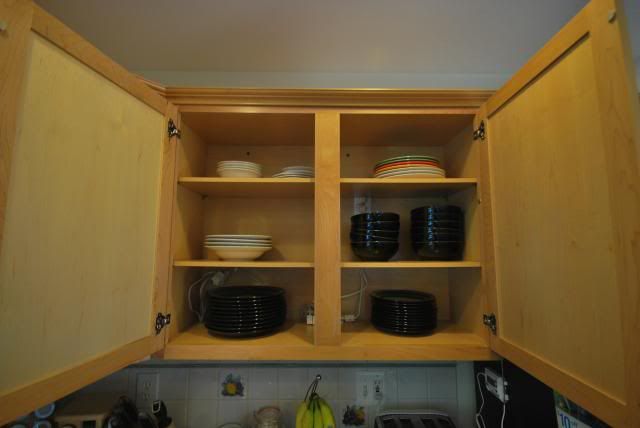
Double cabinets are definitely needed for dishes, if only so you don't have to stack your dishes too high, or stack multiple sizes together. The bottom black dishes are our nice "casual" china that we got for our wedding. The rest is a collection of random plates throughout the years, including a few plates that I *cough* pilfered from the dining hall.
I might've had a problem back in the day.

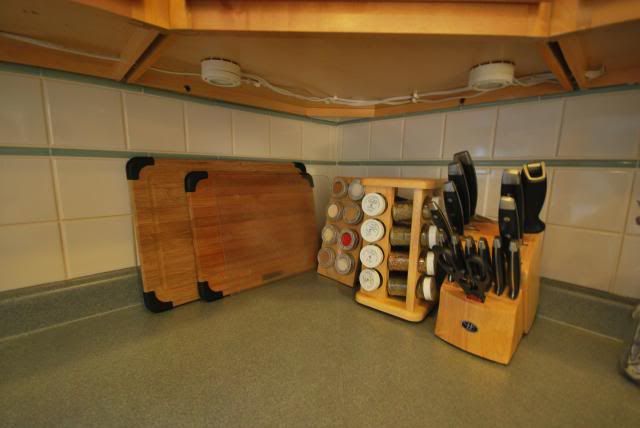
We don't really drink, so a wine rack, while pretty, is useless for us. However, we do have an excess of water bottles. The result? A water bottle rack! Through this little project, I learned that we have not one, not two, not three, not four, but
five Baja Fresh "Infinite Refills" cup. Not bad for a company that left New England 4 years ago.
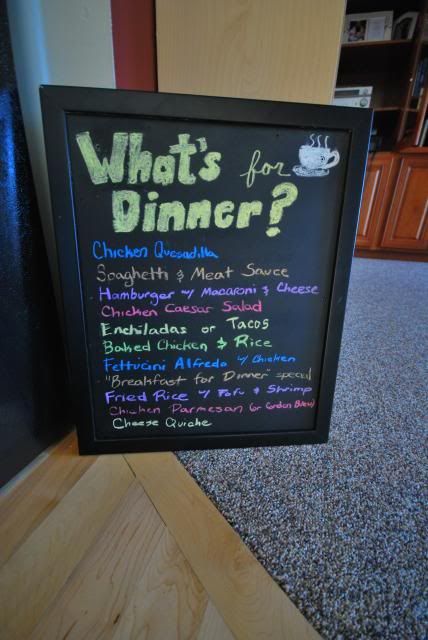
Hey, remember
this little project? After finding absolutely no proper place to hang it, I decided to do what most restaurant do and lean it against the outside of my little "restaurant".
And now onto the counters. Let's start on the opposite side by the fridge and work our way back. If possible, I really recommend creating a second "cutting station" in the corner opposite of your oven. It gives everyone in the kitchen a little bit of space, especially as one is preparing the food and the other is cooking it.
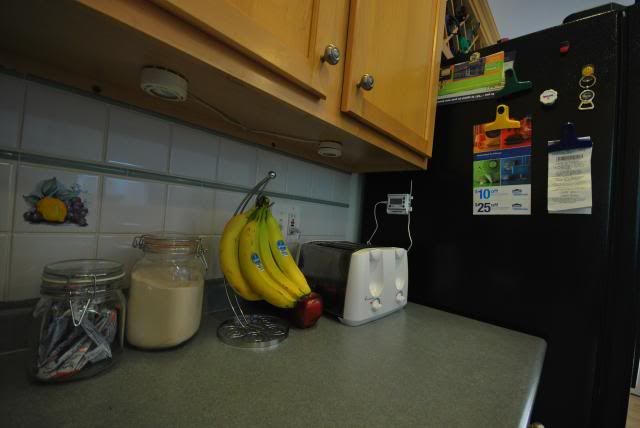
Mine happens to be in the corner by the fridge, where my toaster, mini "drink station", and fruit stand resides. Note that I have all the "practical" stuff (coupons, receipts, etc) on the side of my fridge. Keeping such things to the sides really makes the kitchen look neater.
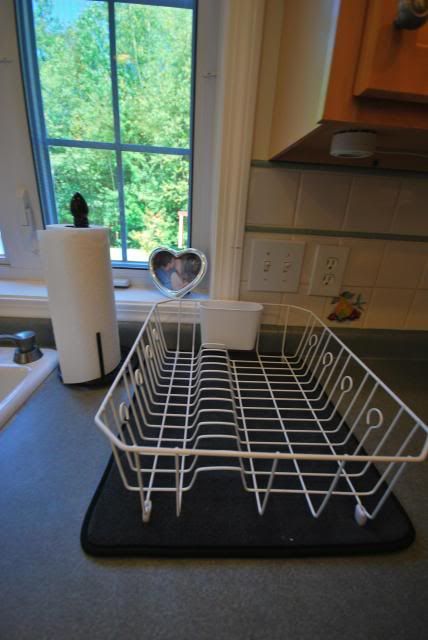
I got rid of my plastic drying rack mat and replaced it with a microfiber one. Not only is it a lot cleaner-looking, but, since the microfiber can be anywhere (as opposed to right next to the sink), I moved the drying rack a few inches away from the sink. Nothing is more frustrating than washing a dirty bowl and getting dirty, soapy water on clean items that have been drying in the drying rack. A bit of distance from the sink helps minimize that occurrence.
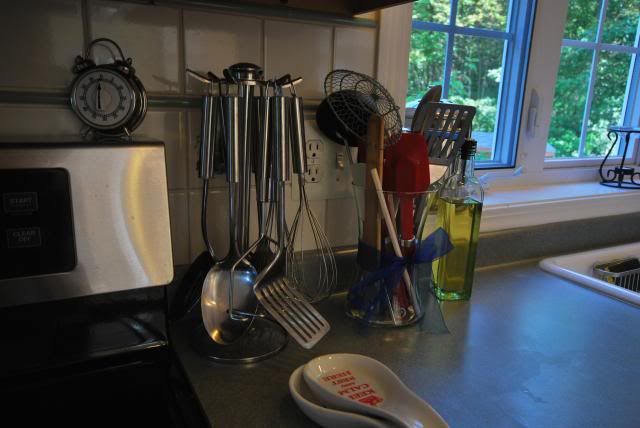
Again, all about whether or not you are left- or right-handed. It's useful to have all my utensils on the righthand side, since both my husband and I are right handed. And, if you remember from
from one of my very first posts, vases make great utensil holders. Especially vases from your wedding.
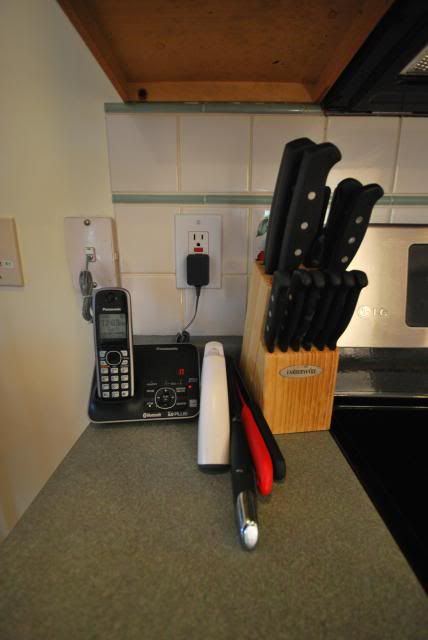
And, on the opposite end, I have a second cutting station. We got a second set of knives as an engagement present, and having a second station by the oven is perfect for solo cooking, or cooking that requires lots of cutting.
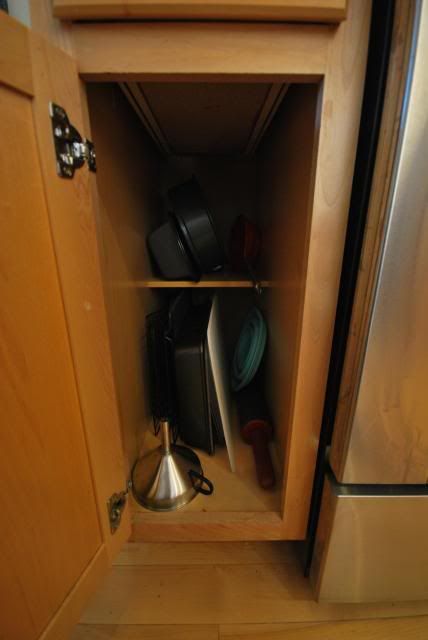
And now, we finally make our way to the lower cabinets. I put the rest of our cutting boards, as well as cake and brownie pans, rolling pin, etc, to the left of the oven.
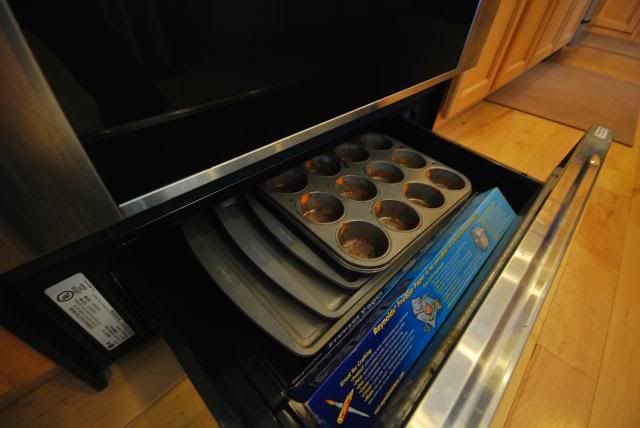
Have an electric stove? Good news! That drawer under your oven is not used for broiling, so you can use it as storage! And, as I have learned, the storage area doesn't get any hotter than the cabinets next to it when the oven is on. Perfect place for trays and cupcake tins.
To the right of the stove are our mixing bowls, plastic pitchers, and grilling utensils. The little plastic shelf really gives me a necessary extra bit of space. I got them on whim last year around Christmas (if only because I needed a Walmart box for my sister-in-law's present, in order to trick her as to what the actual gift was) and they have been incredibly useful.
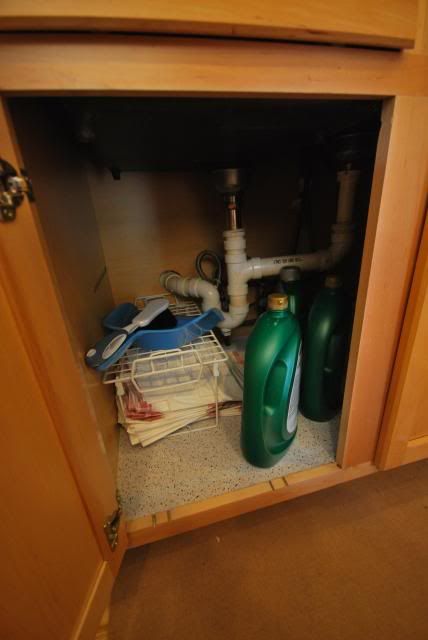
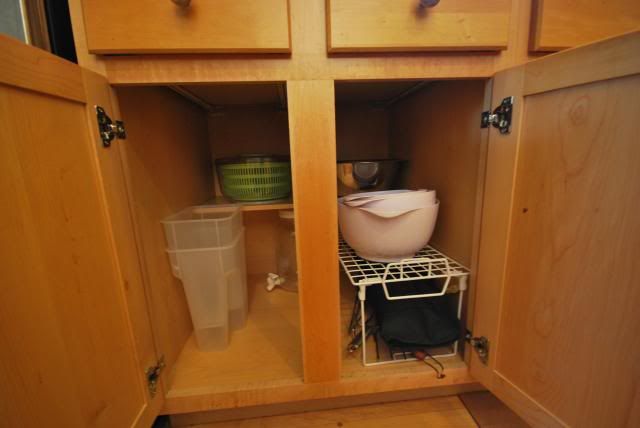
...Like in places like under my sink. The fake-granite contact paper also helps take the edge of a usually dank and decrepit cabinet, but, more on that later.
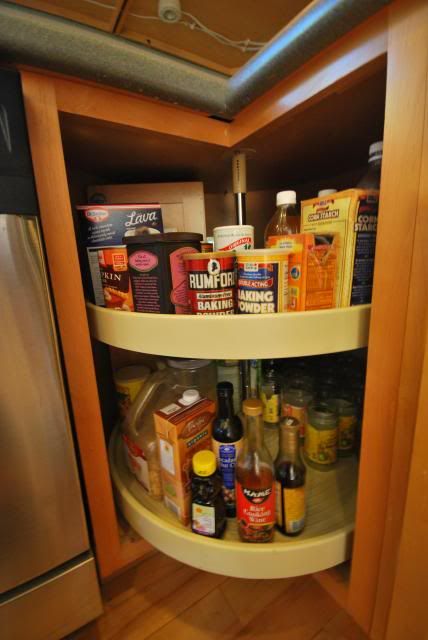
Lazy Susans are perfect for all the baking essentials -- baking soda, cocoa powder, etc -- as well as the non-perishable cooking essentials for very specific meals, like Asian food.
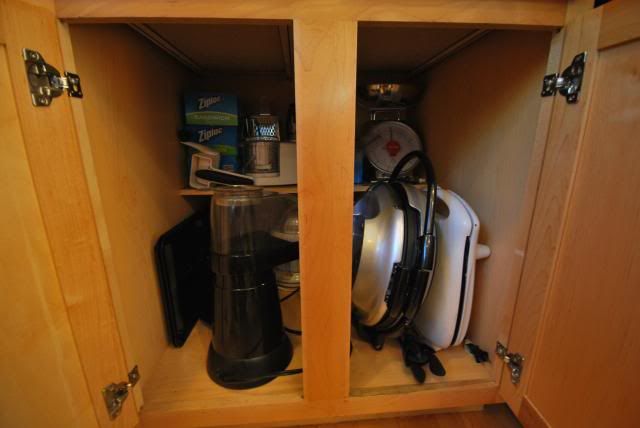
The cabinet next to the fridge is where we placed our various appliances, ones that, unlike the toaster, aren't used that often, but often enough that we don't want to store it away in the basement.
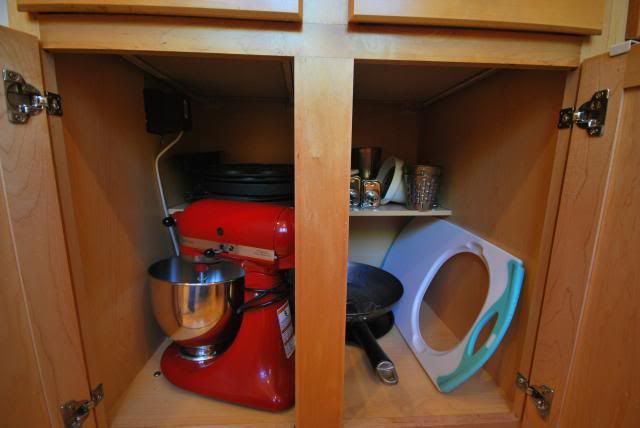
Those that didn't fit in the cabinets by the fridge went into the cabinets in the island, along with our oversized cutting boards and wok (because what is proper Asian food without a wok to cook it in?)

Just outside that cabinet is where I hung a dual-towel rod. I had never seen one of these before, but I stumbled across it in Marshall's and was too amused not to purchase it. And, so far, it's been a great investment. It's nice to have one set of towels used for wiping your hands while cooking (located by the oven) and a set for actually washing your hands. Nothing spells fun that washing your hands and drying them off on a towel that was just used to wipe away oil and grease.
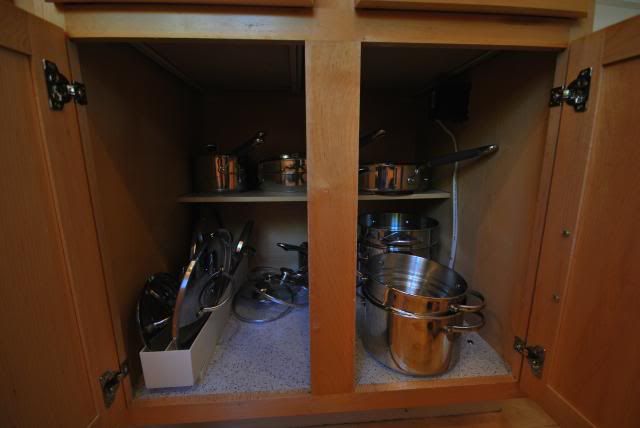
We placed all our pots and pans in the cabinet across from the oven. At some point, we'll be installing a pan rack above the island, but that's not for another 5+ years, when we finally get the gumption (and money) to redo our kitchen.
Organizing a kitchen doesn't have to a headache. It's all about being intuitive and figuring out what works best for you. And don't be afraid to take things out and move them around. Remember: this is your kitchen. Organize it the way you want it.

The nonstick coating makes it easy to clean with the swipe of a sponge. under counter oven
ReplyDeleteAwesome article with beautiful picture!!!I am so happy to get this article. Because I found the way to organize small kitchen.I get some important info what will easy my job.
ReplyDelete