Here is a project I meant to post last July. I think it's safe to say the summer was absolutely nutty, which resulted in this falling by the wayside. Enjoy!
I pride myself on gifting (it's one of the many things I have in common with my in-laws). That being said, I tend to get into the habit of buying presents early, only to find other presents that would work as well. This puts me in the poor house, but hey -- look at the smile on that friend's face!
Take, for example, my husband's birthday. My husband had created a huge wishlist on Amazon, filled with textbooks on sustainable energy for a house. I went
in cognito and purchased his textbooks from a new Amazon account (since we share one) back in April, when our house hunting had just begun. I figured -- hey, what a great present! Even if we don't end up getting a house this year, it'll be nice to say they are off his wish list!
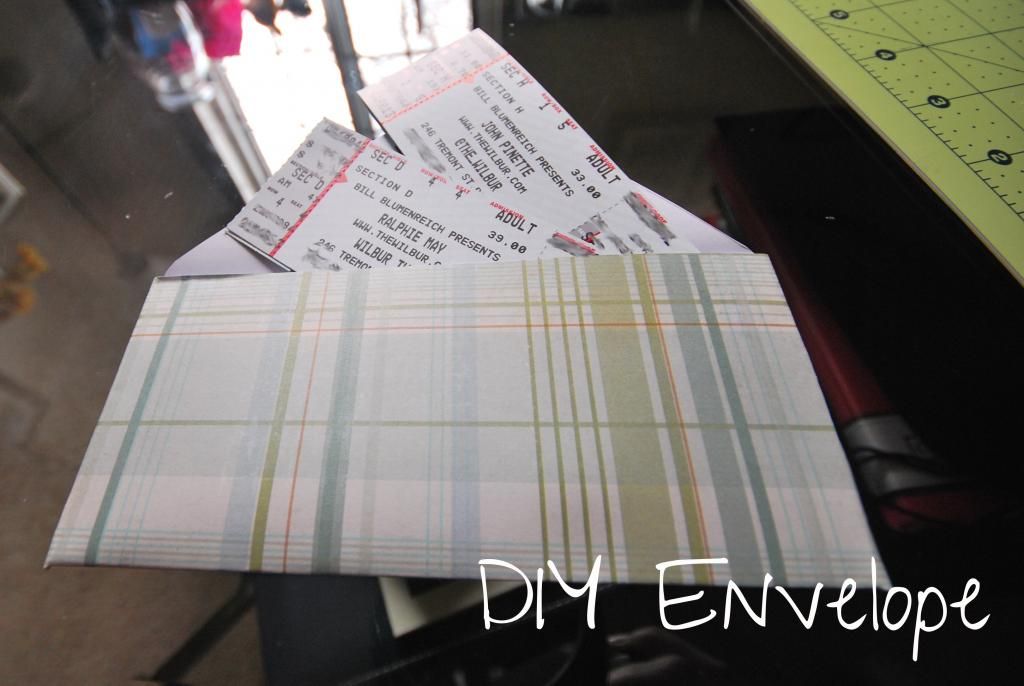
And then May hit. And not one, but two of our absolute favorite comedians announced that they were coming to Boston in the summer, and their tickets were going on sale now.
So, I naturally did what any budget-conscious person does: bought a set of tickets for each comedian, post haste.
Since I essentially doubled the amount of money spent for my husband's birthday, I decided to save a whole 5 cents and make my own envelope for the tickets.
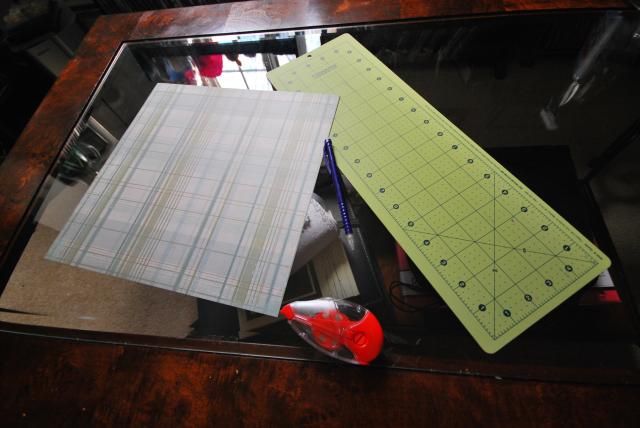
This turned out to be way easier than I imagined. All I needed was card stock, a ruler, a pencil, scissors, and scrapbooking tape.
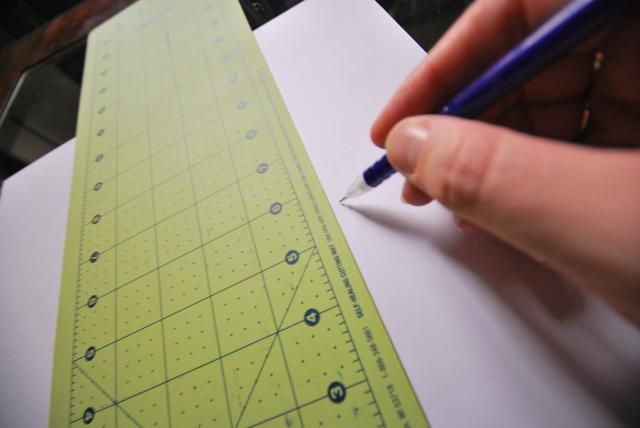
First, I measured the length and width of the tickets. I added about an inch to the width and 1.5" to the length. This was a rough addition -- I added or subtracted a little so I'd end up with two nice round numbers. On the card stock, I measured and marked the width. Using the ruler, I drew a straight line one each mark the length of the tickets plus ~1.5". I marked where each line ended, and drew an additional line with the exact same measurement. I finished up by drawing two straight lines: one that connected the midway marks and one that connected the end points.
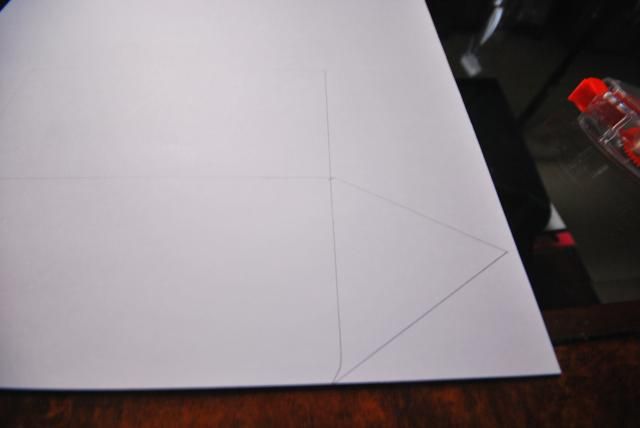
I then drew out an equilateral triangle on the bottom half, with the two points meeting at the beginning and midway marks, for each side of the rectangle.
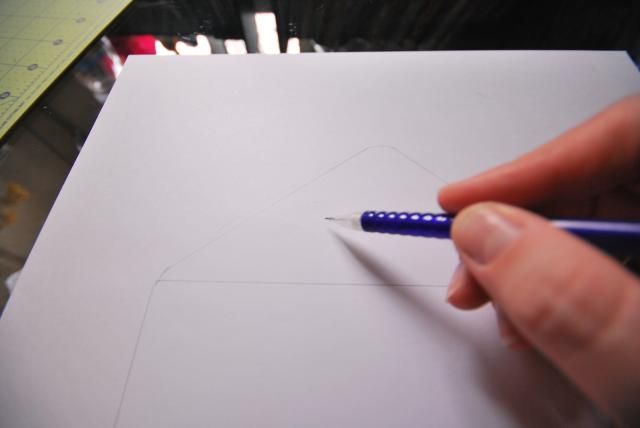
I then drew somewhat of a right triangle on the rectangle (where the 90* point faces away from the rectangle). If you're feeling up to it, you can erase the point and round the corners out by hand.

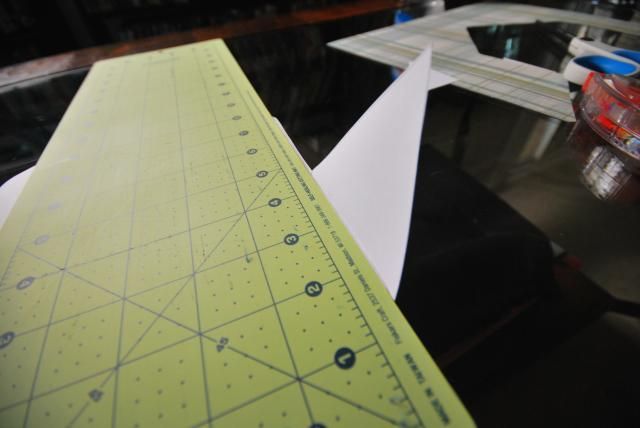
And now: you cut it out. If done correctly, you get something that resembles a very fat rocketship.
The rest is just folding and taping. Using the ruler, fold against every straight line. Fold the triangles and the midway point up against the ruler, creating a nice, sharp, even fold.
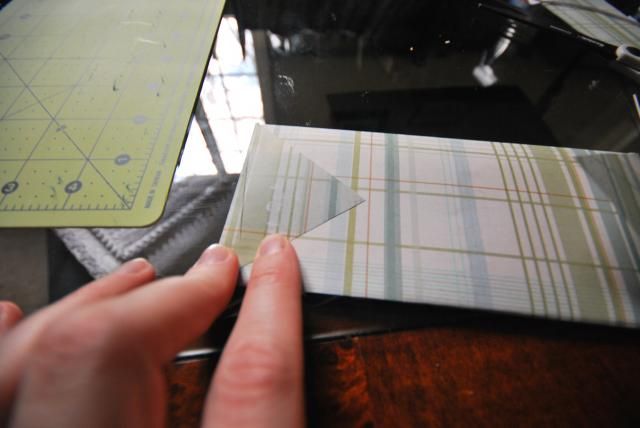
I decided to first fold the smaller triangles after I folded the midway point, just to make sure that everything would fall into place. This is a step you can skip completely if you're not neurotic like me. Instead, fold the triangles toward the rectangle
with the rectangle still not fully folded. Lay a clean strip on each side of the triangle along the outside (read: patterned side) of the card stock. With a pink and an index finger keeping each triangle in place, fold the rectangle at the midway point and press the newly-made envelope for a couple minutes. Placing it under a heavy book works as well.
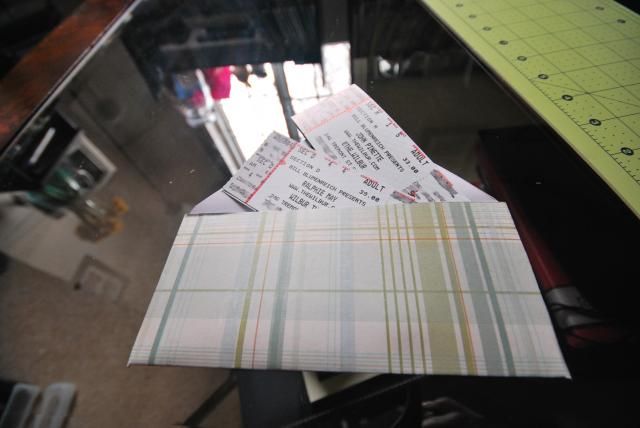
And there you have it! You just made a gorgeous, one-of-a-kind envelope.
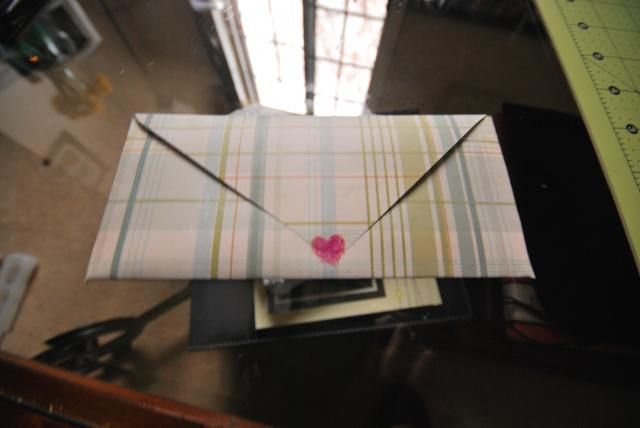
You can close it using scrapbooking tape as well, but I decided to seal it with a piece of tape, cut out into the shape of a heart. You can also seal it with a square of washi tape, old-school wax…the possibilities really are endless.

No comments:
Post a Comment