Ask any teacher who works with young kids what contact paper means to them, and you'll probably get the same answer: it is the crack pipe to our very masochistic addiction. From protecting posters from grabby hands to fake-laminating construction paper projects, we easily go through a kilometer's worth of it in a year. I was eager to do a project outside of school that involved contact paper. And that's where glass etching came in.
I used to do glass etching back when I used to go to camp. We'd design random glass bottles with whatever stencils the older kids had lying around. After camp, I kind of forgot about glass etching. But I stumbled across glass etching again and decided I needed to do glass etching again, starting first with making a spiral-etched frame.
Now, to backtrack, one aesthetic I had in my wedding was, long, flawy, ivy-like spirals. I know that's not exactly the most original aesthetic theme for a wedding, but I loved it simply because it came about organically. I just naturally picked things that had this is ivy-on-the-brick quality about them. After the wedding, I went nutty and purchased a ton of frames with spiral-painted borders (much to my husband's chagrin).
I decided that, for the sake of practicing my glass etching, I should make an etched glass frame with spirals.
Obviously, I was only doing it for the practice.
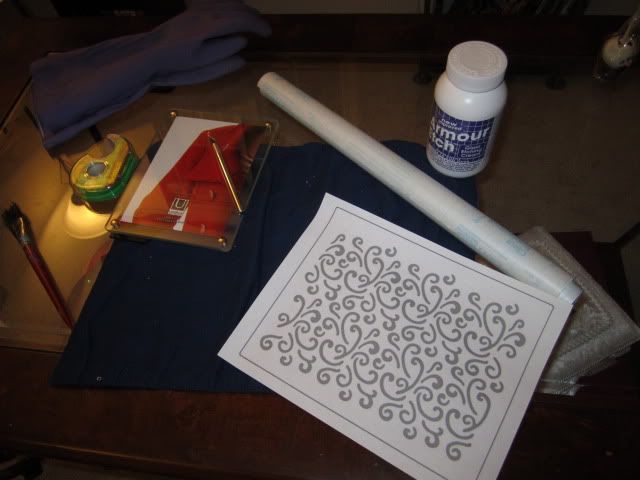
For this I got: etching cream, contact paper, scissors, a glass frame, an exacto knife, scotch tape, a paintbrush, and said spirals (I decided to just print out some spirals, after finding no stencils to my liking). Whatever can't be purchased at a crafts store can easily be bought either at a home improvement store or online.
I first taped down the contact paper onto a cutting board. I made sure the piece I cut out was larger than the frame itself. Since my design was so close to the edge, I wanted to be able to protect the sides of the frame with the contact paper.
I outlined the frame on the contact paper in pencil so I could have a general idea of where things would go. I also kept the frame close by, as this particular frame had bolts at each corner, and I wasn't interested in having metal-etching as part of my design.
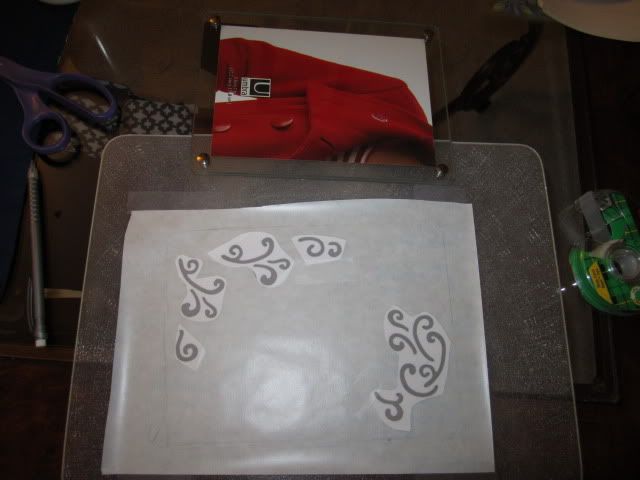
I cut out the paper spirals I wanted and taped them to the contact paper. Then, slowly (very, very slow) and methodically (very, very, methodically), I traced around each spiral with the exacto knife.
Cutting with an exacto knife isn't exactly the easiest, let alone cutting paper outlines of spirals that are only taped on with an exacto knife. By spiral 2, I was silently (and then not-so-silently) cursing myself, wondering why I couldn't have had a few basic squares as my main aesthetic.
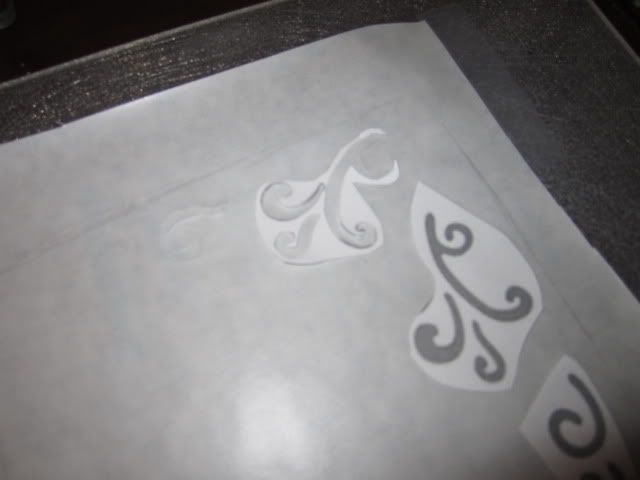
After the spirals have been cut around, I removed the "stencil" and the tape around it. Using the exacto knife as a kind of scalpel, I then removed the contact paper spirals.
As I've learned, it's okay with you can only remove the plastic adhesive. The paper underneath it stuck like mad and, after spiral 2, I realized that there really was no need to cut out the paper as well, as the paper is removed from the plastic adhesive after I am done, anyway. It was easier to see what had been cut out and which hadn't when I removed the paper as well.
Speaking of making things easier, I sliced the contact paper diagonally and placed the sheets down accordingly. Place contact paper is a bit of a science, so trial and error is going to be your best bet. Just take it slow and focus primarily on the cut-out portions. I'm grateful that applied the contact paper in two portions: my measurements were completely off and I would've have some lopsided spirals otherwise.
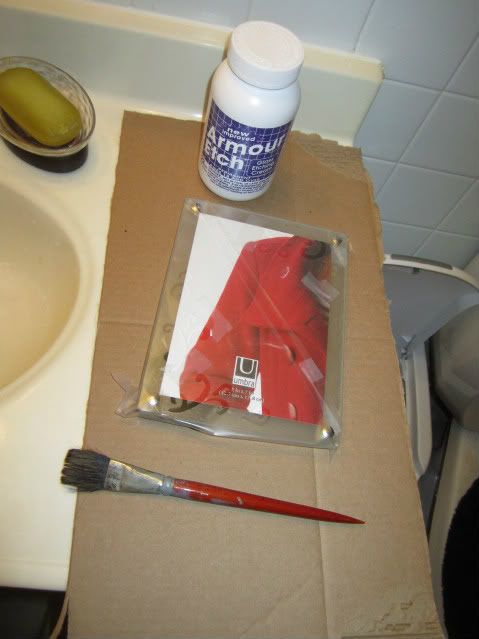
This is where I moved my operation to the bathroom, and added a long-sleeved shirt and gloves to my attire. Etching cream is NOT something you want on your skin, or on any furniture of value. Just in case, I also placed a piece of cardboard on the frame as well.
Aside from the wall-to-wall tiles and ceramic, I also used the bathroom for one big reason: its ventilation system. Etching cream smells like Taco Bell farts. It is equal parts sulfuric and plastic and it's not a smell you want emanating throughout your home.
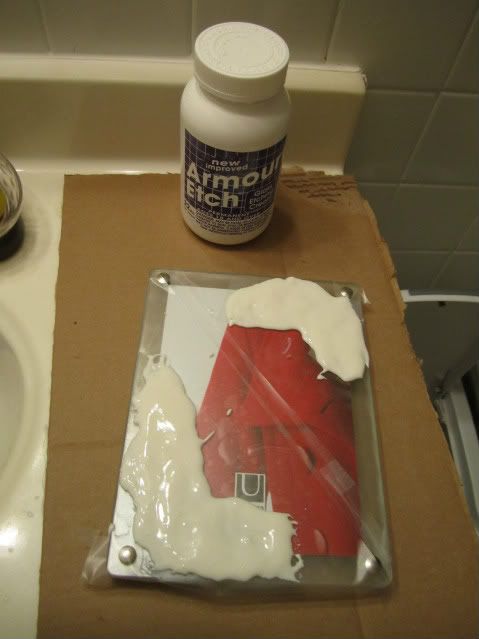
Using a regular paintbrush, I generously covered the stenciled areas with etching cream. Now, when I say "covered", I mean "lathered". The general rule of etching cream is, if you can see the glass through the cream, you run the risk of splotchy etching. You know you are done with it looks like someone spread silly putty all over your craft.
And now, you wait. For some etching cream, the wait time is 5 minutes. For others, it's as quick as 30 seconds. I actually flubbed completely and let it go as long as 10, but I thankfully didn't come into my bathroom to find disintegrated glass. From what I read up on later, leaving it on for long periods of time doesn't do any harm and might actually make the spirals more pronounced.
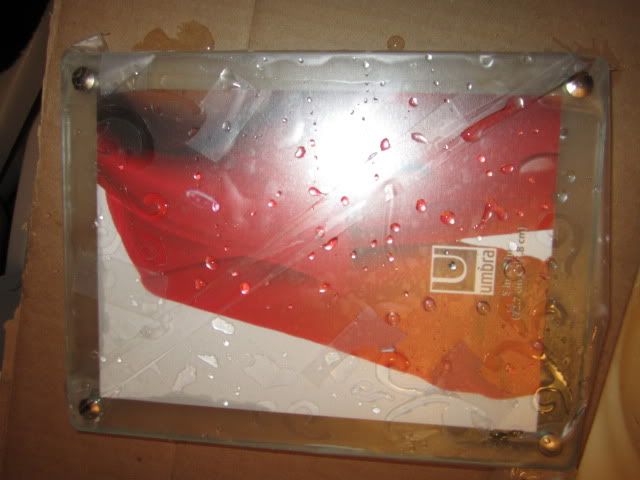
Afterwards, I put my gloves back on and rinsed all of the cream off. I removed all the contact paper and rinsed everything a second time. Then, I simply walked away. Why? Because, when wet, you can't really see the etching. And if you're neurotic like me, you'll panic and wonder what you did wrong. So I went off, enjoyed a couple pages of my book, and came back when I was sure it was dry.
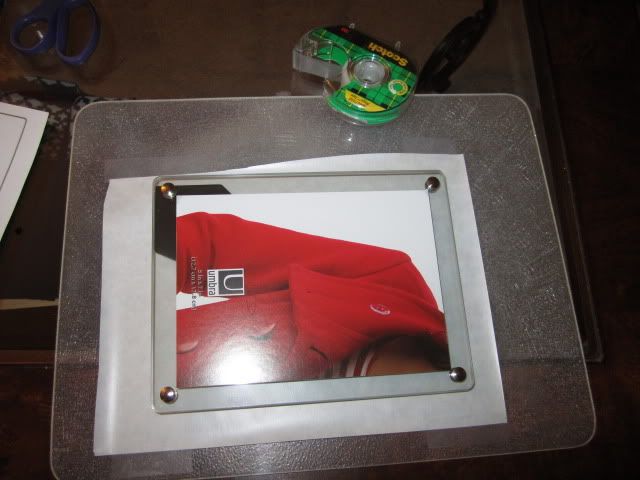
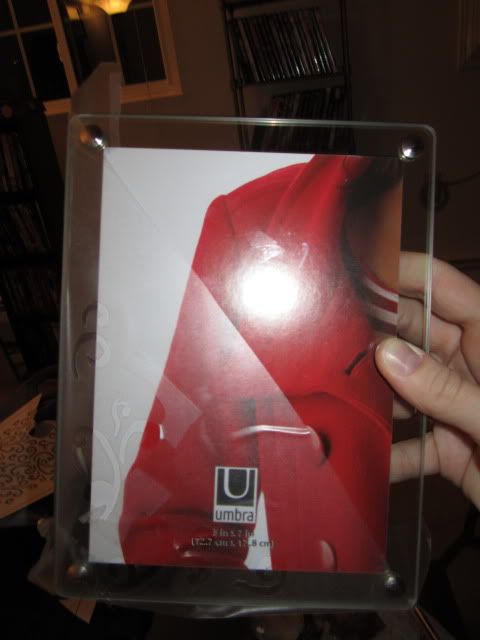
The frame I purchased (which I got
off of Amazon) is meant for a 5 x 7 photo. I decided that, since the spirals are better seen when there isn't a photo in the way, I would choose a 4 x 6 picture instead. I choose a picture of myself right before the garter toss. It might seem narcissistic, but it was leftover from the pictures I ordered after the wedding and I'm pretty sure my husband would downright faint if I had ordered even MORE prints -- even if it was for the sake of practicing my glass etching.
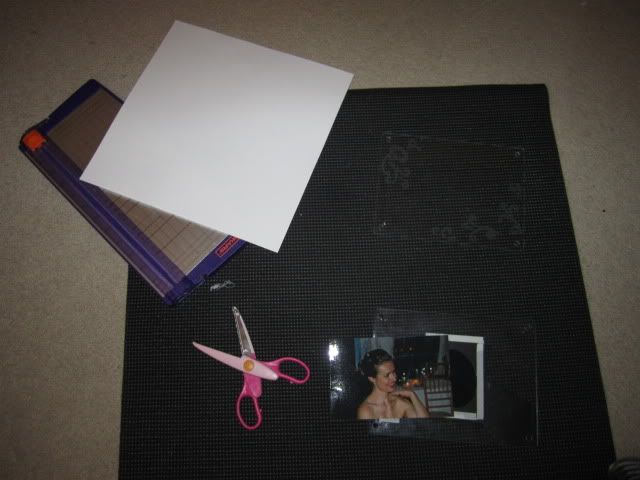
One thing I realized, however, if that the photo didn't completely cover the rectangular mount for the frame's stand. To solve this, I got out my: scrapbooking trimmer, some white card stock, a pair of decorative edge scissors, an scrapbooking tape. Everything is on a yoga mat since I had moved my operation to my crafts/yoga room, and my crafts desk is so cluttered that the only clean place to put things was on the floor where my mat was.
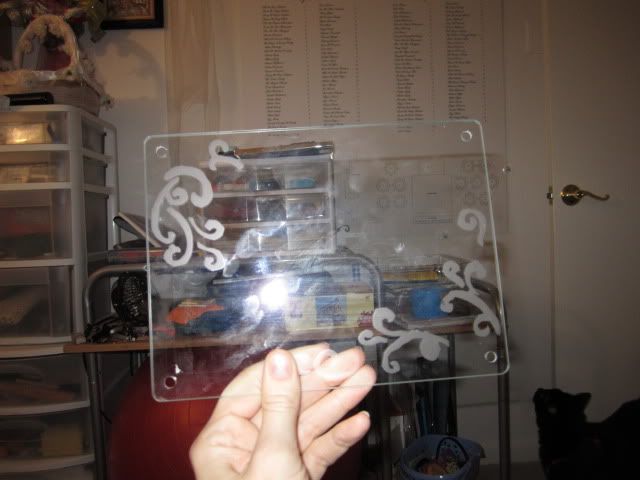
I removed the two pieces of the frame by unscrewing the four corners. I'll also take a moment to show off the spirals. And my cluttered desk.

I measured and cut a 6 1/2" by 7 1/2" piece of card stock. I then glued the photo in the center (so I would know exactly how things would look as I was cutting) and trimmed right by the edge. Since the frame has no specific "photo holder", I used the scrapbooking tape to tape the photo to the back portion of the frame as well -- as it would NOT stay in place when I screwed the bolts back.
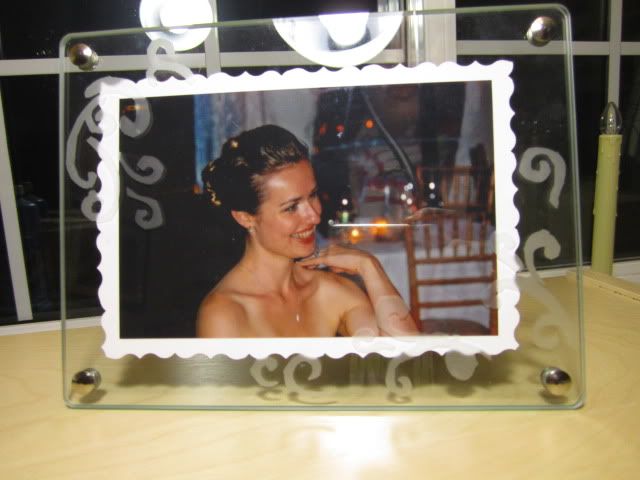
I'm really happy with how this came out. It's nothing I'd exactly try to sell, but, for someone who hasn't even picked up an exacto knife in 8+ years, this isn't half bad.

The frame with the rest of that bookshelves' frames. The picture behind the etched frame was a wedding present from a former student. Her mom purchased a frame from my registry and her daughter drew/wrote her name, my name, and my husband's name, and accompanied it with a picture. One of the most heartwarming wedding presents ever. I miss that girl a ton!

Looks great,way to be creative.
ReplyDeleteYes I agree that doing this kind of stuff can lead you to become creative. So I wanna try this kind of art making etched glass to measure my potential on art:)
ReplyDelete